
I am fortunate enough to be able to volunteer at the Liljestrand house. The house is a mid-century home designed by the family and architect Vladimir Ossipoff, who grew up in Japan. The family turned it into a non-profit, for public access and preservation. As is typical for all historic homes in Honolulu, finding contractors with the skill and patience to do things thoughtfully and sensitively is difficult, so we often have to figure out ways to do things ourselves.
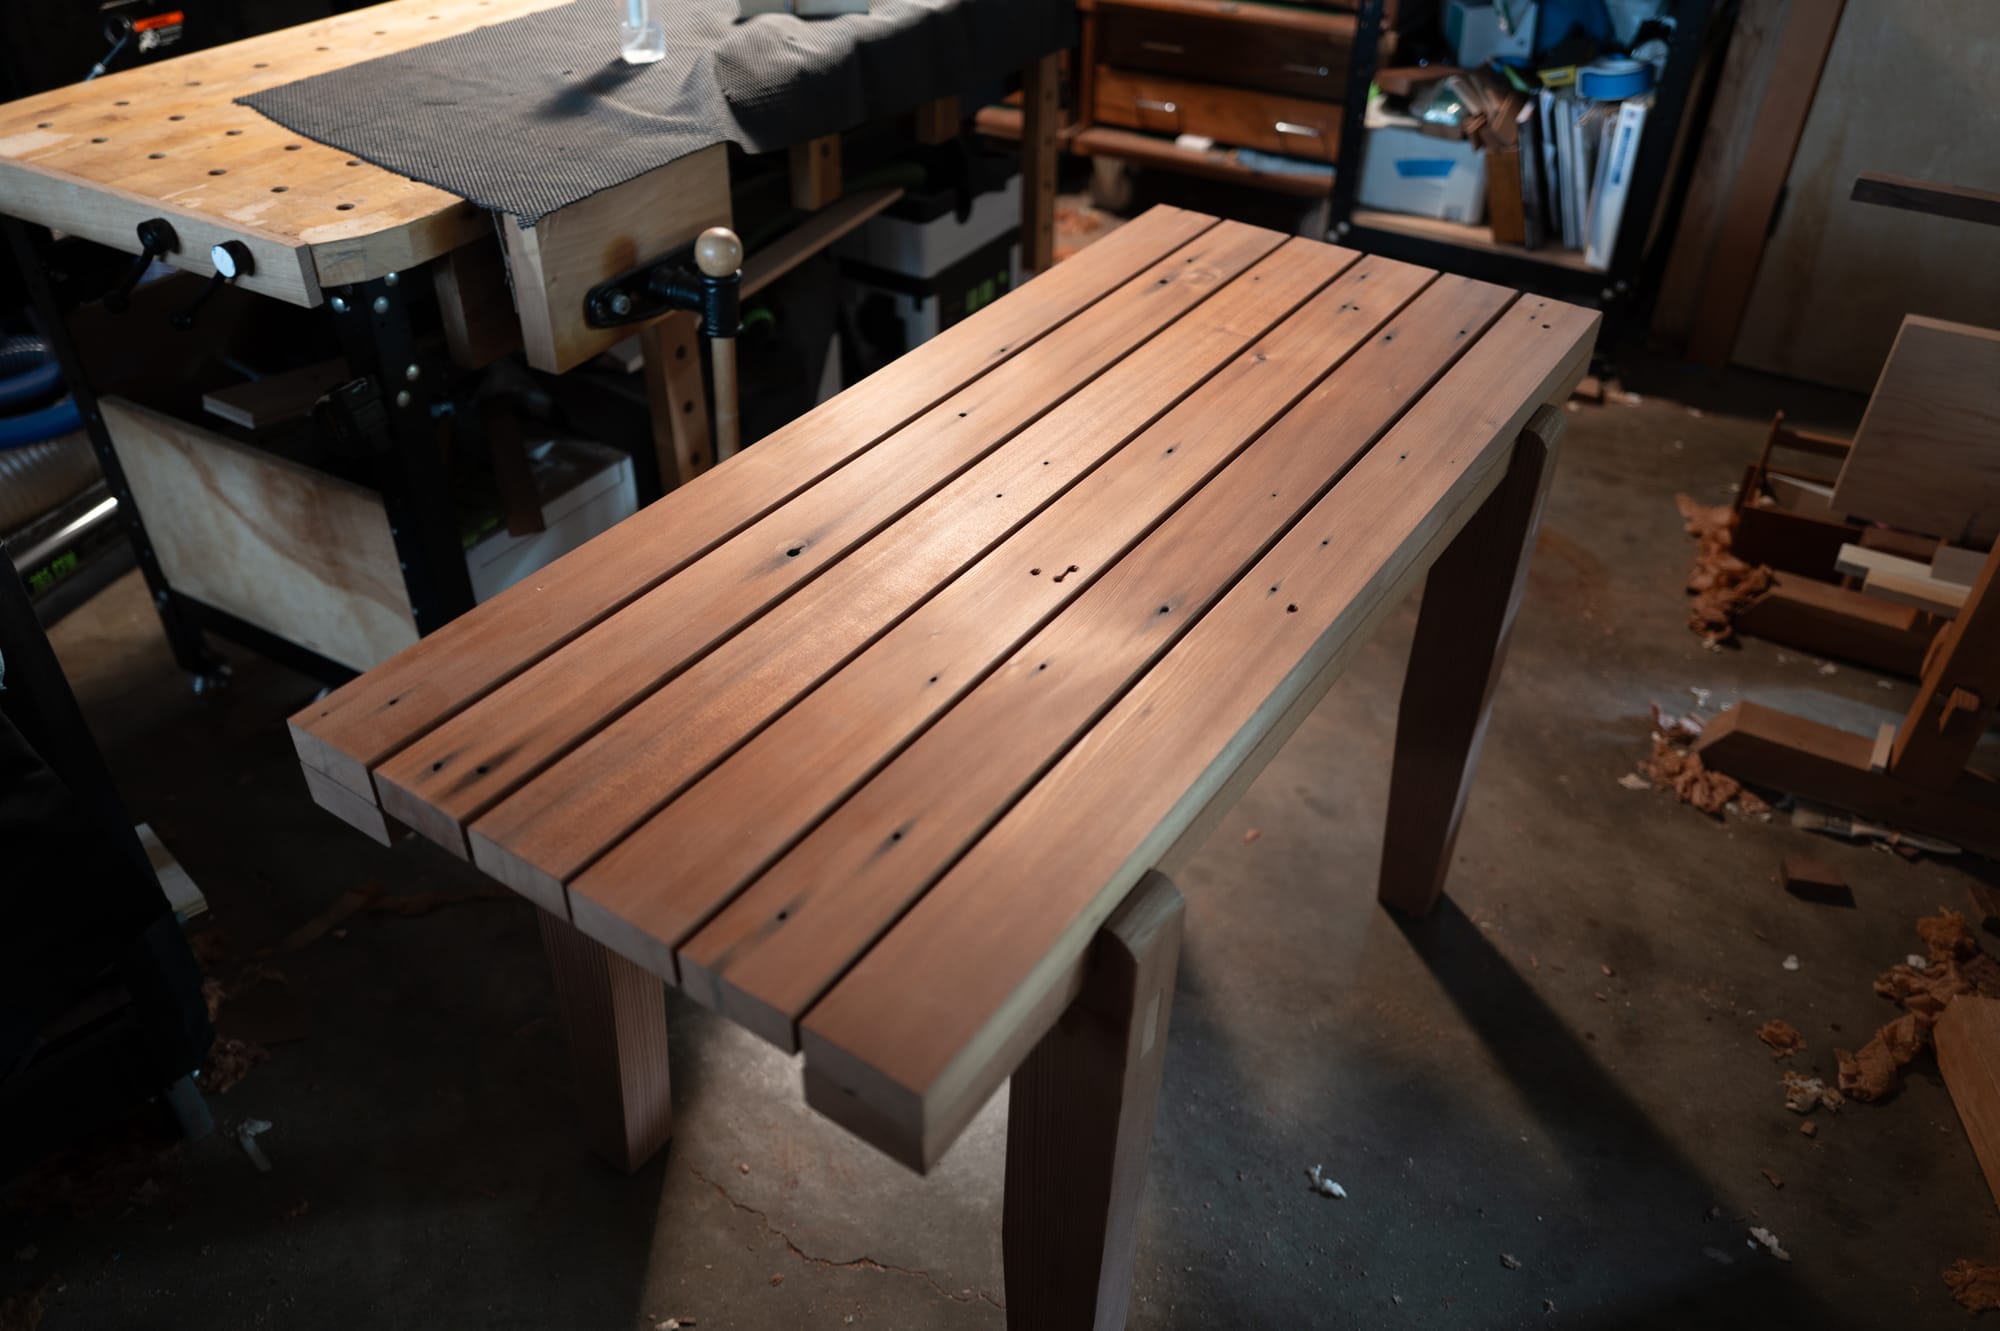
I’ve rebuilt a screen for them in the past, but this time, I was to replicate one of two tables thrown together from framing material offcuts and nails by the original carpenters and architect. The design made for an interesting challenge for someone who prefers to build things with a certain type of joinery.
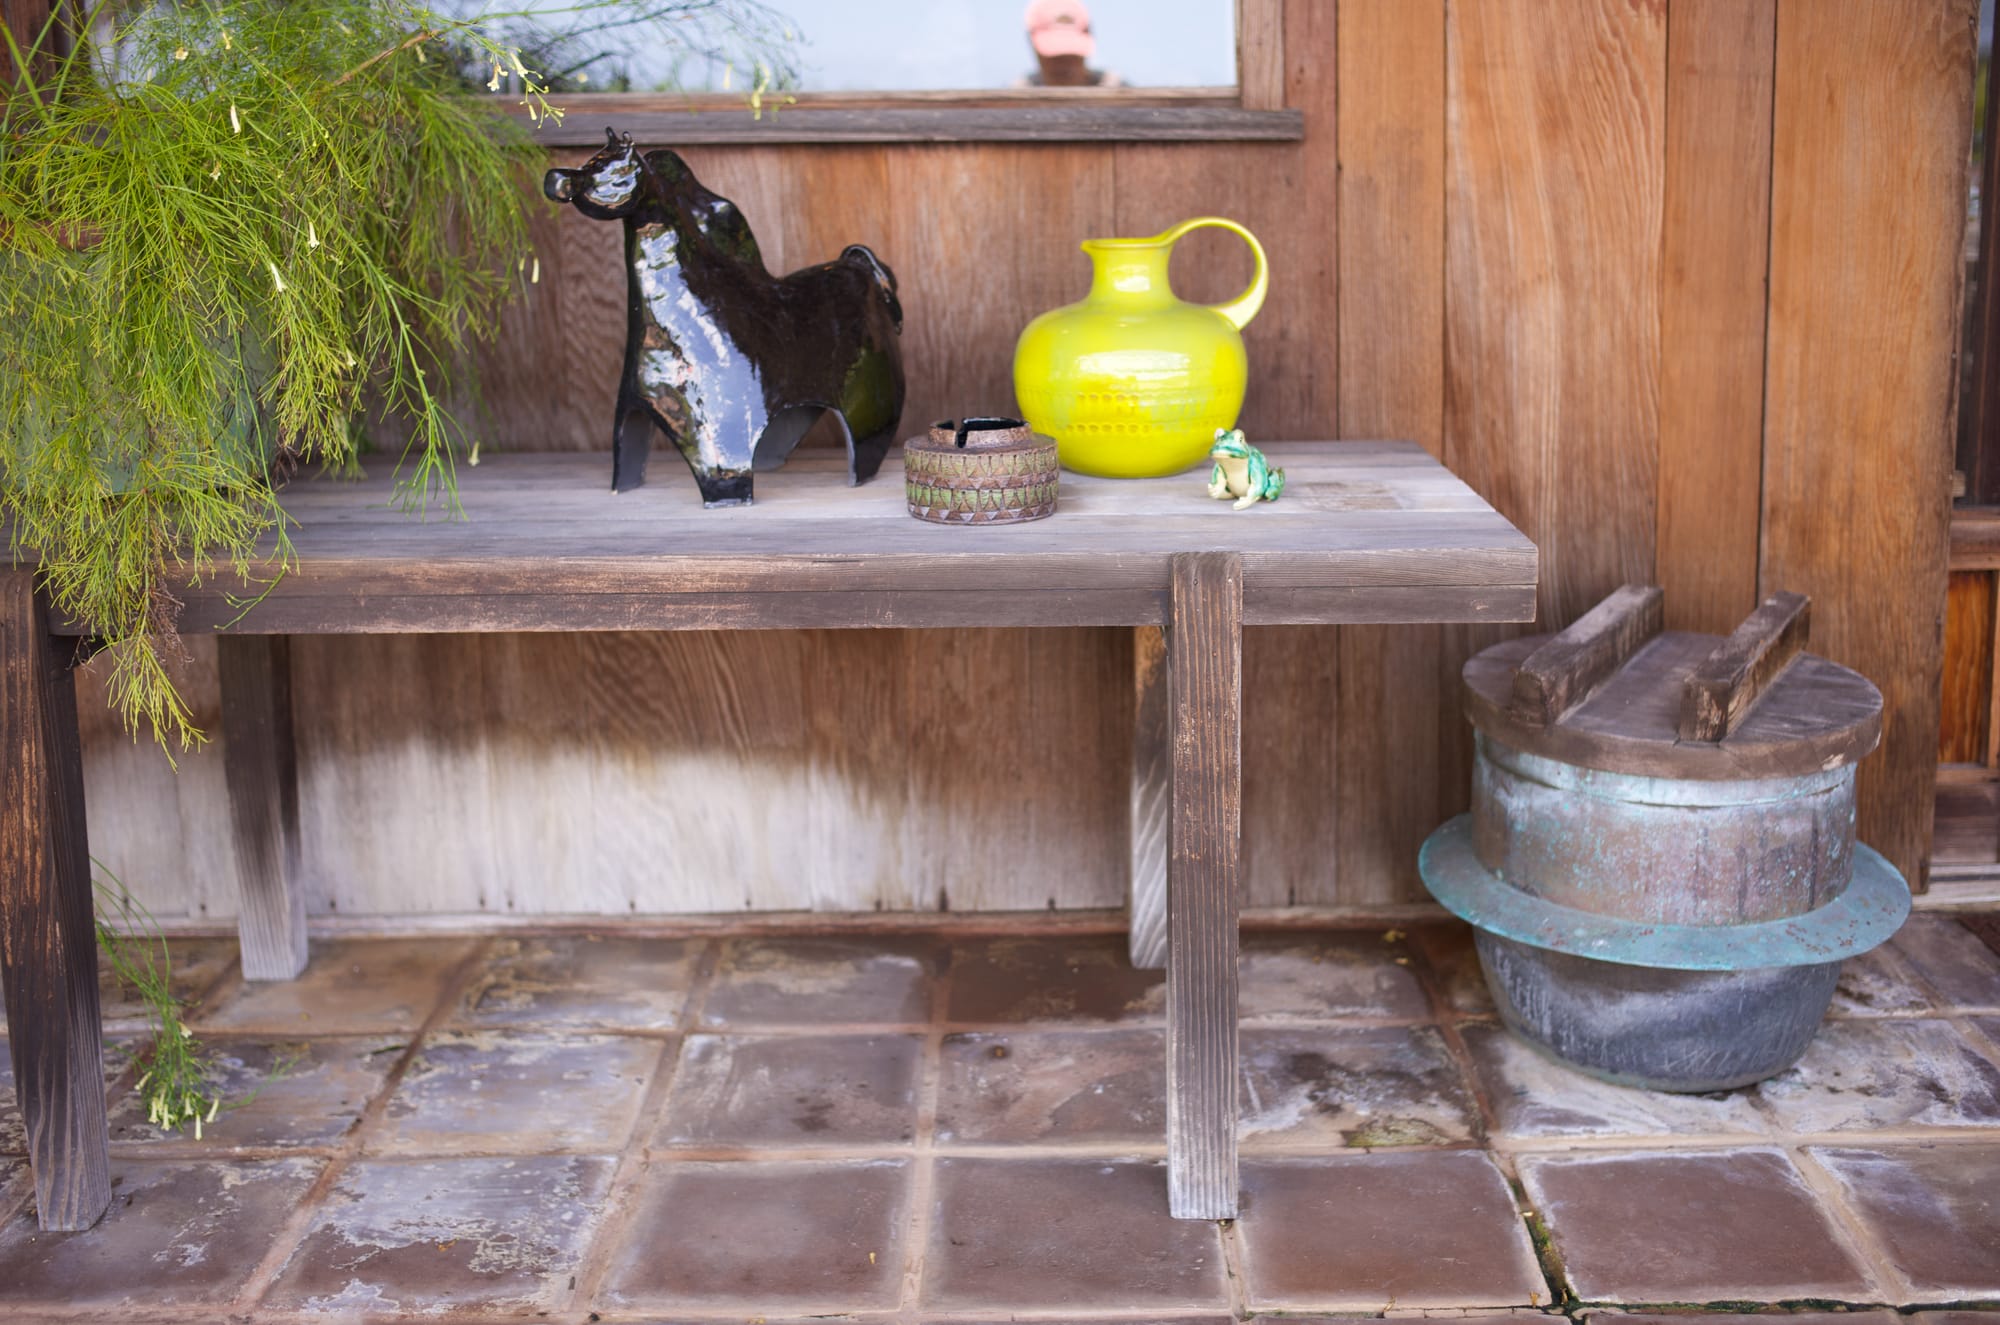
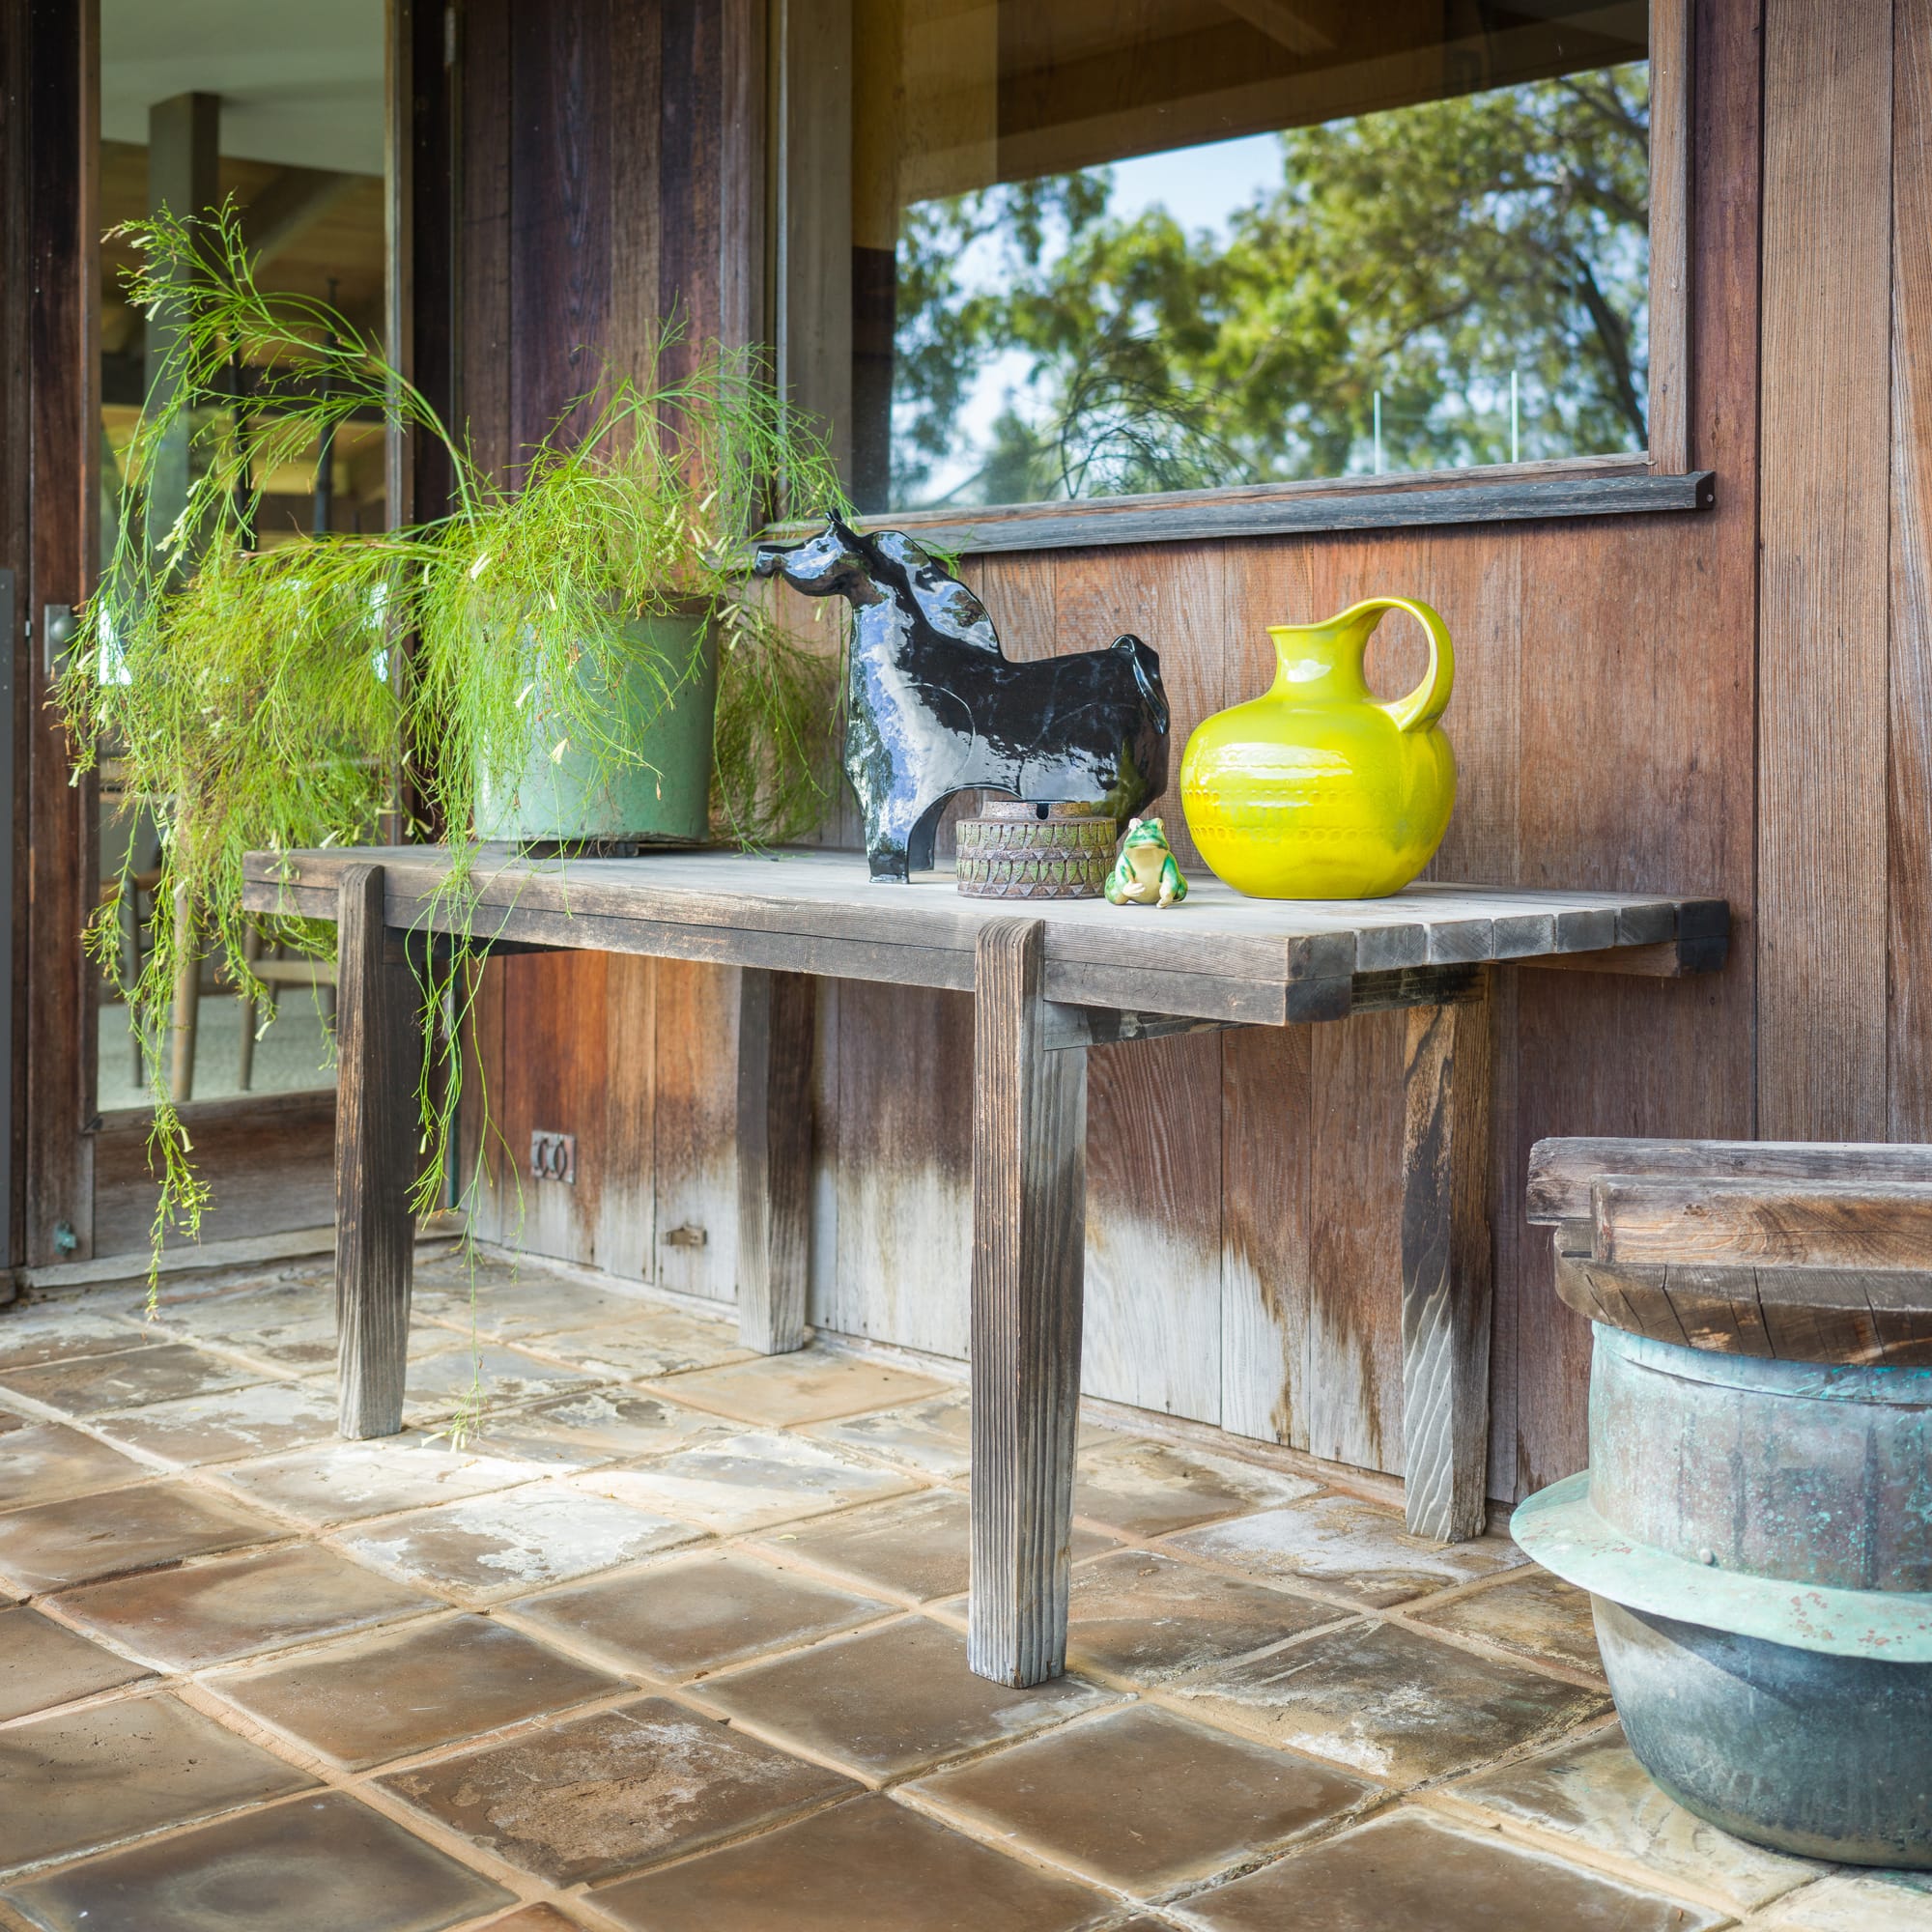
There isn’t much backstory to share about the table set. One was placed under a generous eave, and has aged well.
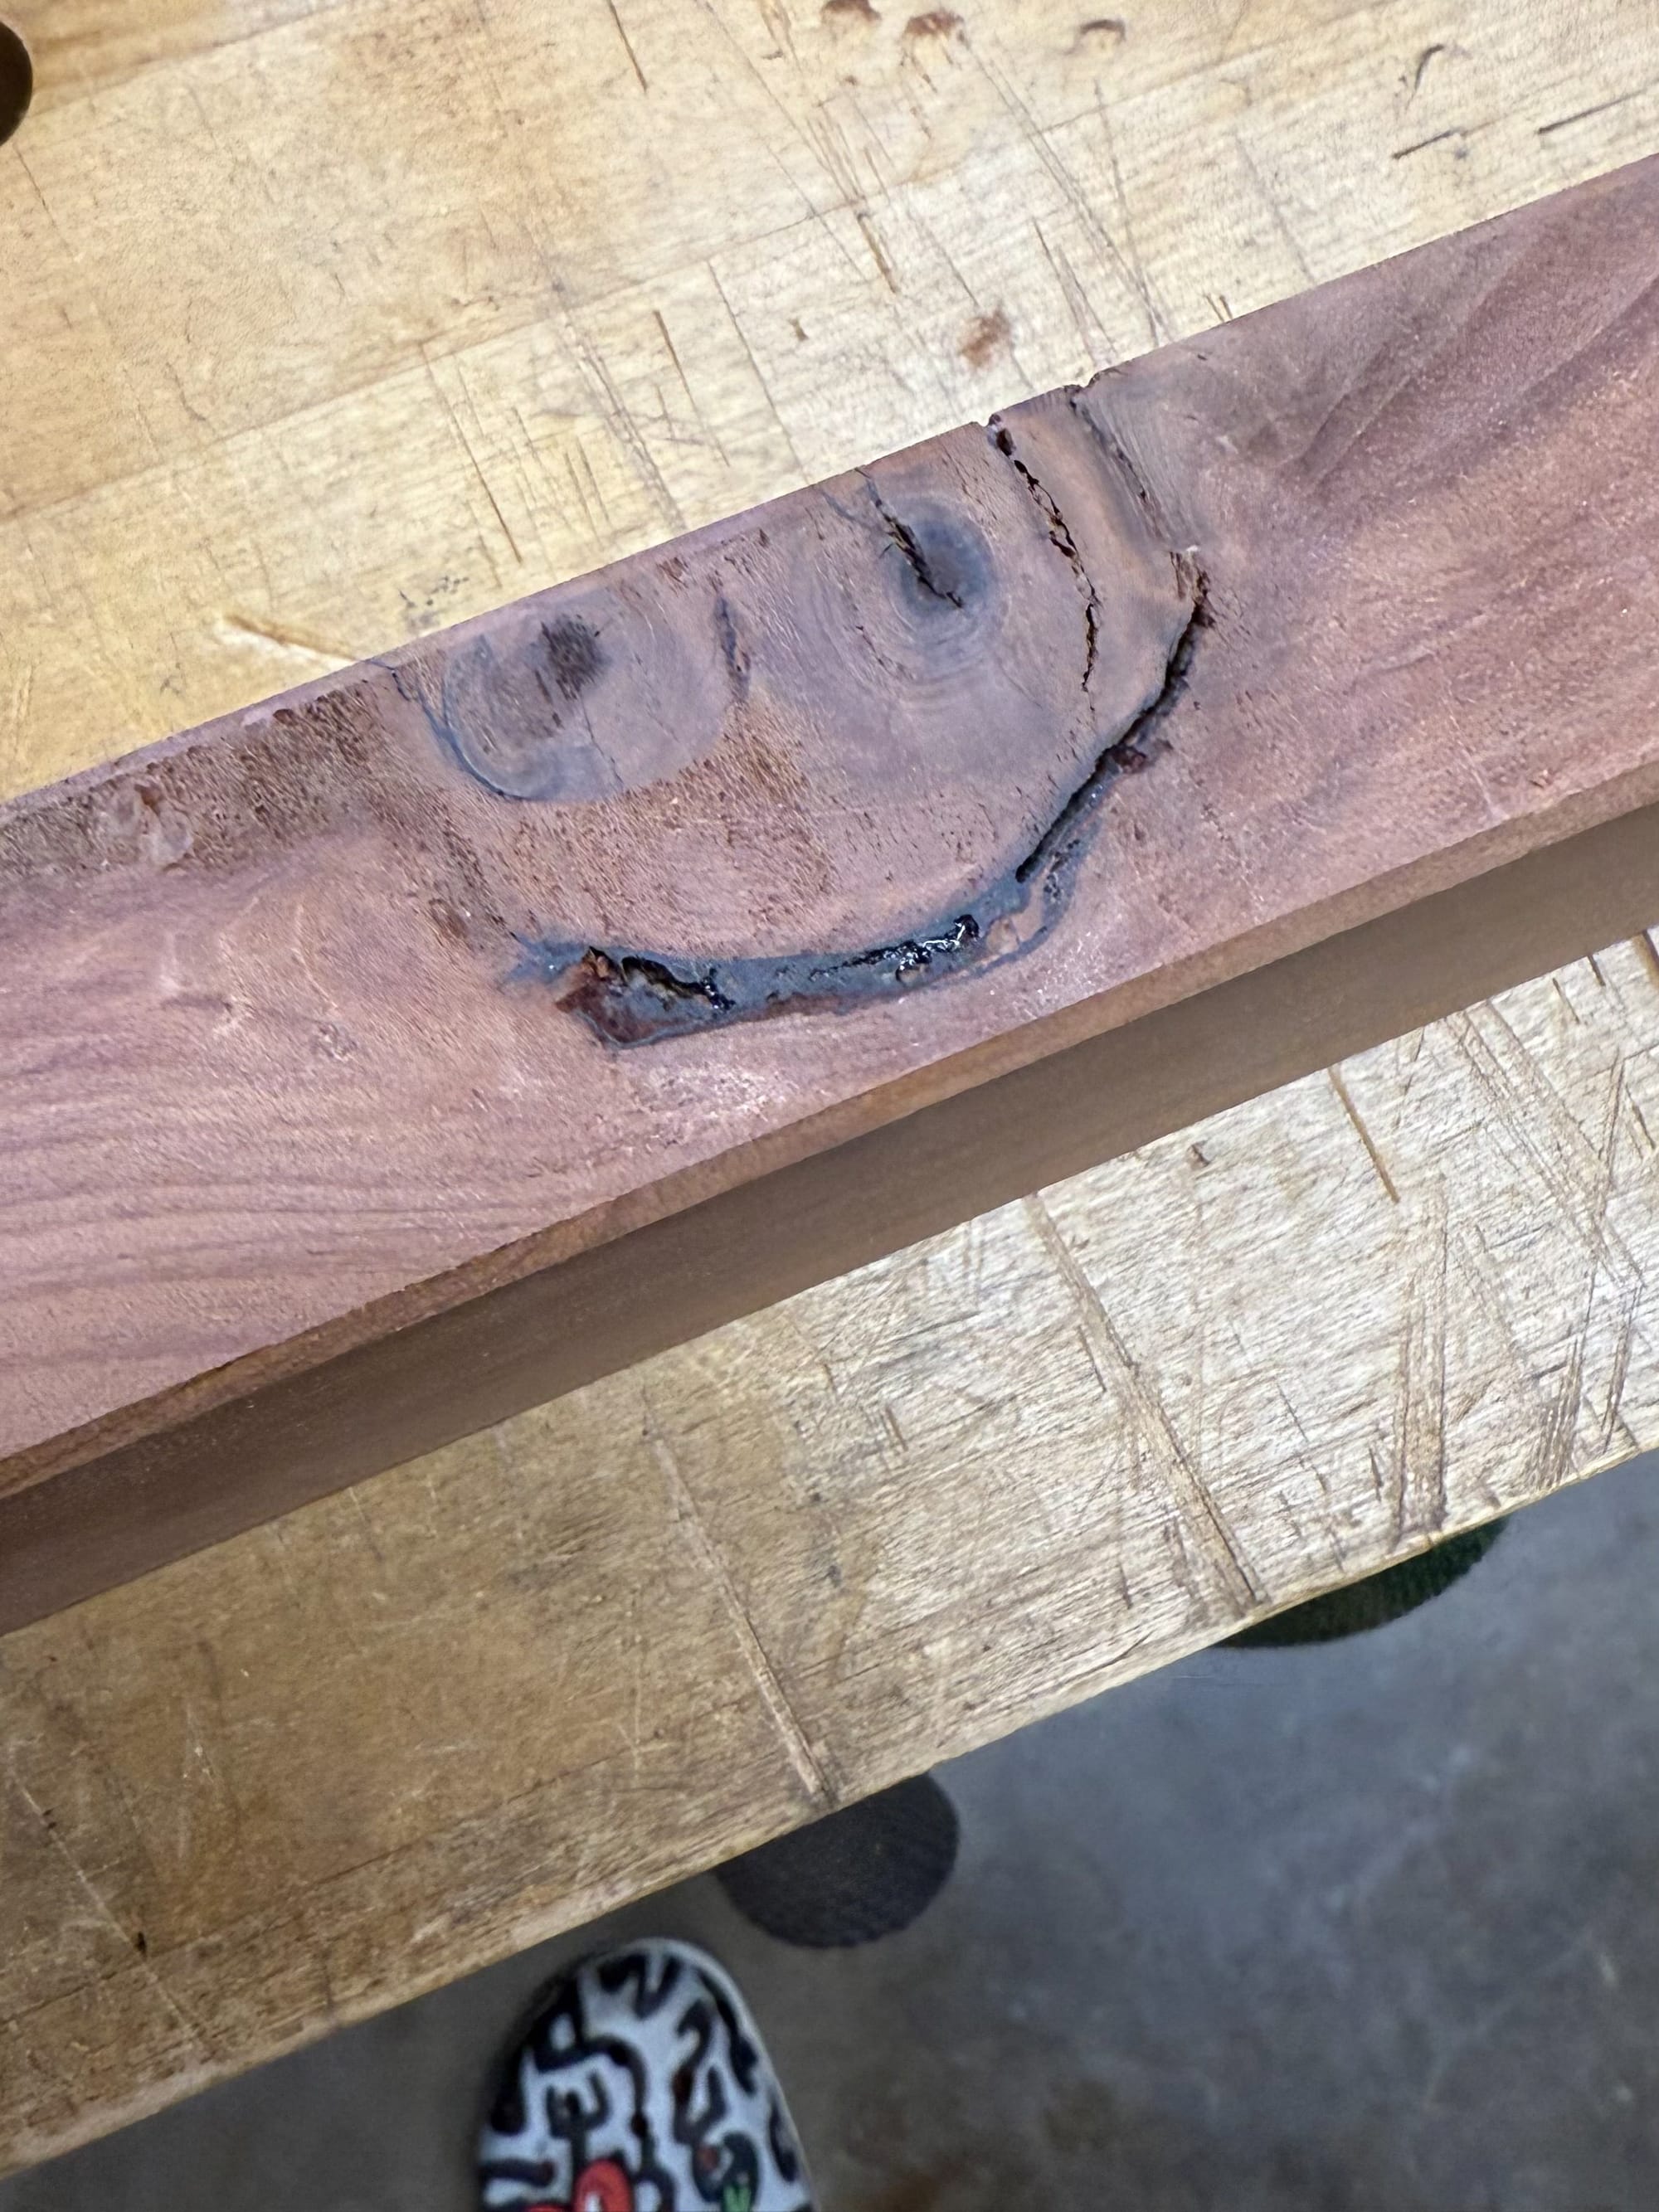
And one was placed in the garden where the nails rusted and redwood eventually decayed due to water being trapped between members. The worn table is covered in moss and lichen and had stretchers tacked on at some point to hold it together.
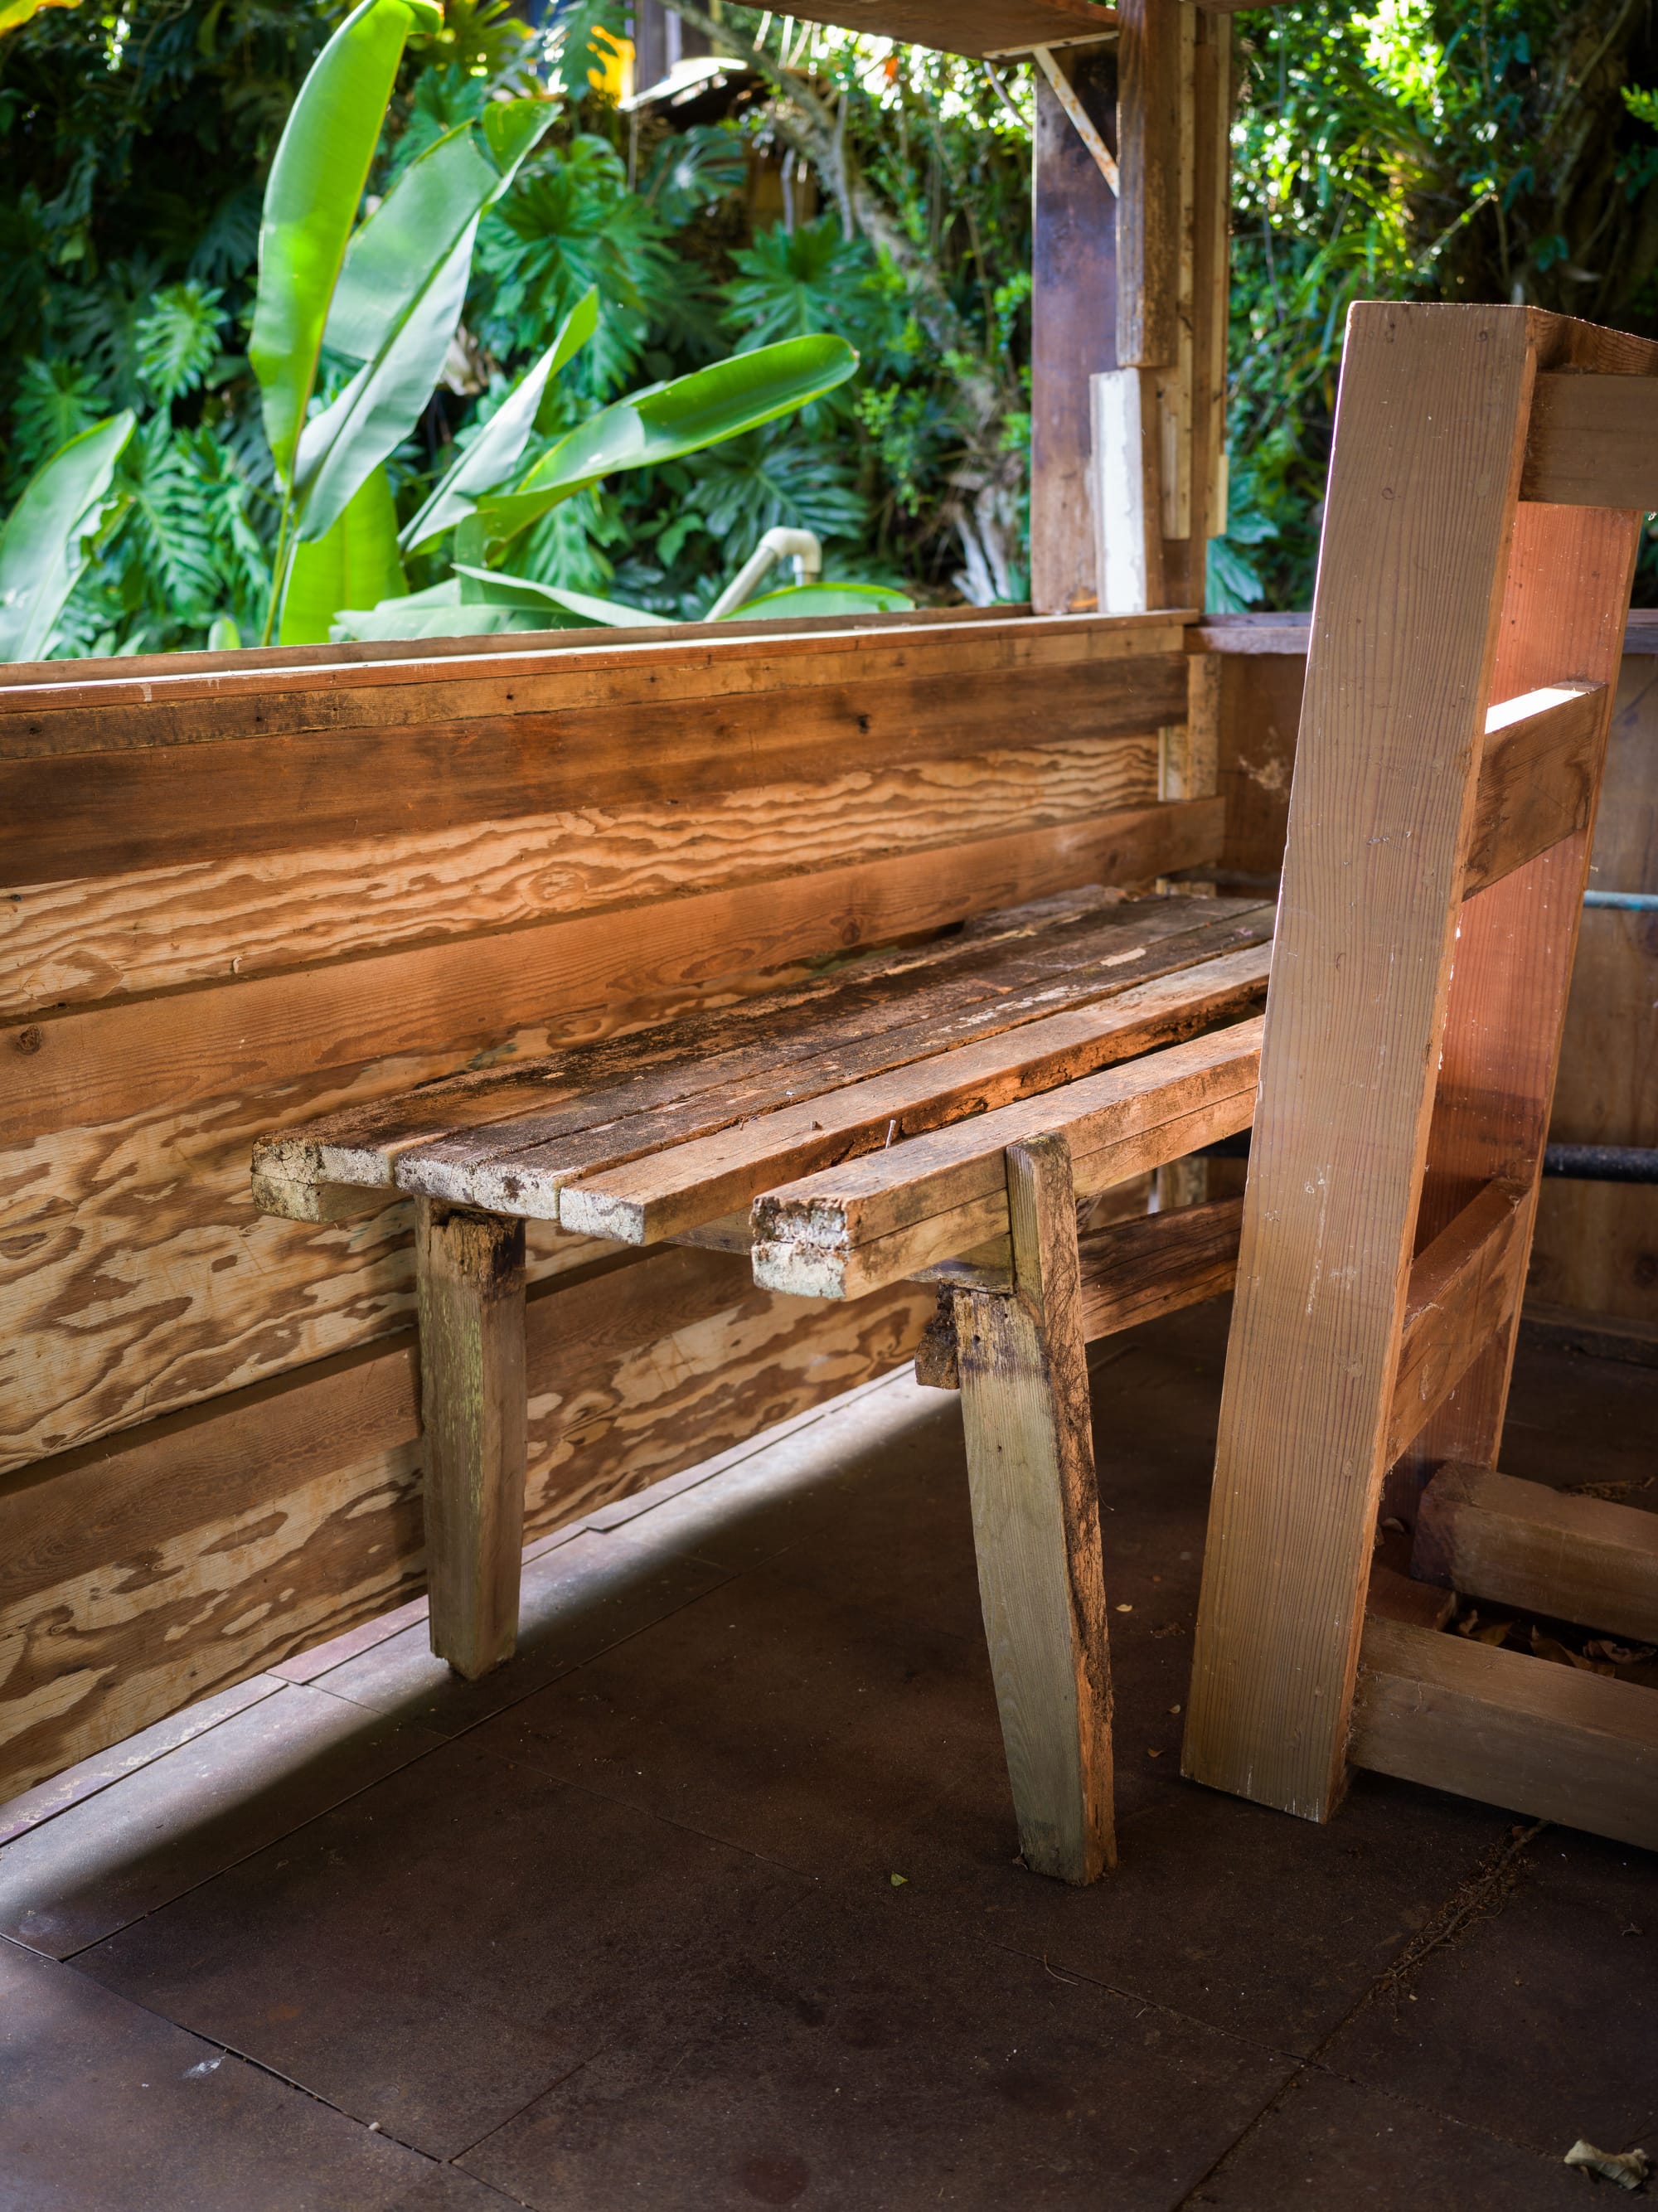
At some point, the family dobermans used the tables as shelter while sleeping on the lanai.
I decided to built it with the type of joinery I prefer, rooted in Japanese carpentry, but maintain as much of the appearance as possible.
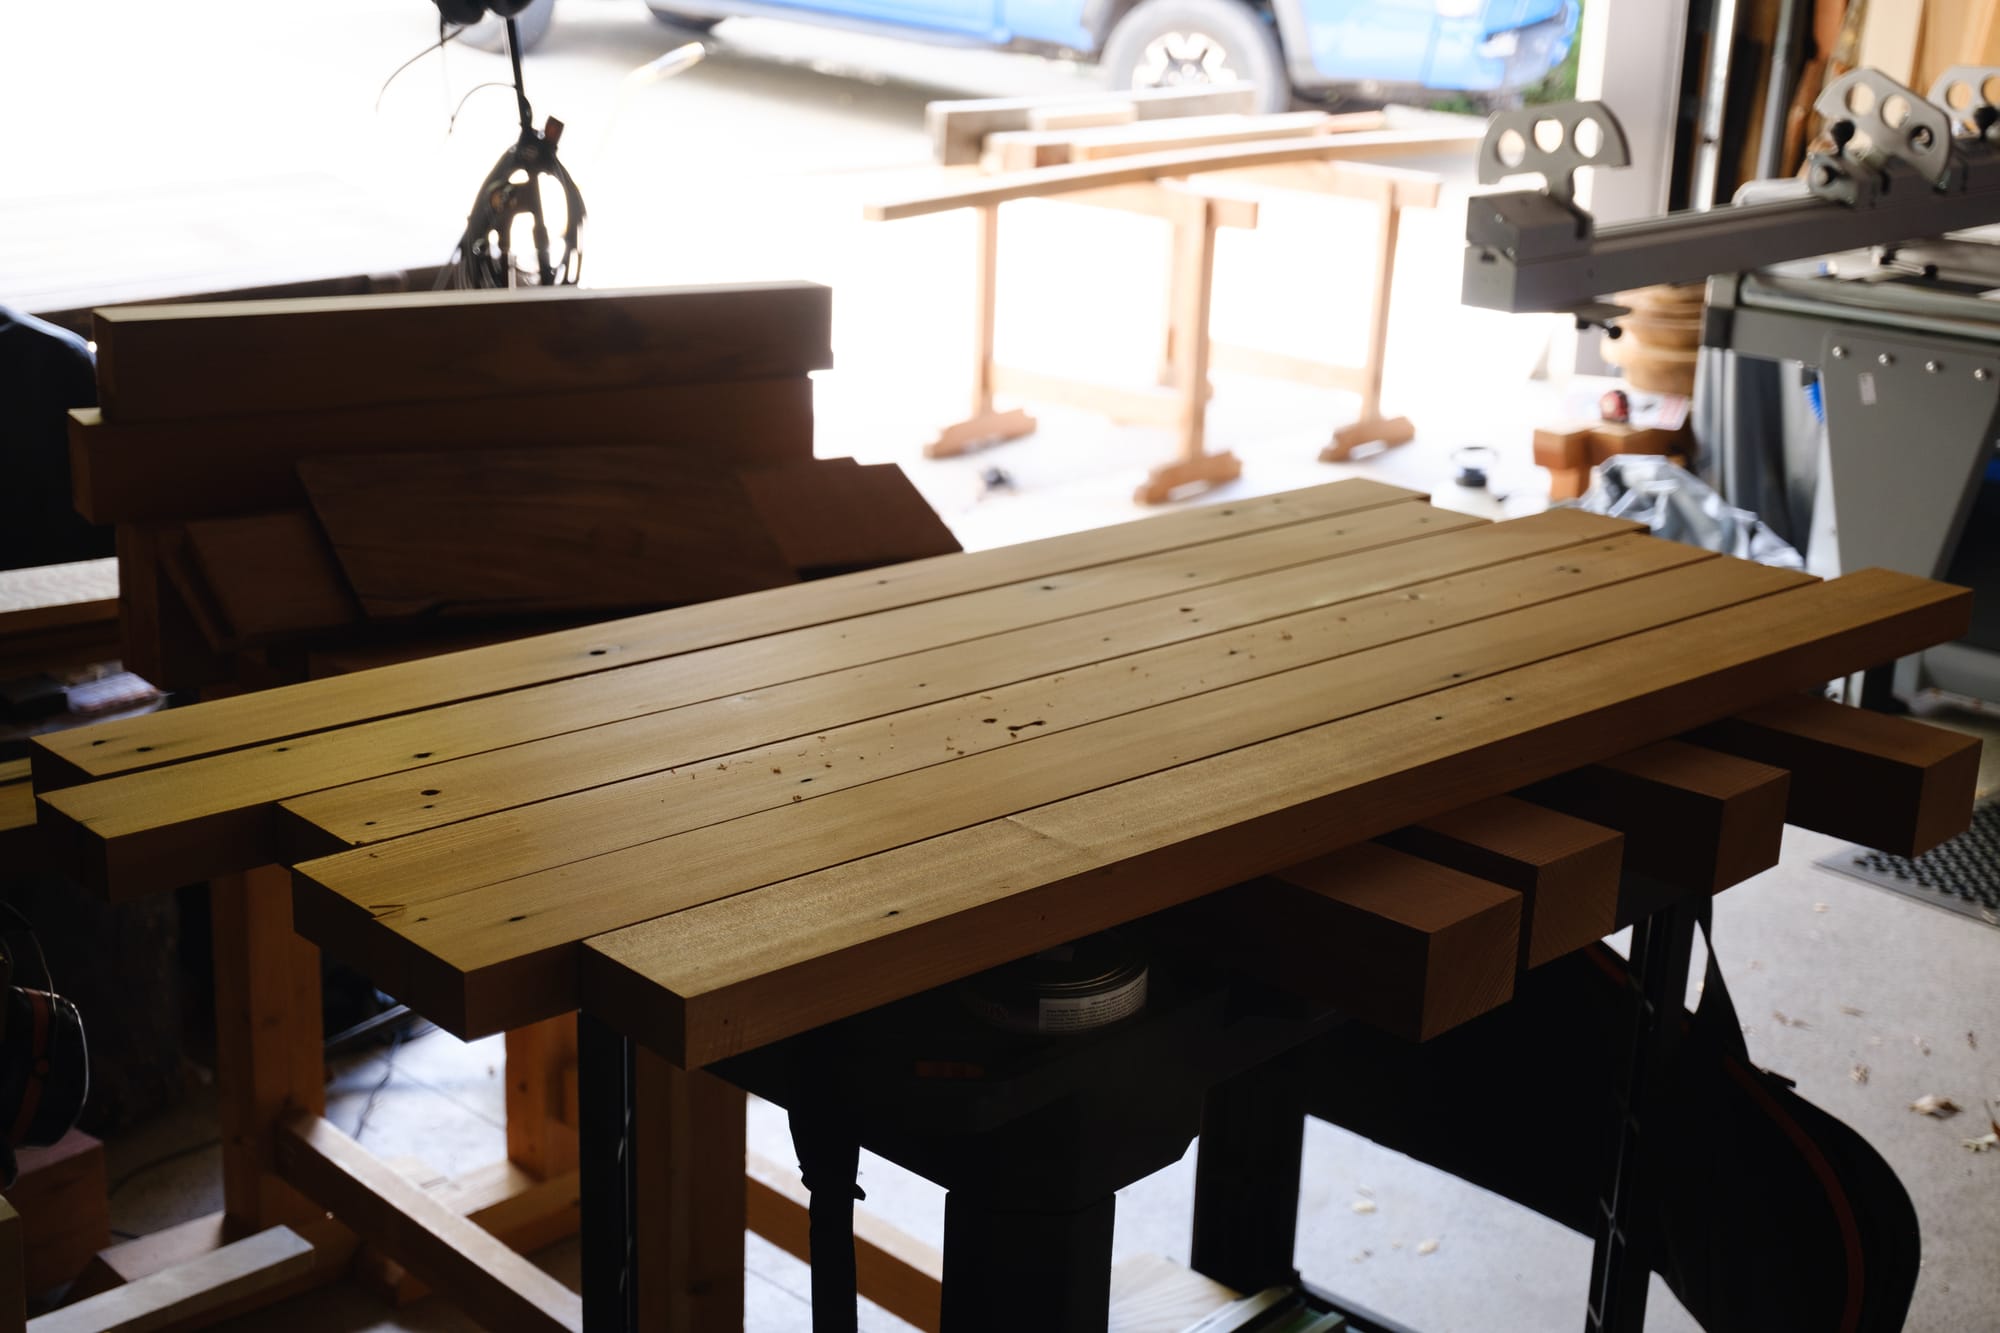
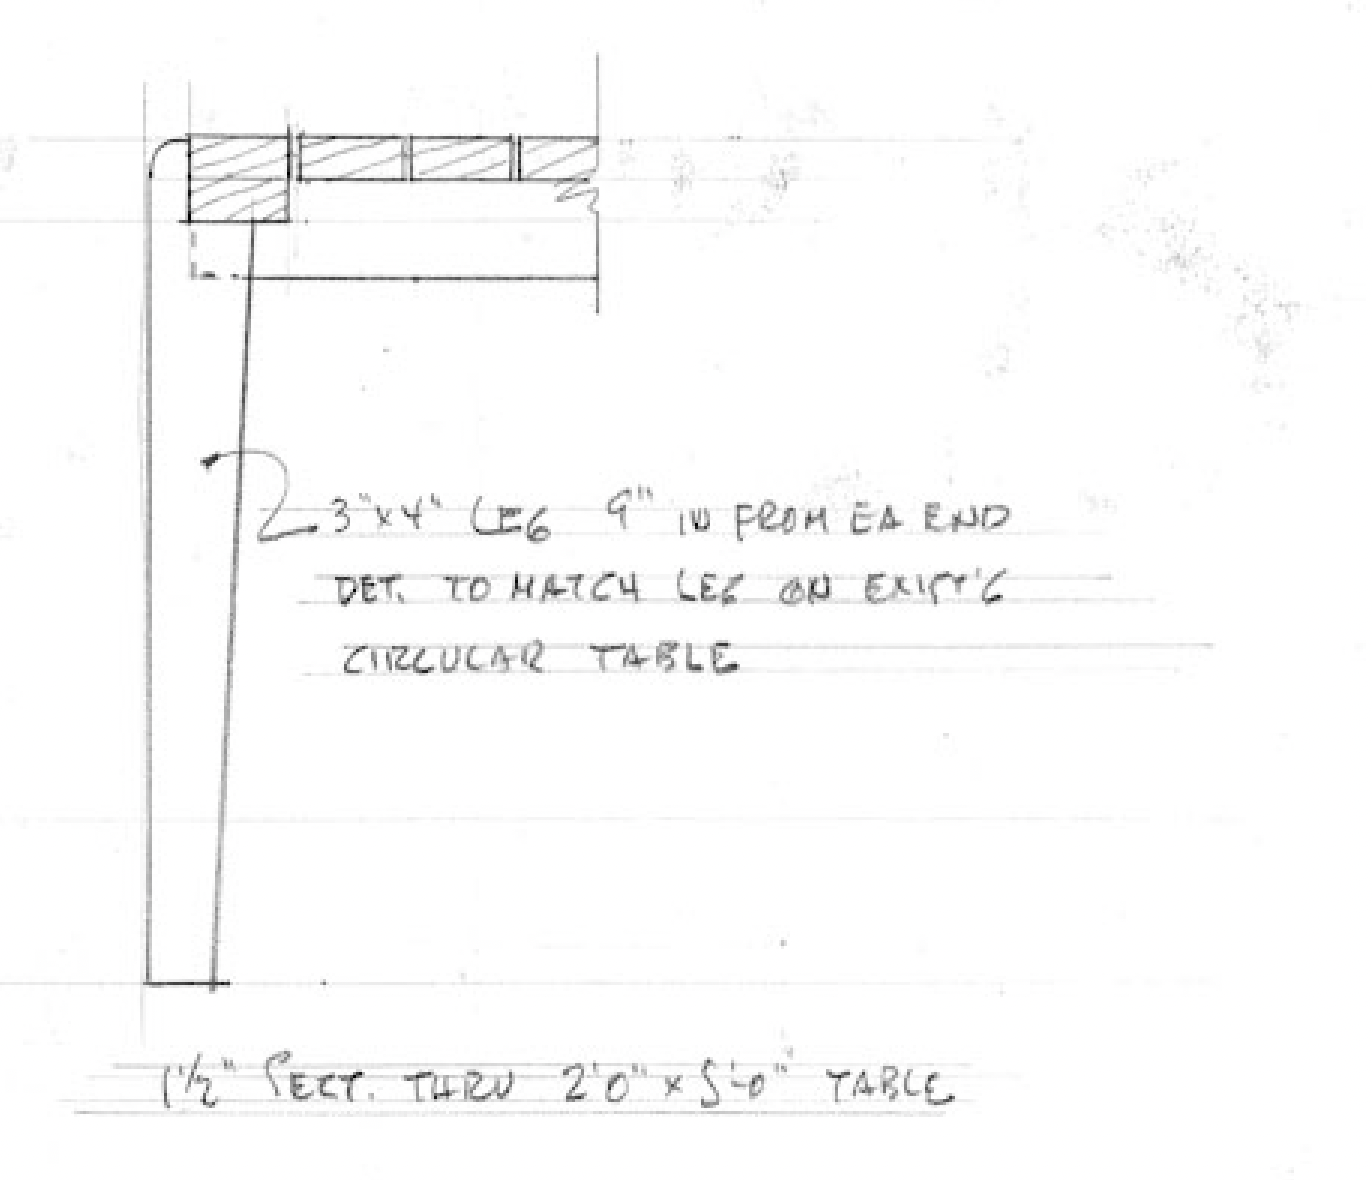
The top would be a little shorter and one board more narrow, as requested by Trudy Couillard, caretaker for the property. The originals are roughly 6 by 2 feet long. This new table would also be smaller; about 4 feet and one 2x4 less in width.
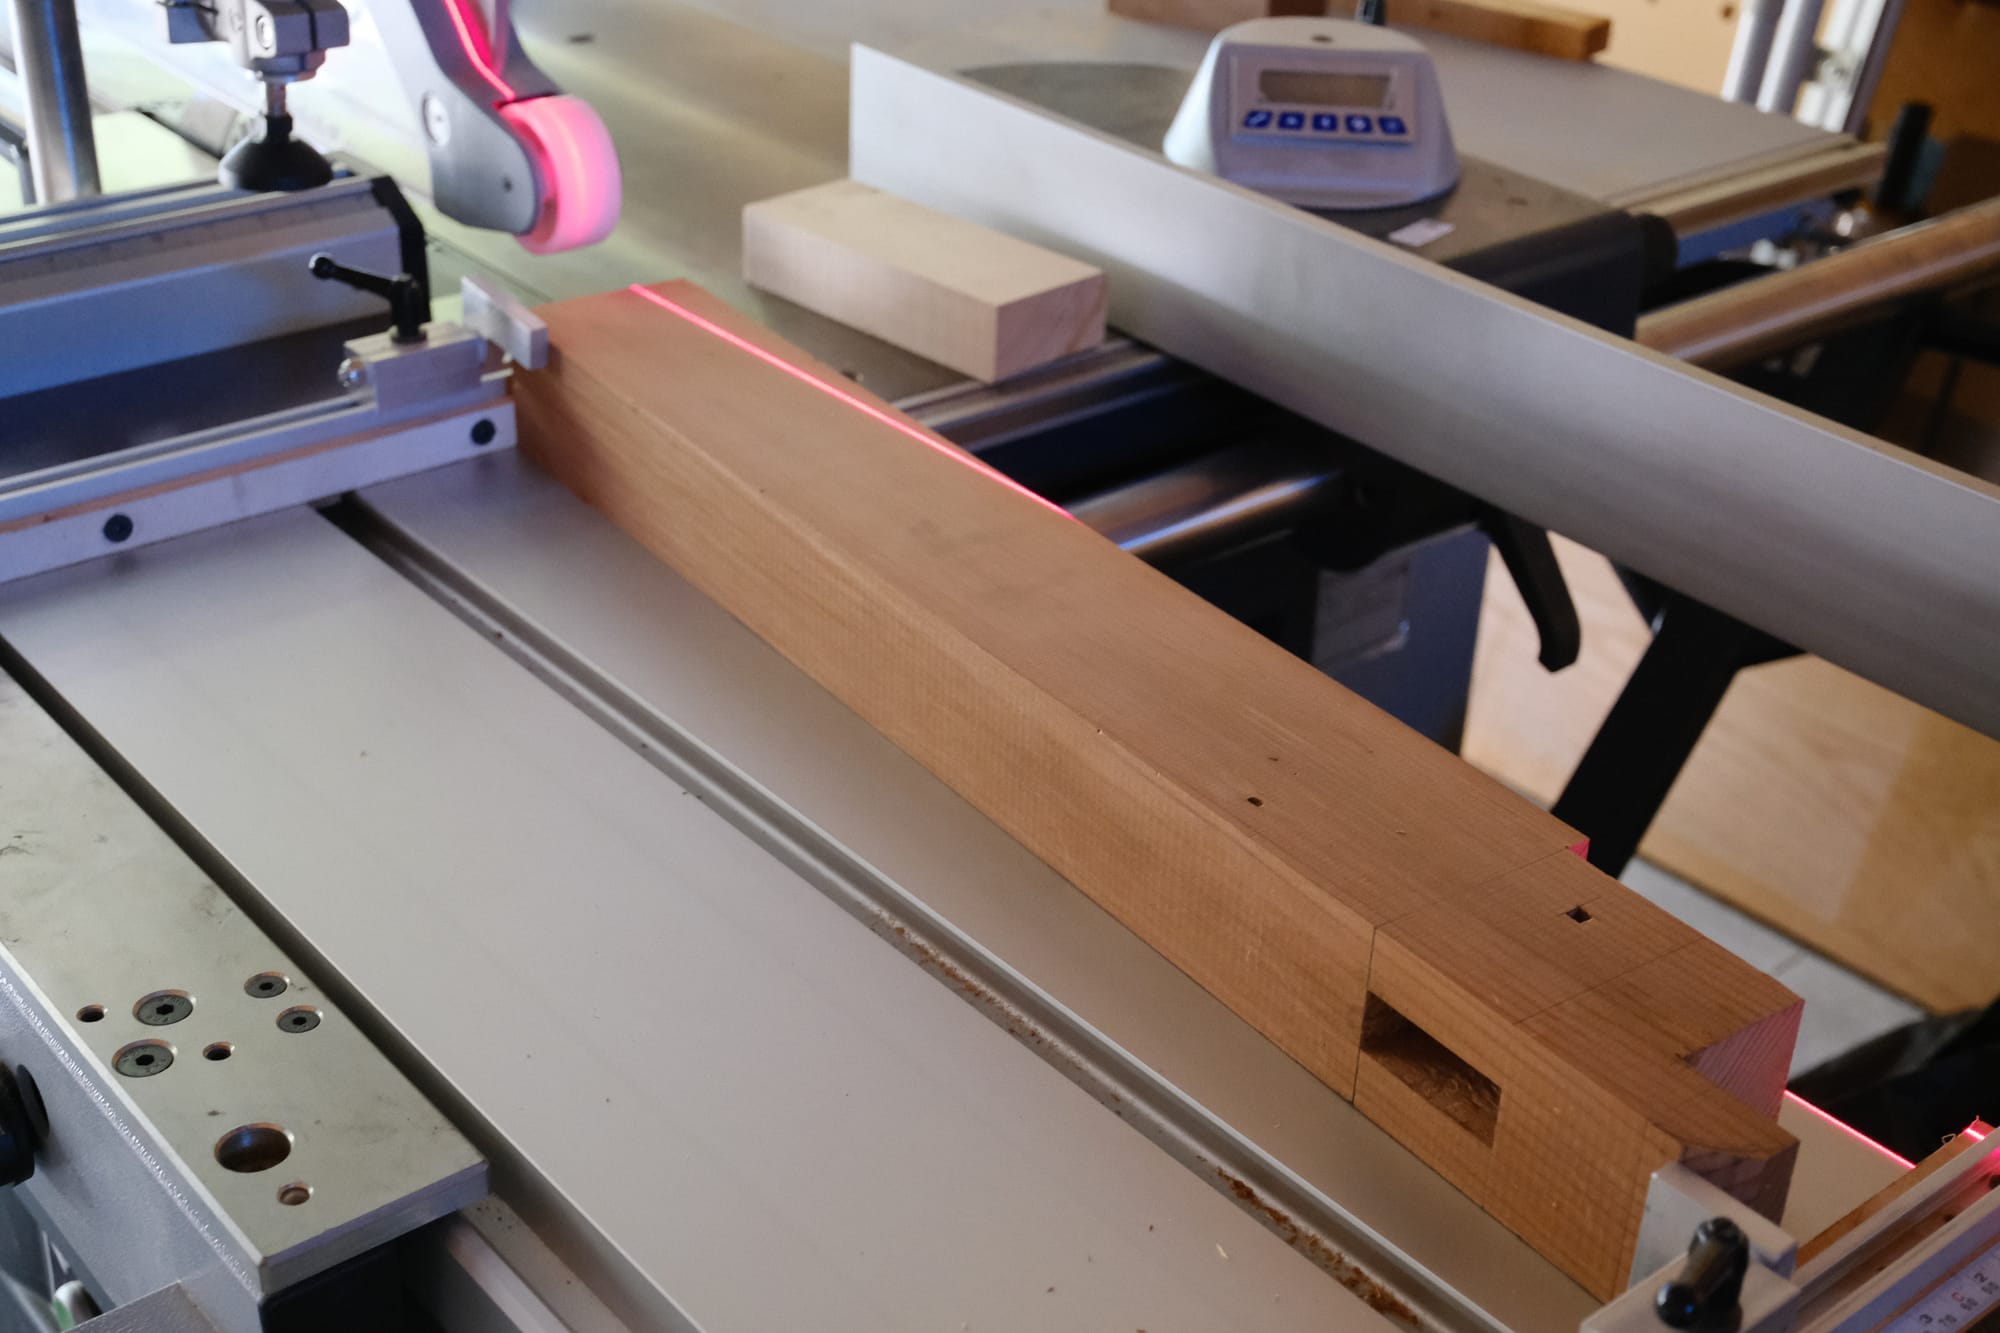
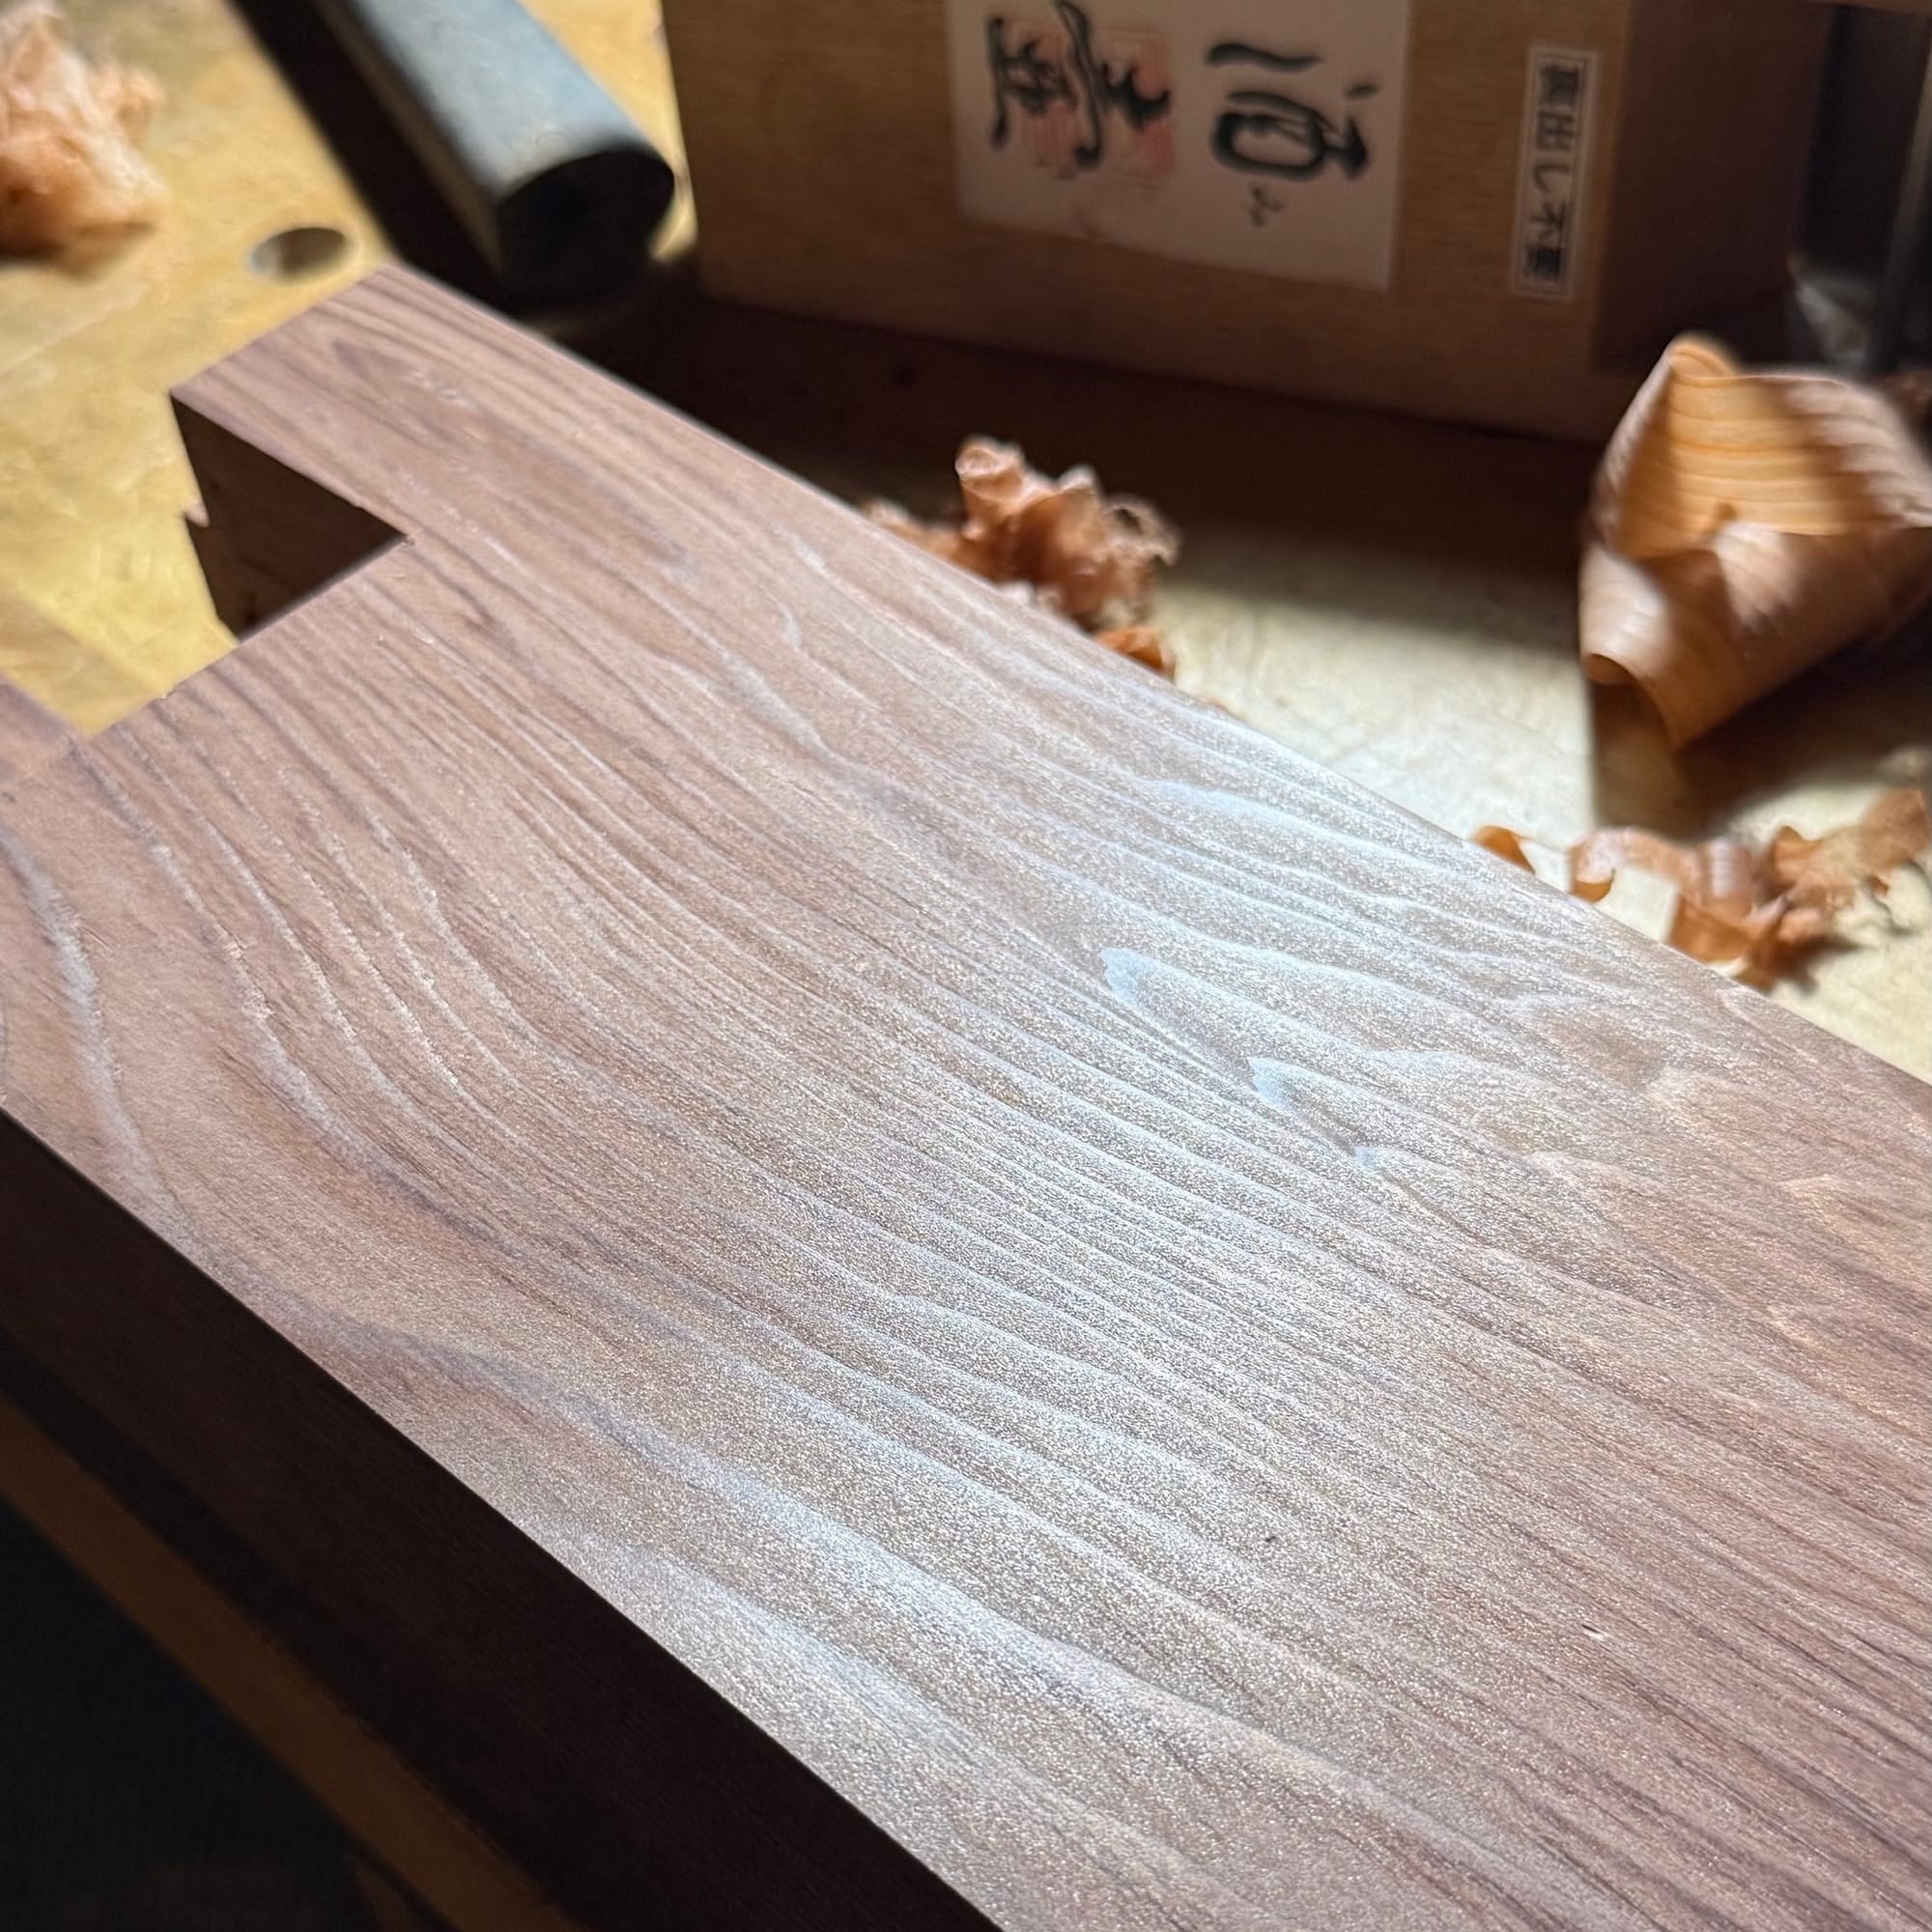
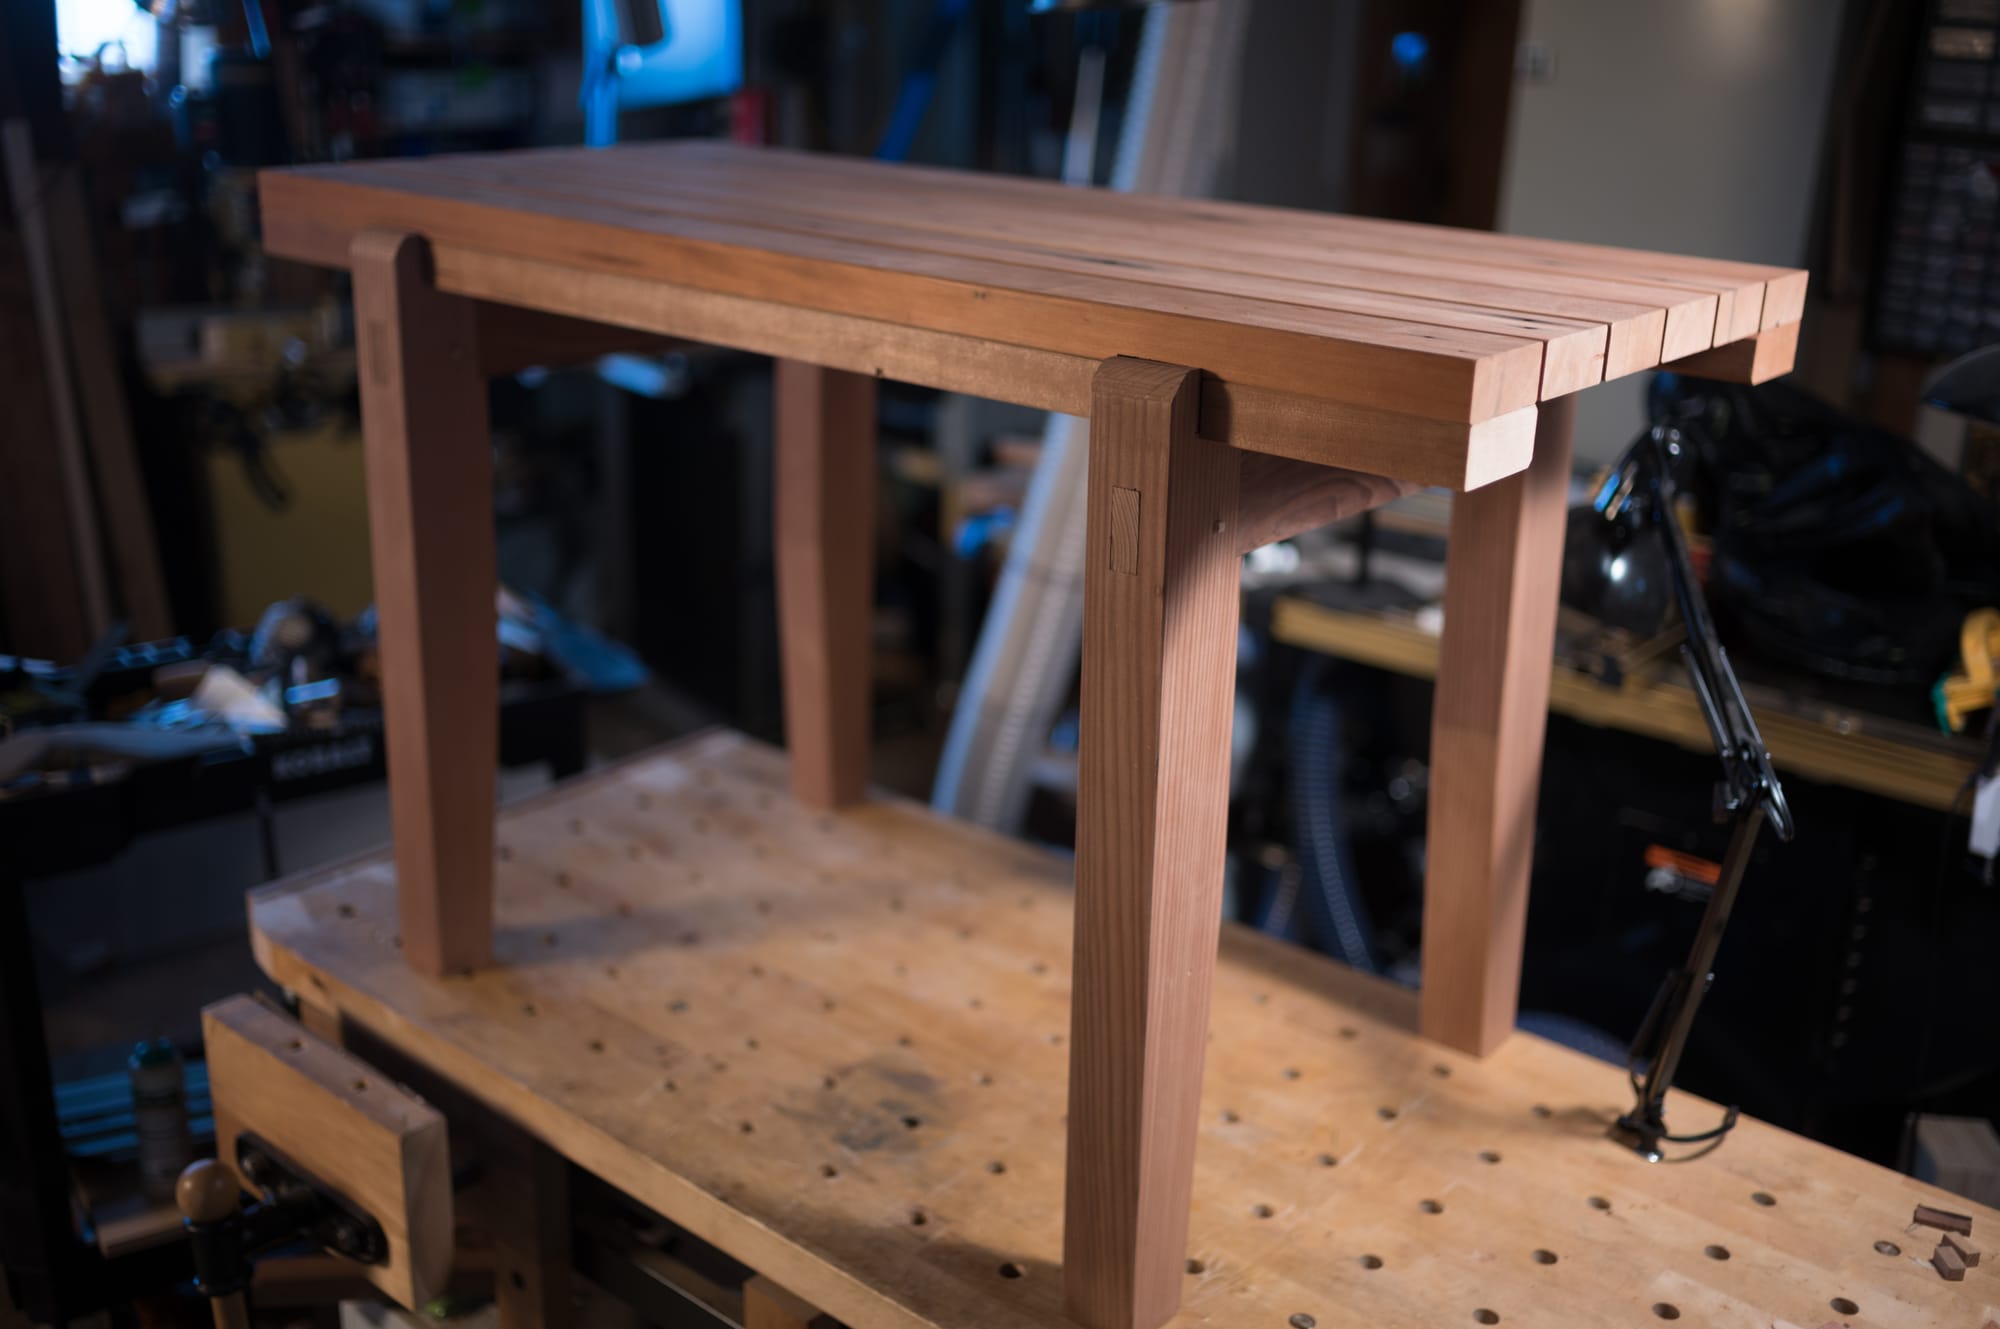
I had some spare 6x6 redwood lying around that was originally cut into a shape that was meant to hold a tapered dovetail cleat and be as tall as possible to provide room for large tenons to strengthen the legs.
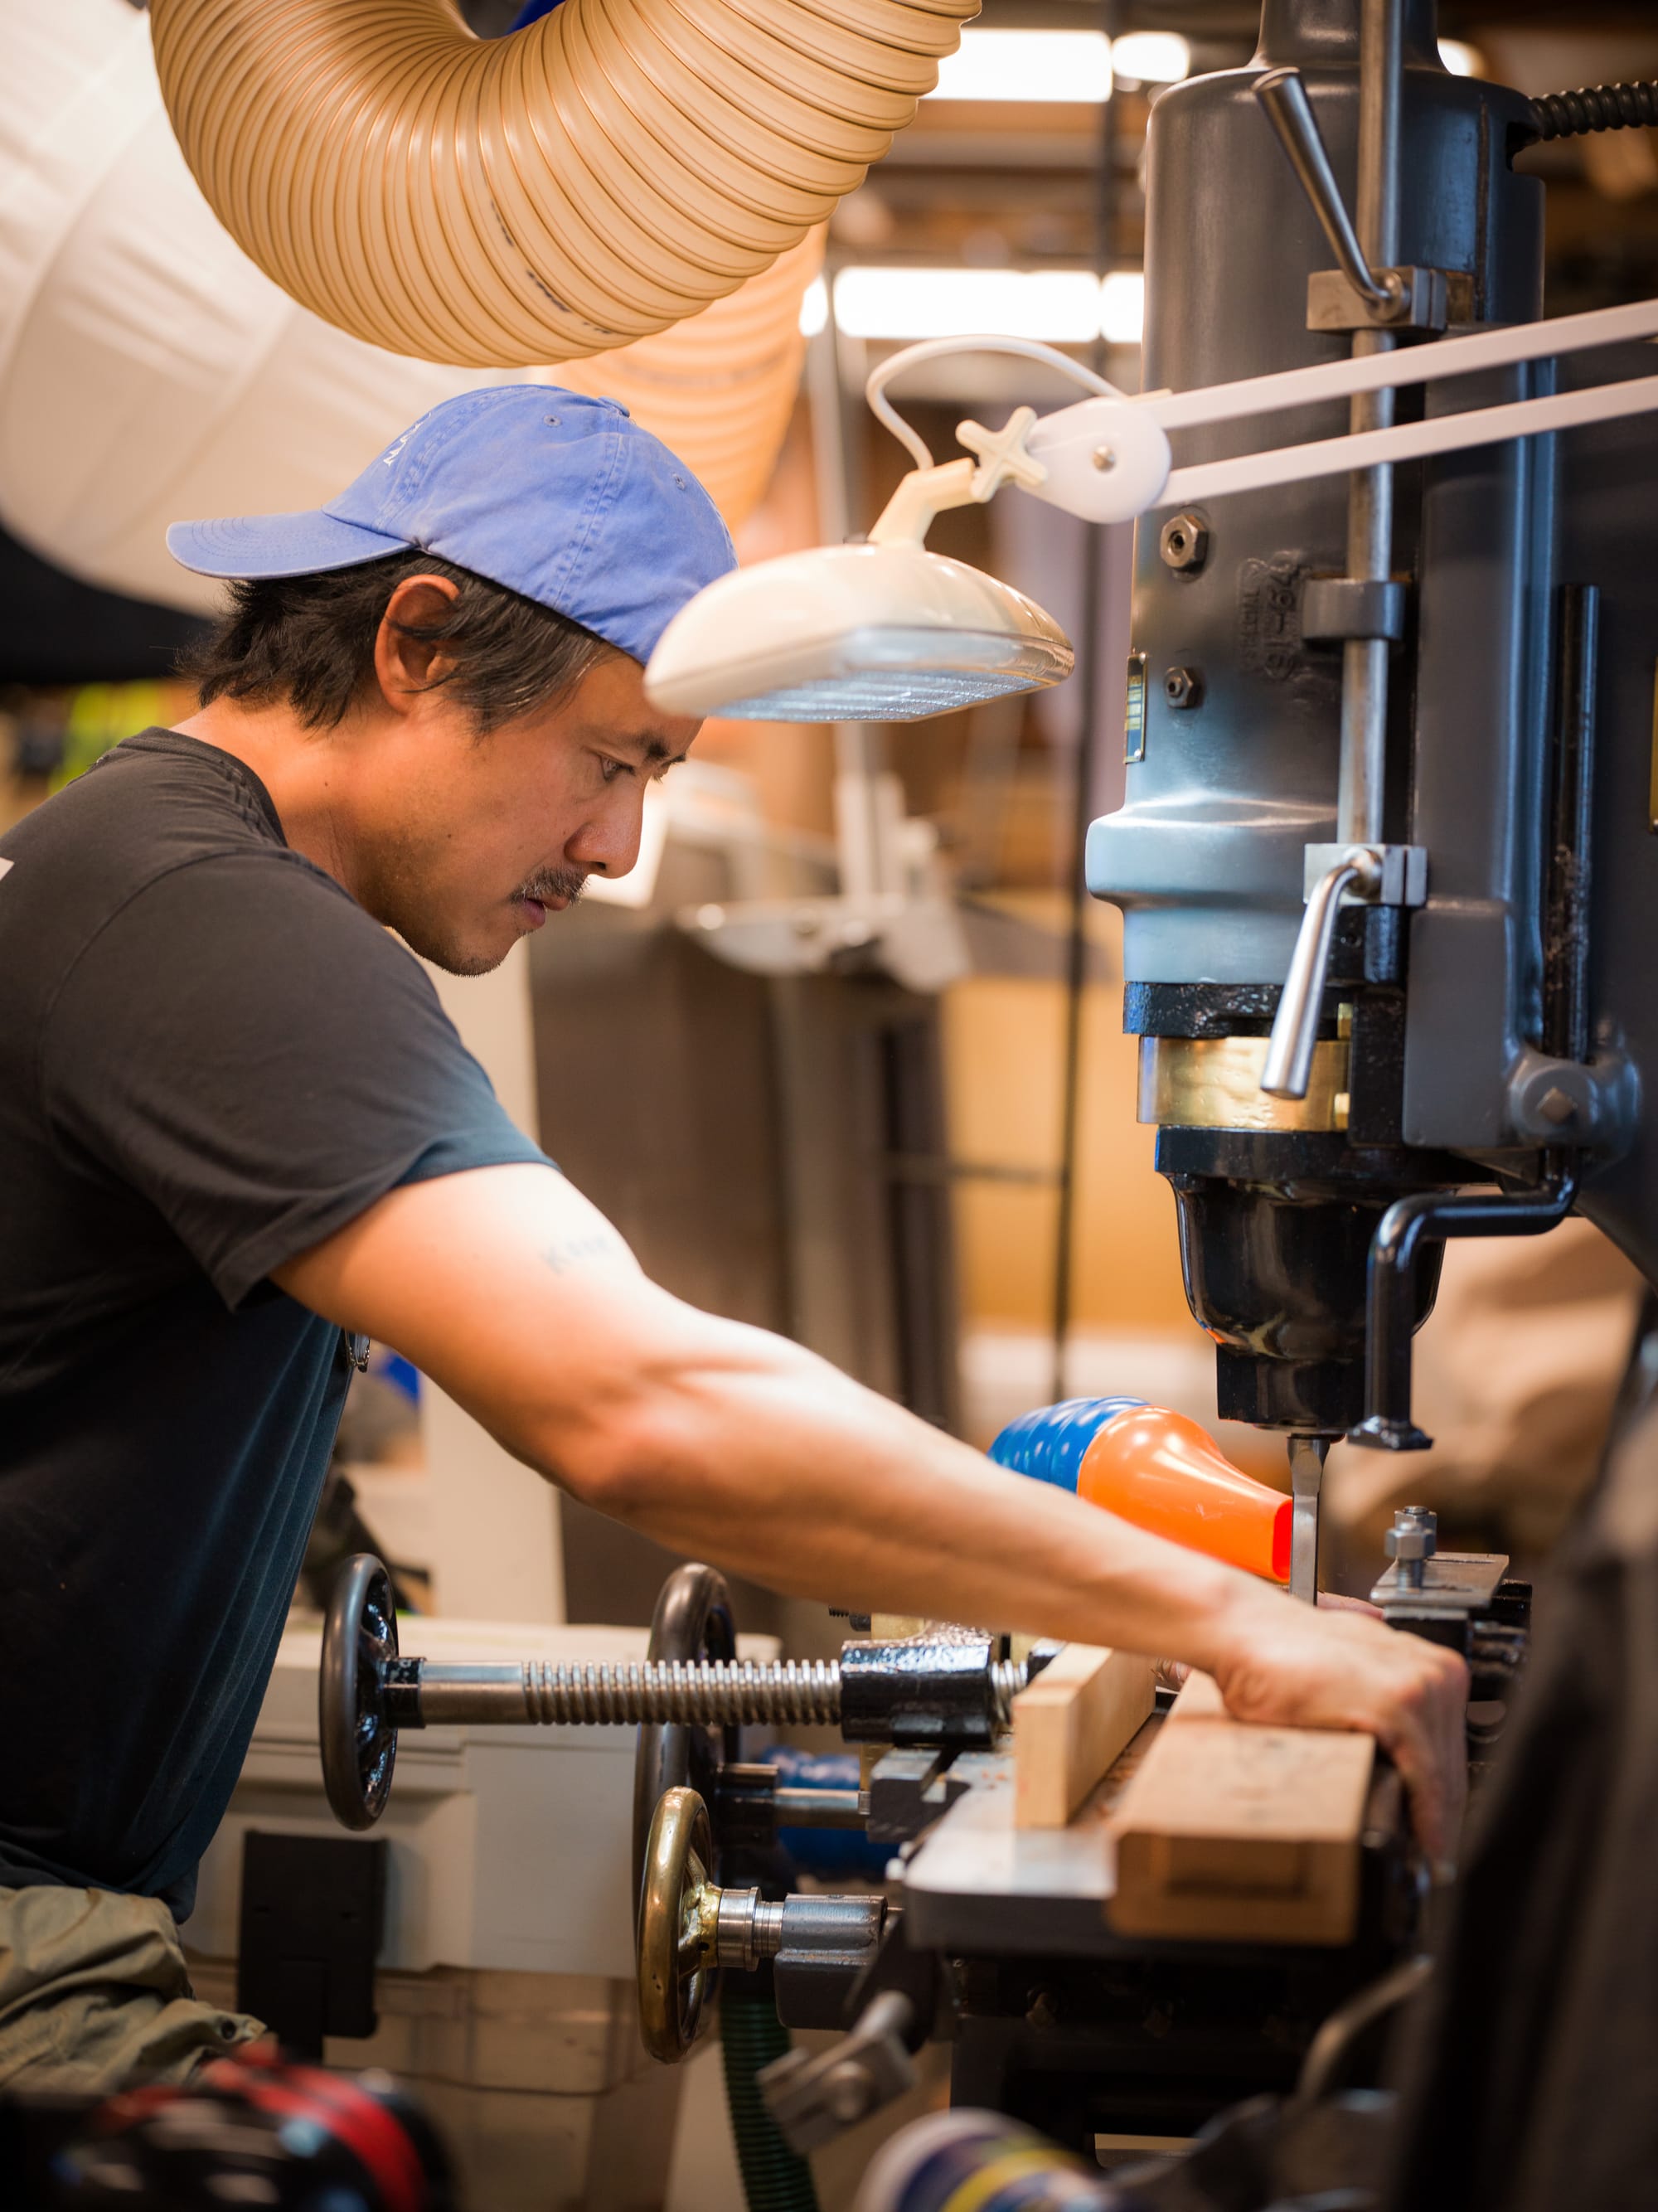
Cutting this shape of part meant the tenon couldn’t be easily sawn out because the cleat area was in the way, so I ended up roughing out with a mortiser.
This way of working is less accurate in my shop than sawing close to a line and finishing by chisel, but good enough for this kind of relatively rough work.
Matching a nailed-together design with joinery was problematic in other ways. The cleat stopped making sense once I realized I didn’t want to join individual boards (spaced by about ¼” in the original design) or mount them this way individually. Either of which would have been fussy with great potential to weaken with even the slightest wood movement in an outdoor environment. That is even considering the relative stability of redwood.
I also oversized the tenons by about 1mm to account for how redwood can crush and get much weaker over time. But given how strong the beam wood was (old growth, very dry) I think that may have contributed to some of the inaccuracy I saw on assembly in that area, later on.
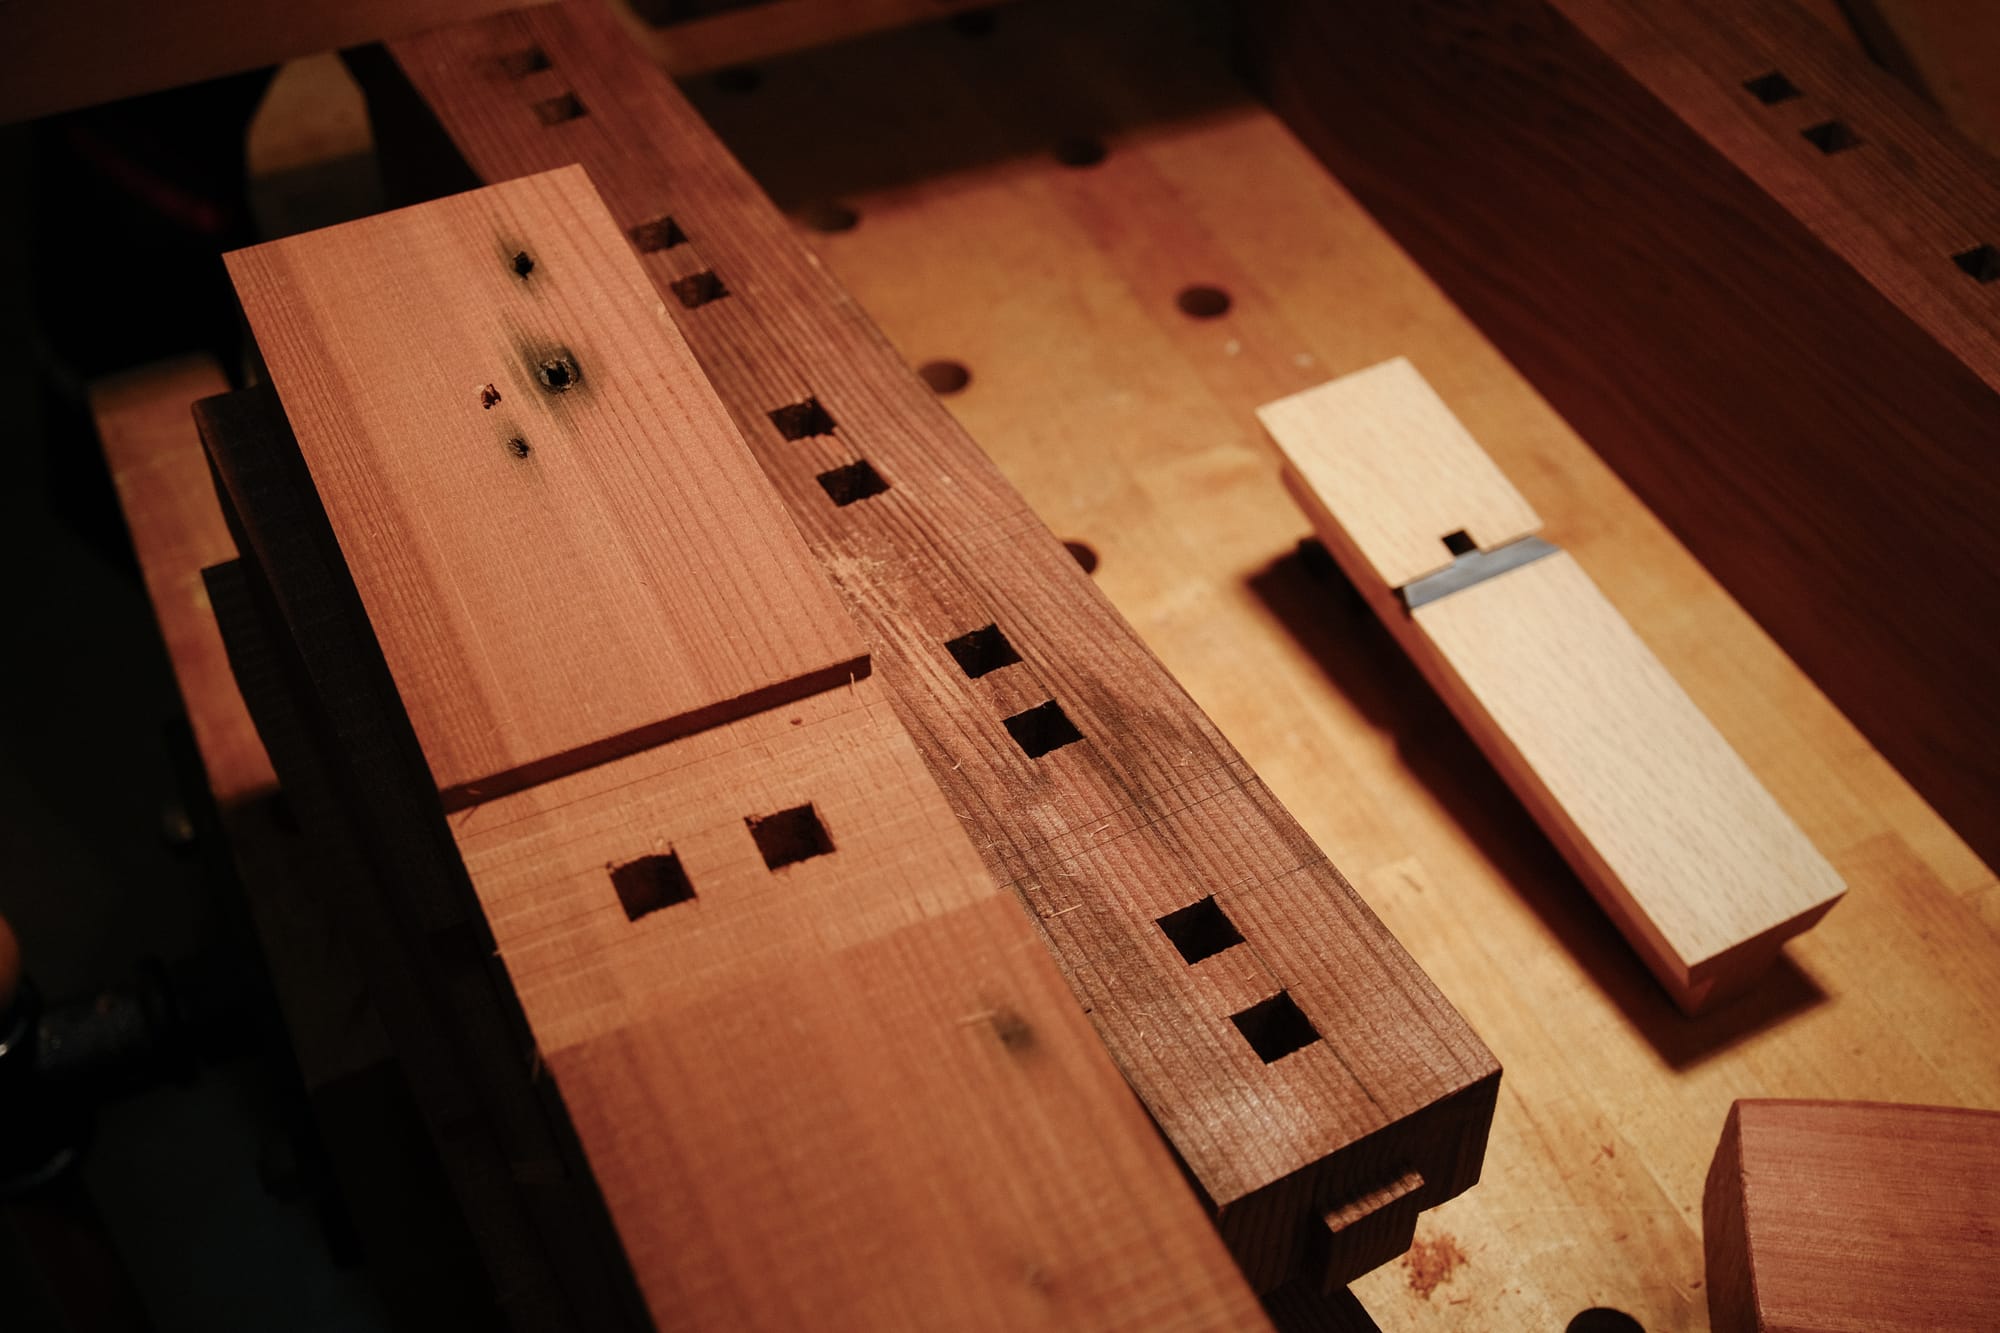
I could have done a series of housed laps in the cross beams, using its height and overall mass to cut deeply for solid registration. But the distance between boards would have meant for short grain on the beam between each lap--a tiny sliver of wood with grain oriented in such a way it could snap off easily. I could have cut out narrow dadoes and inserted spacers across the beam to support the pieces, but it felt a little out of hand. Also, I preferred to avoid cutting anything that would collect water and expose end grain into the beam, given how the other table died.
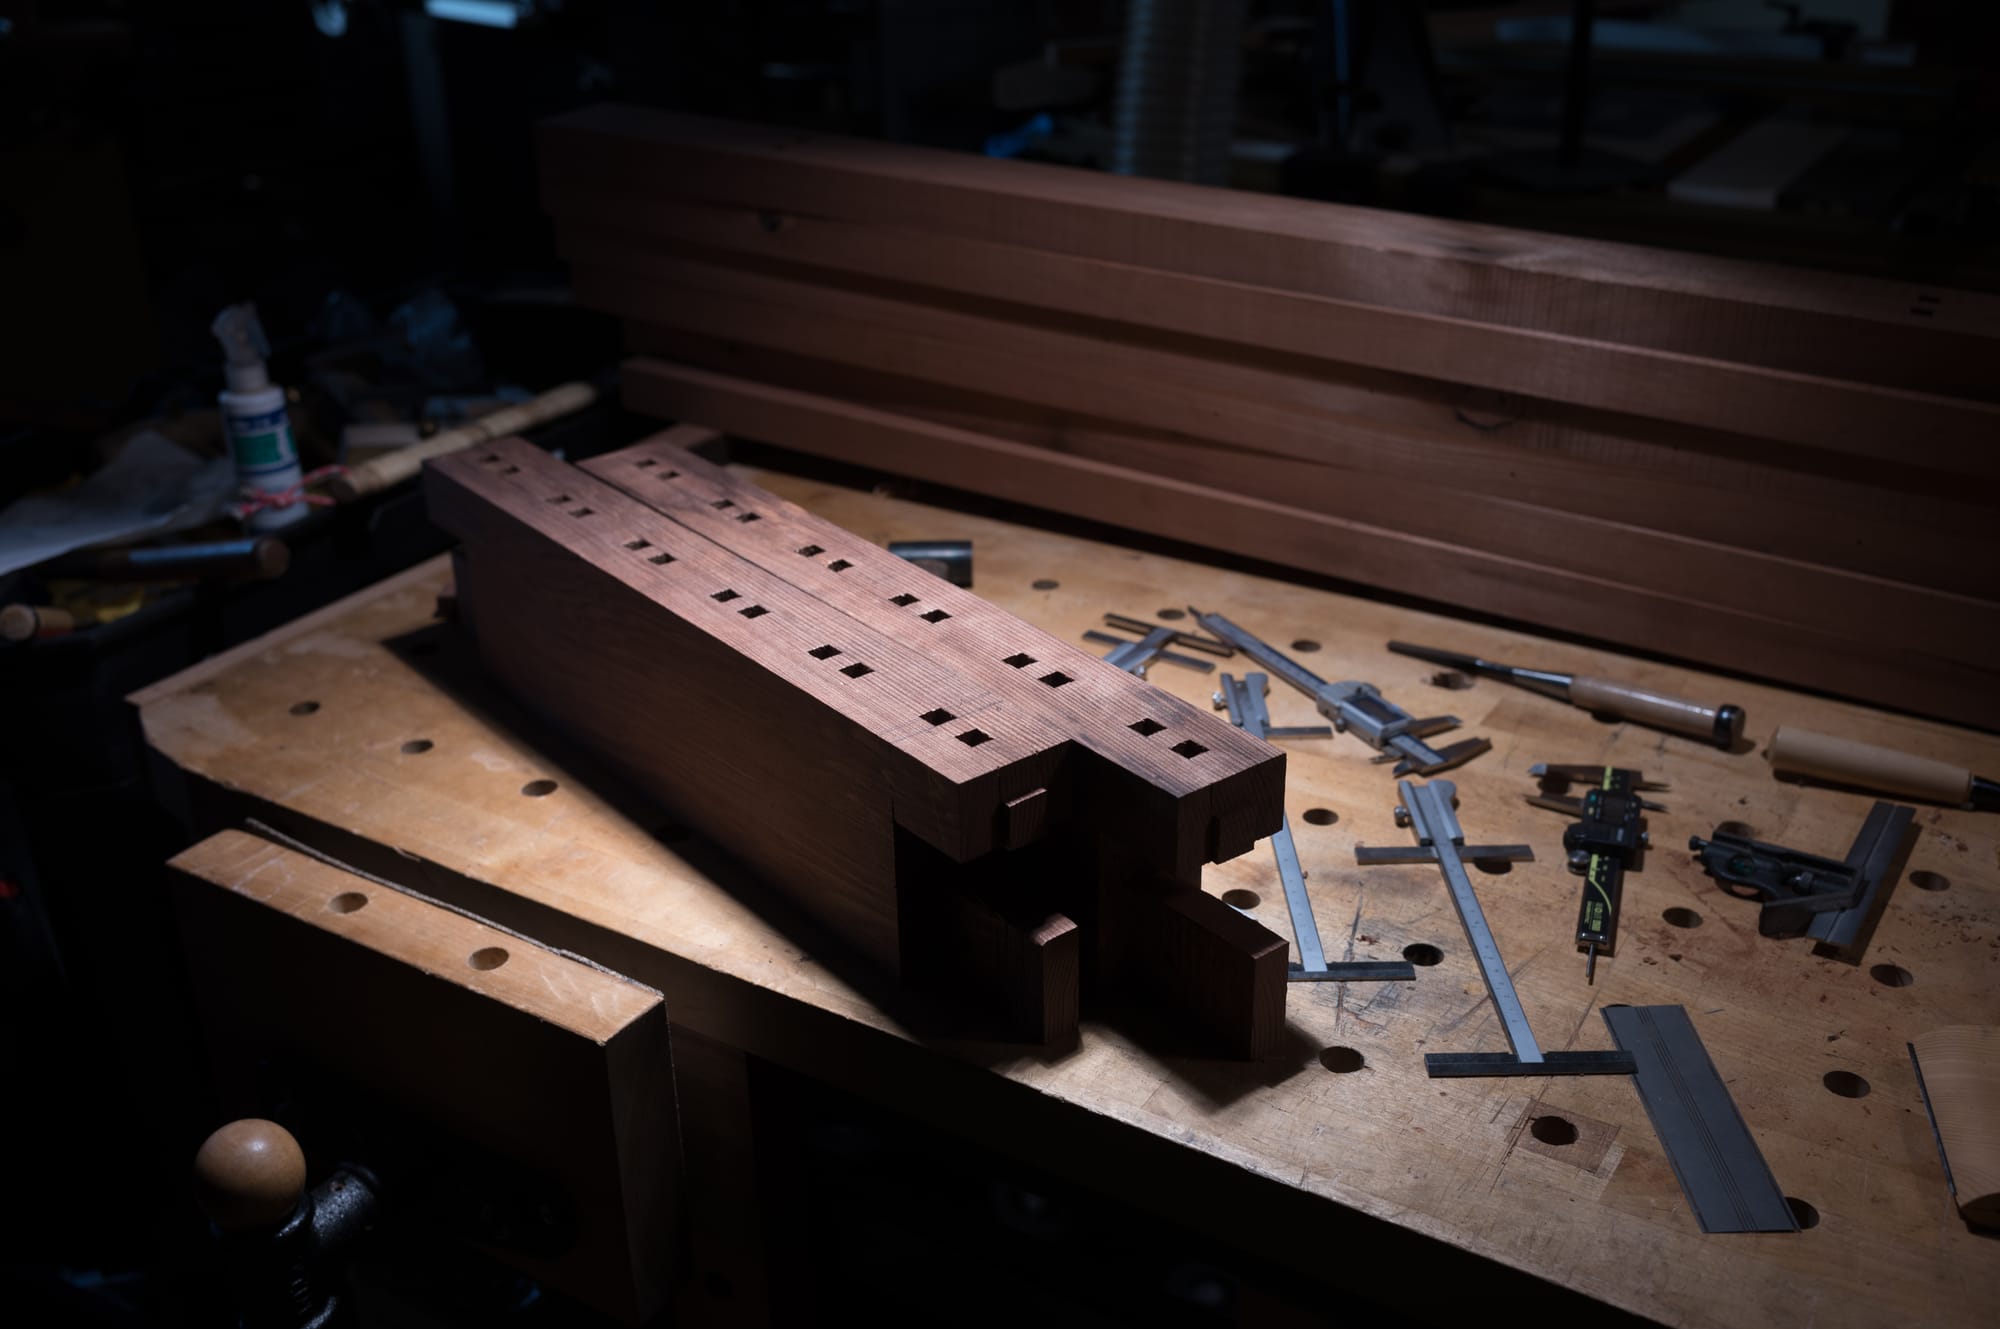
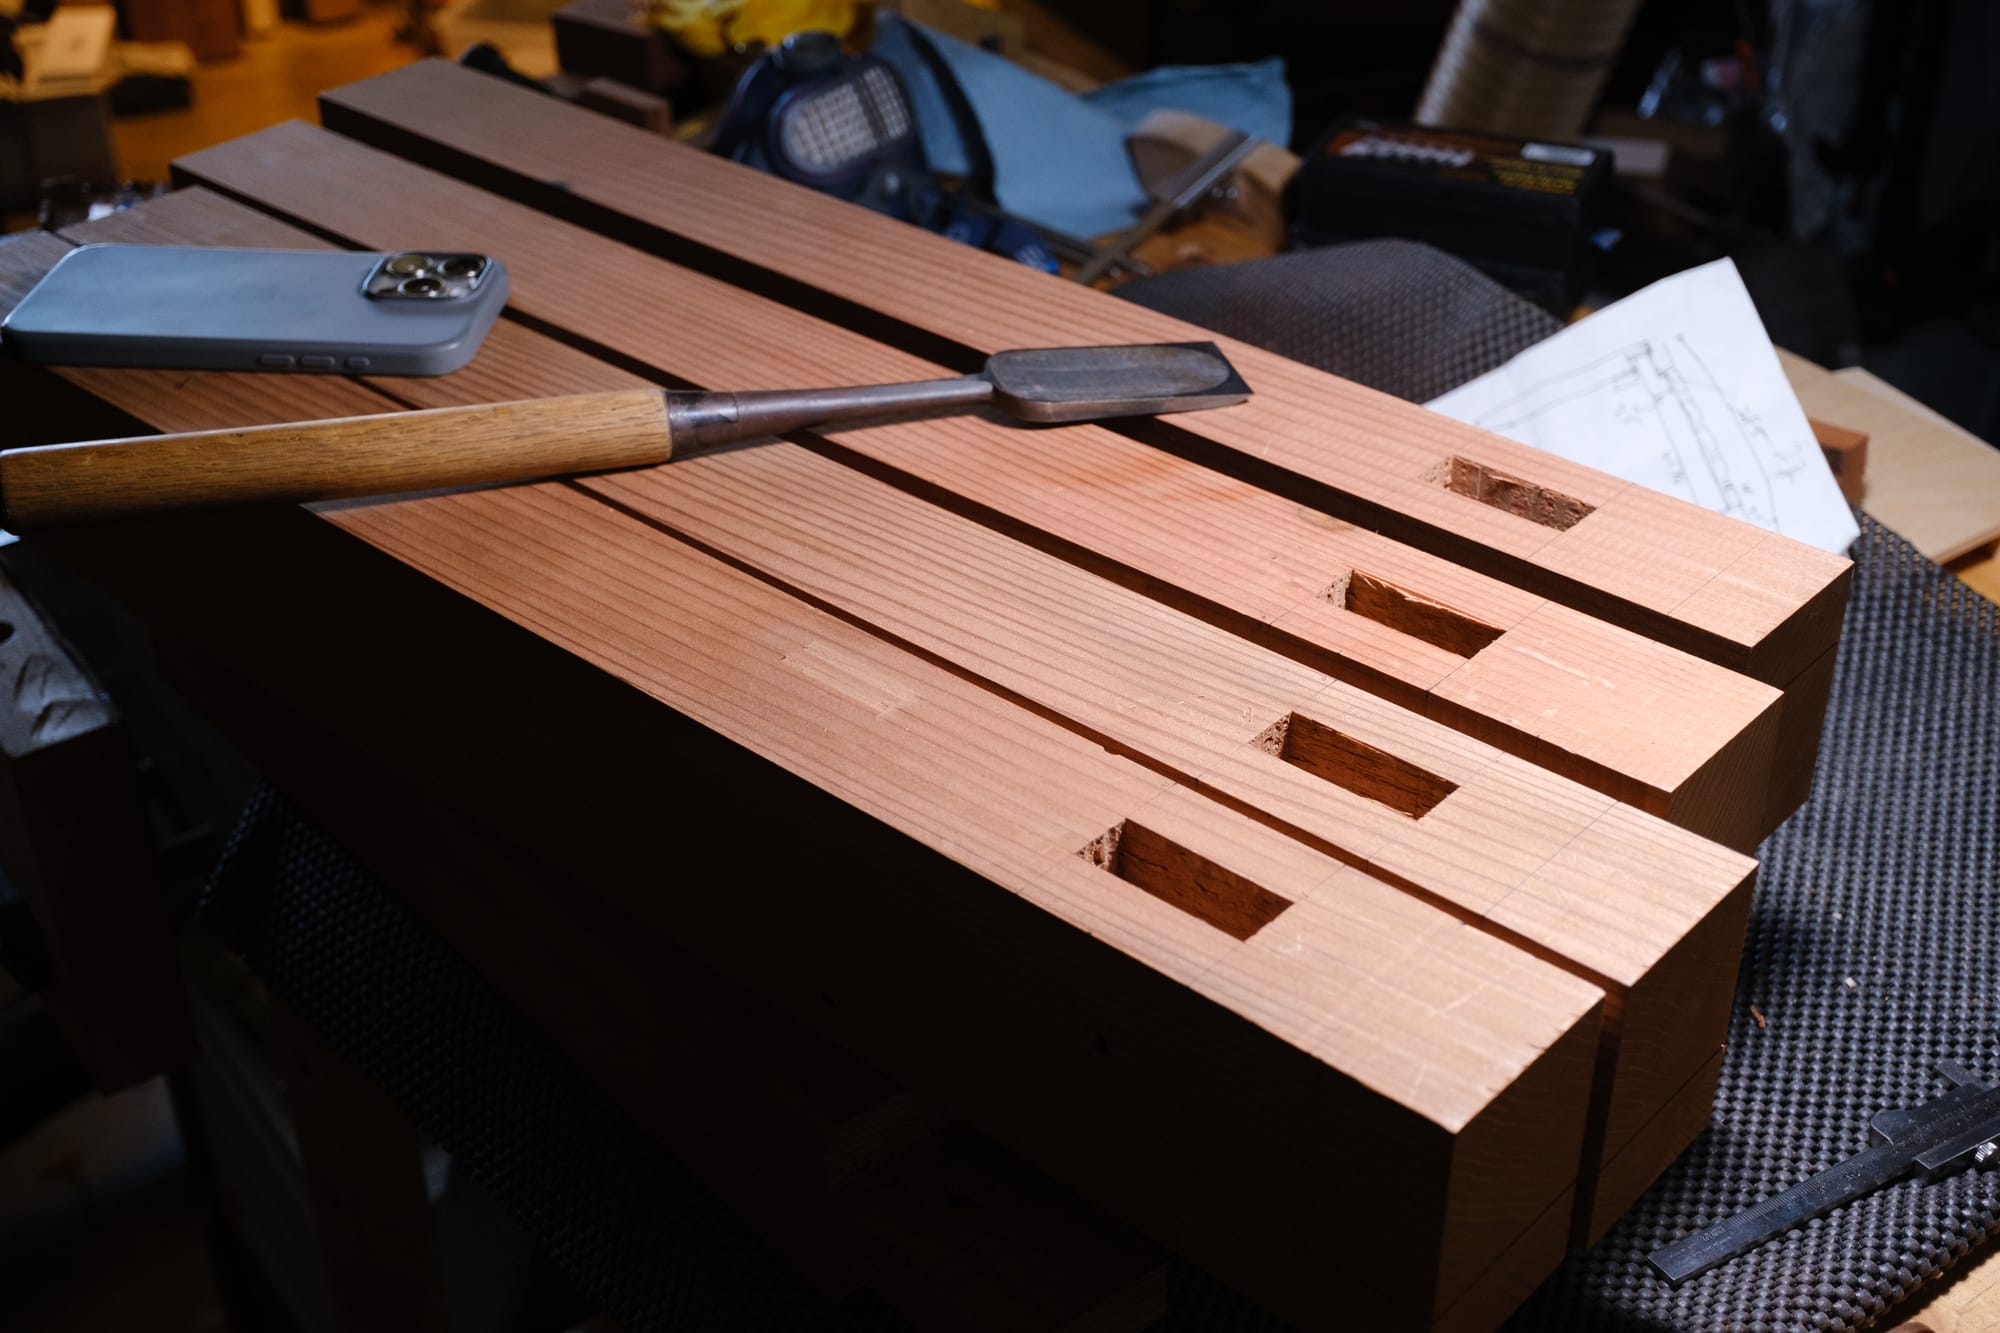
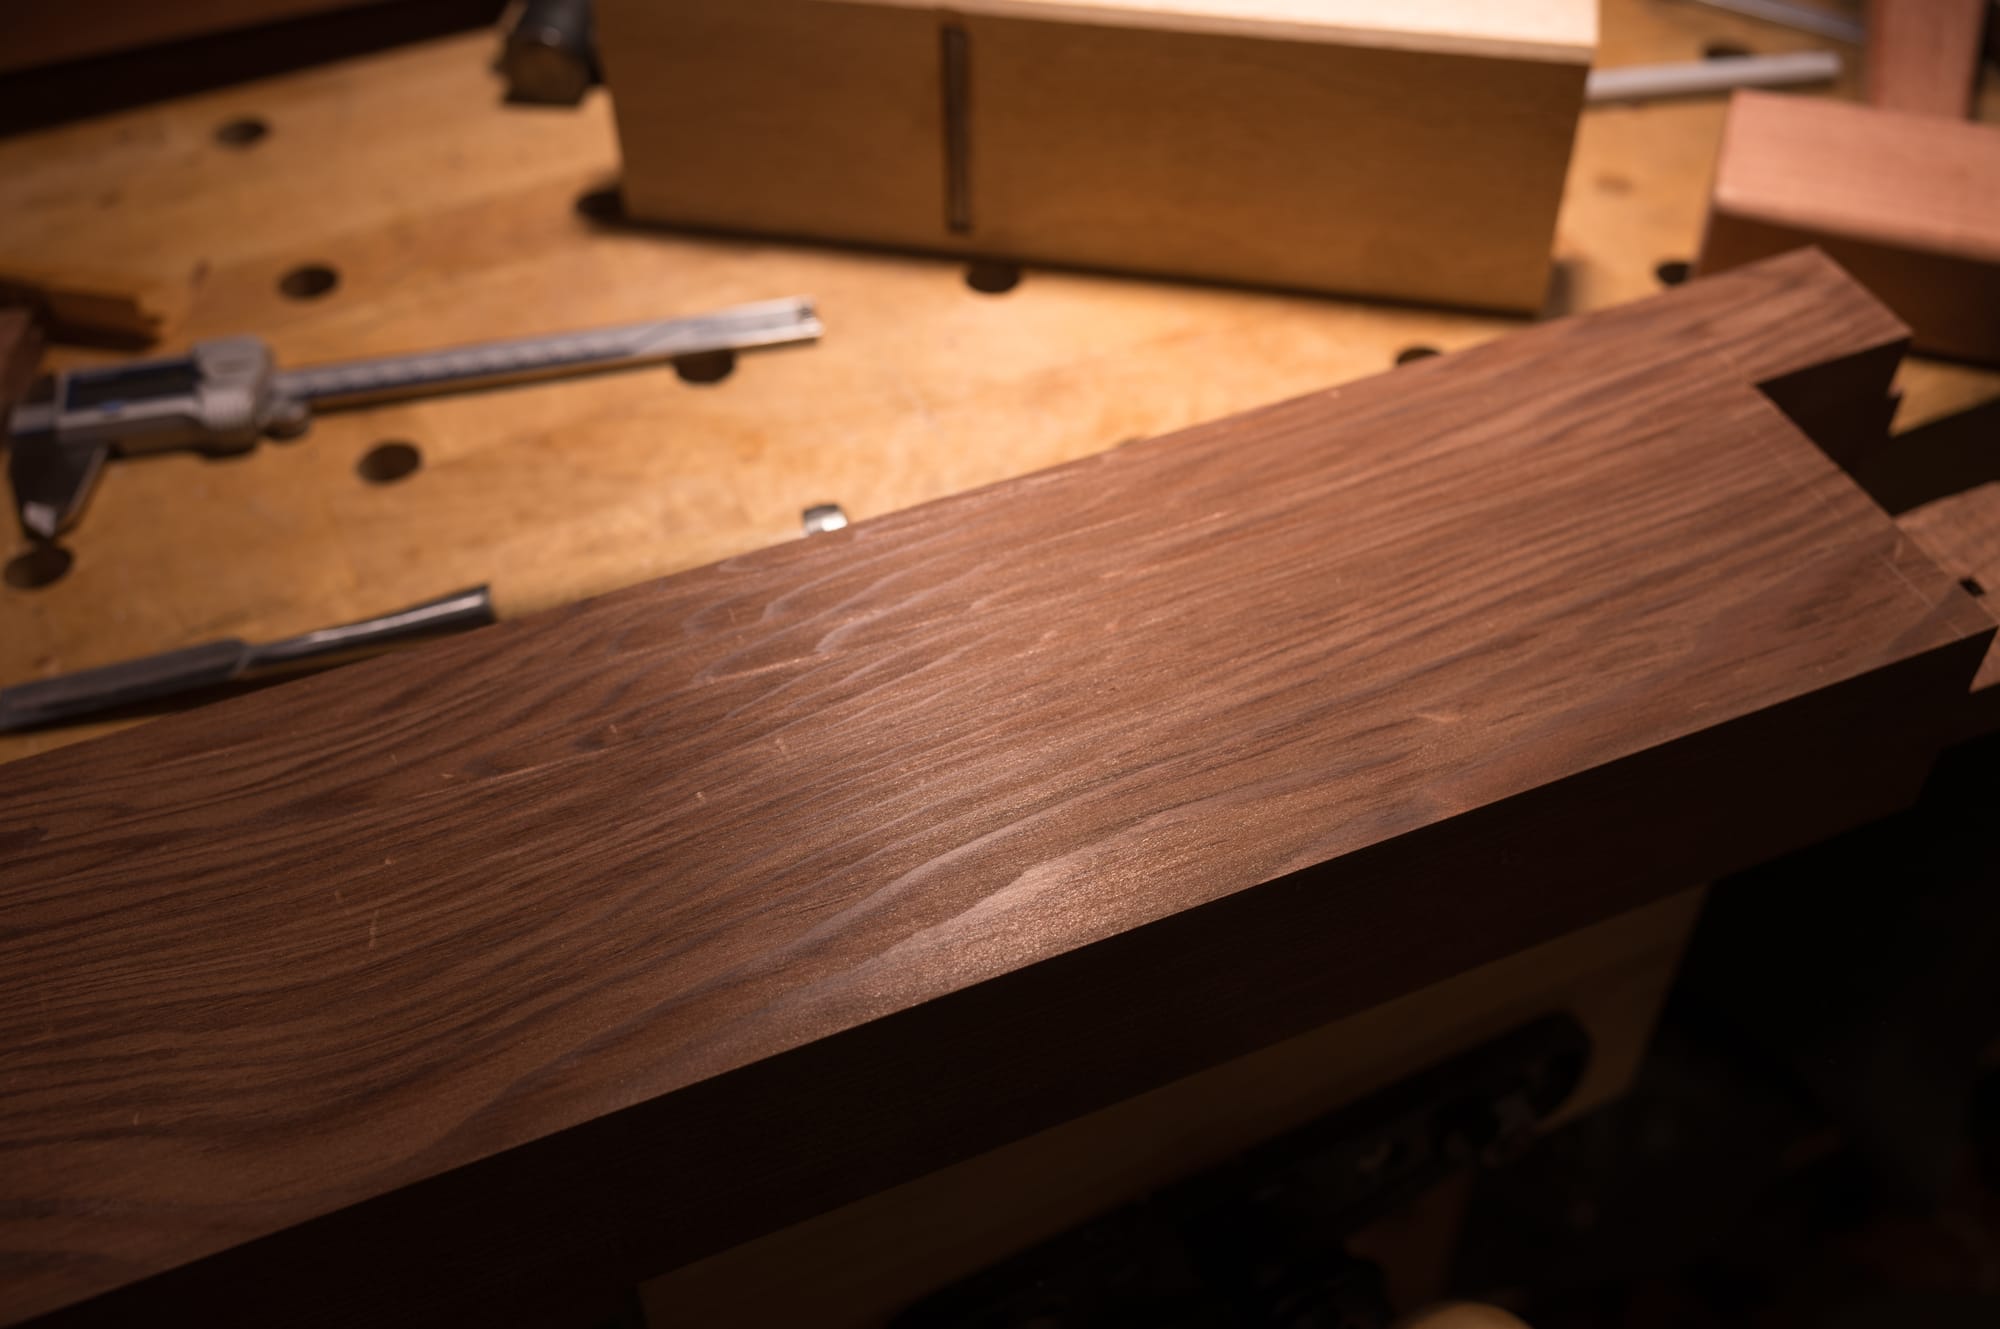
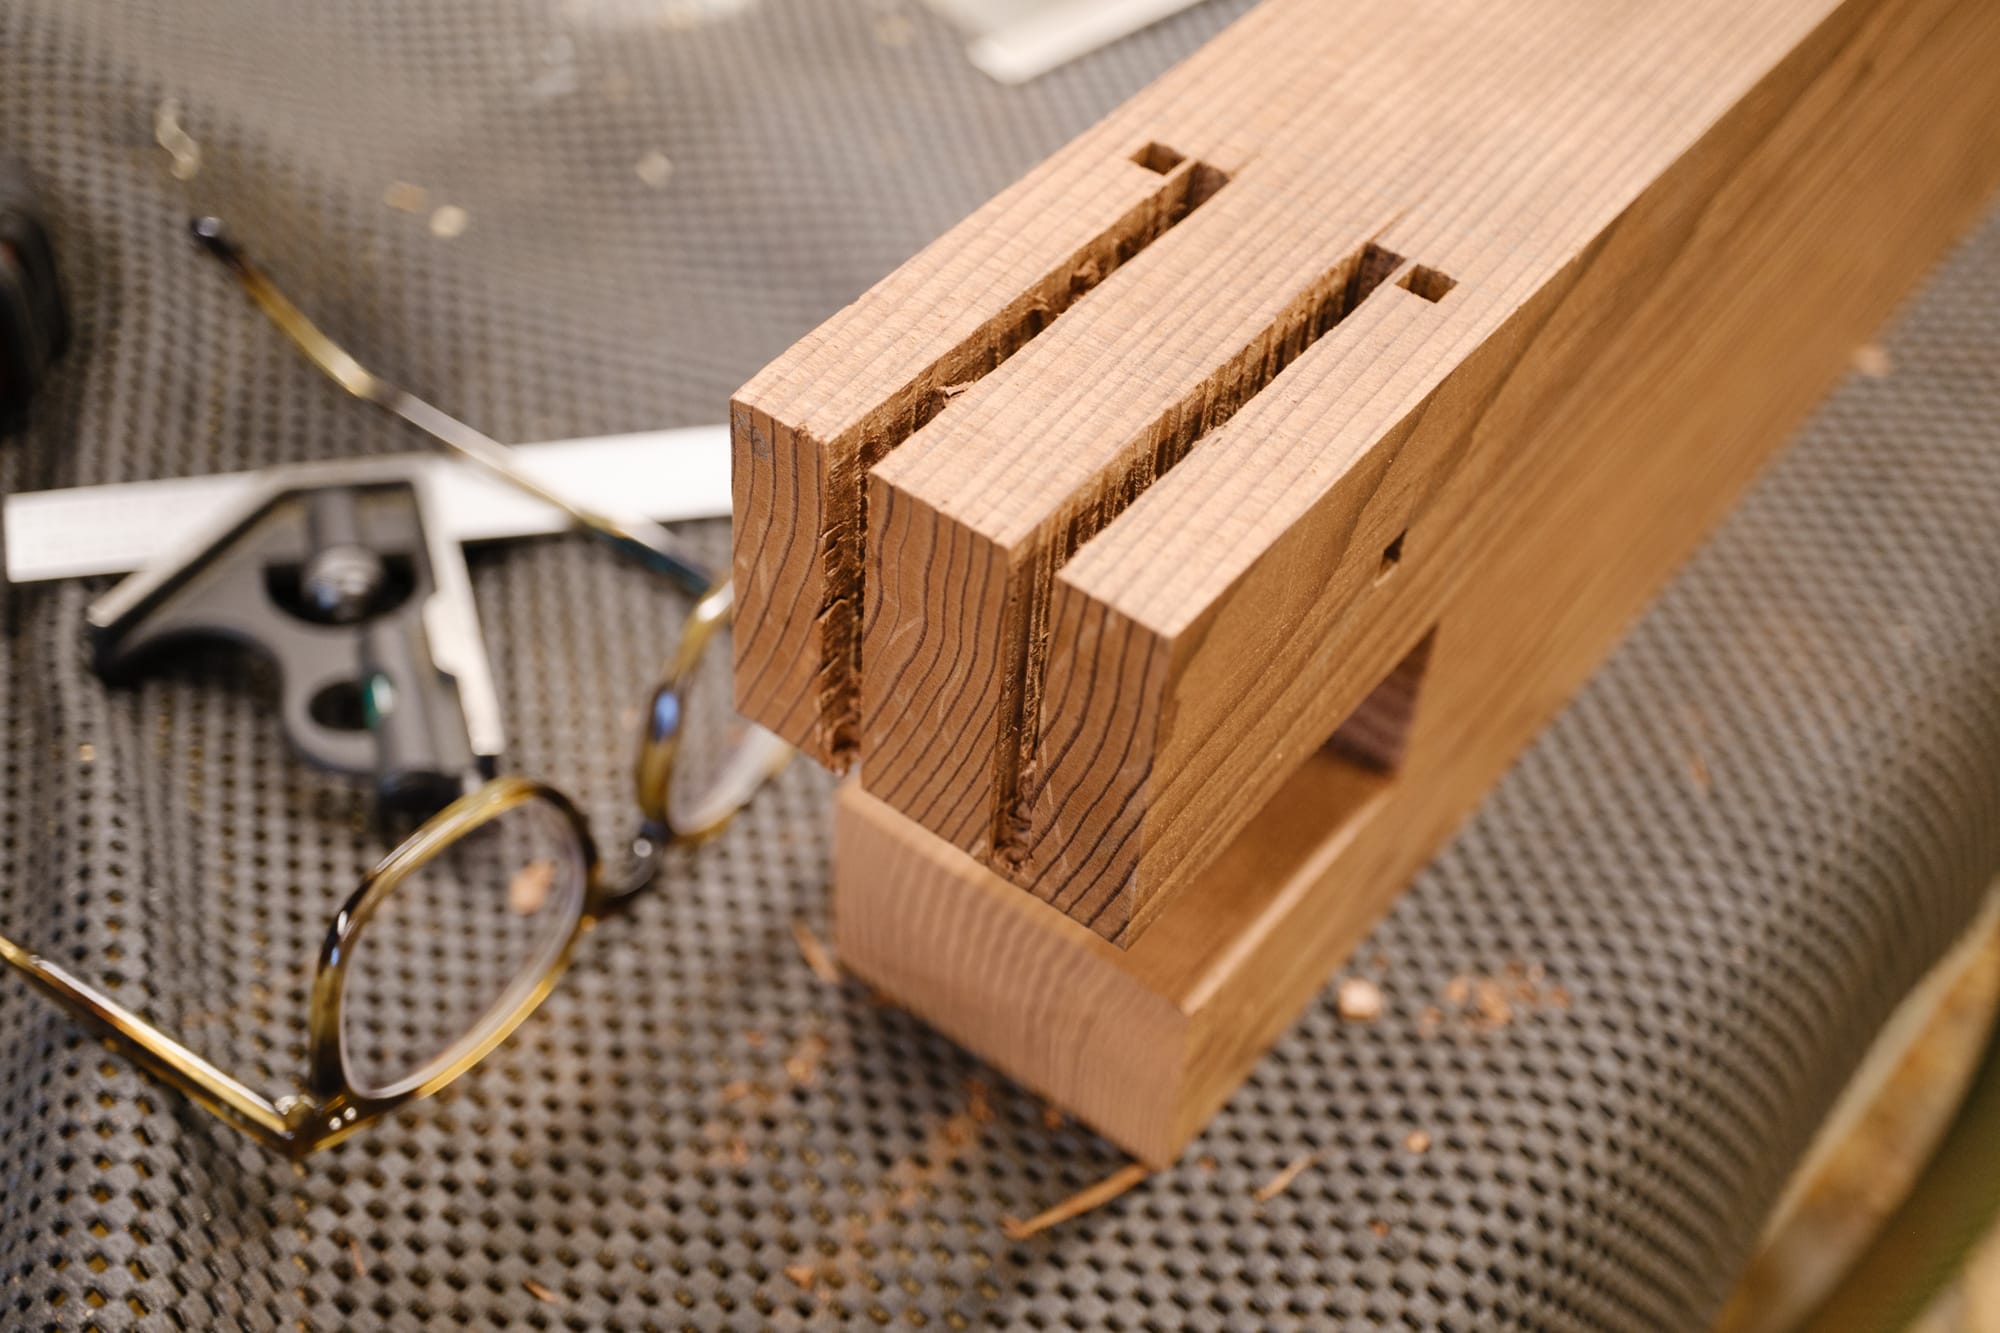
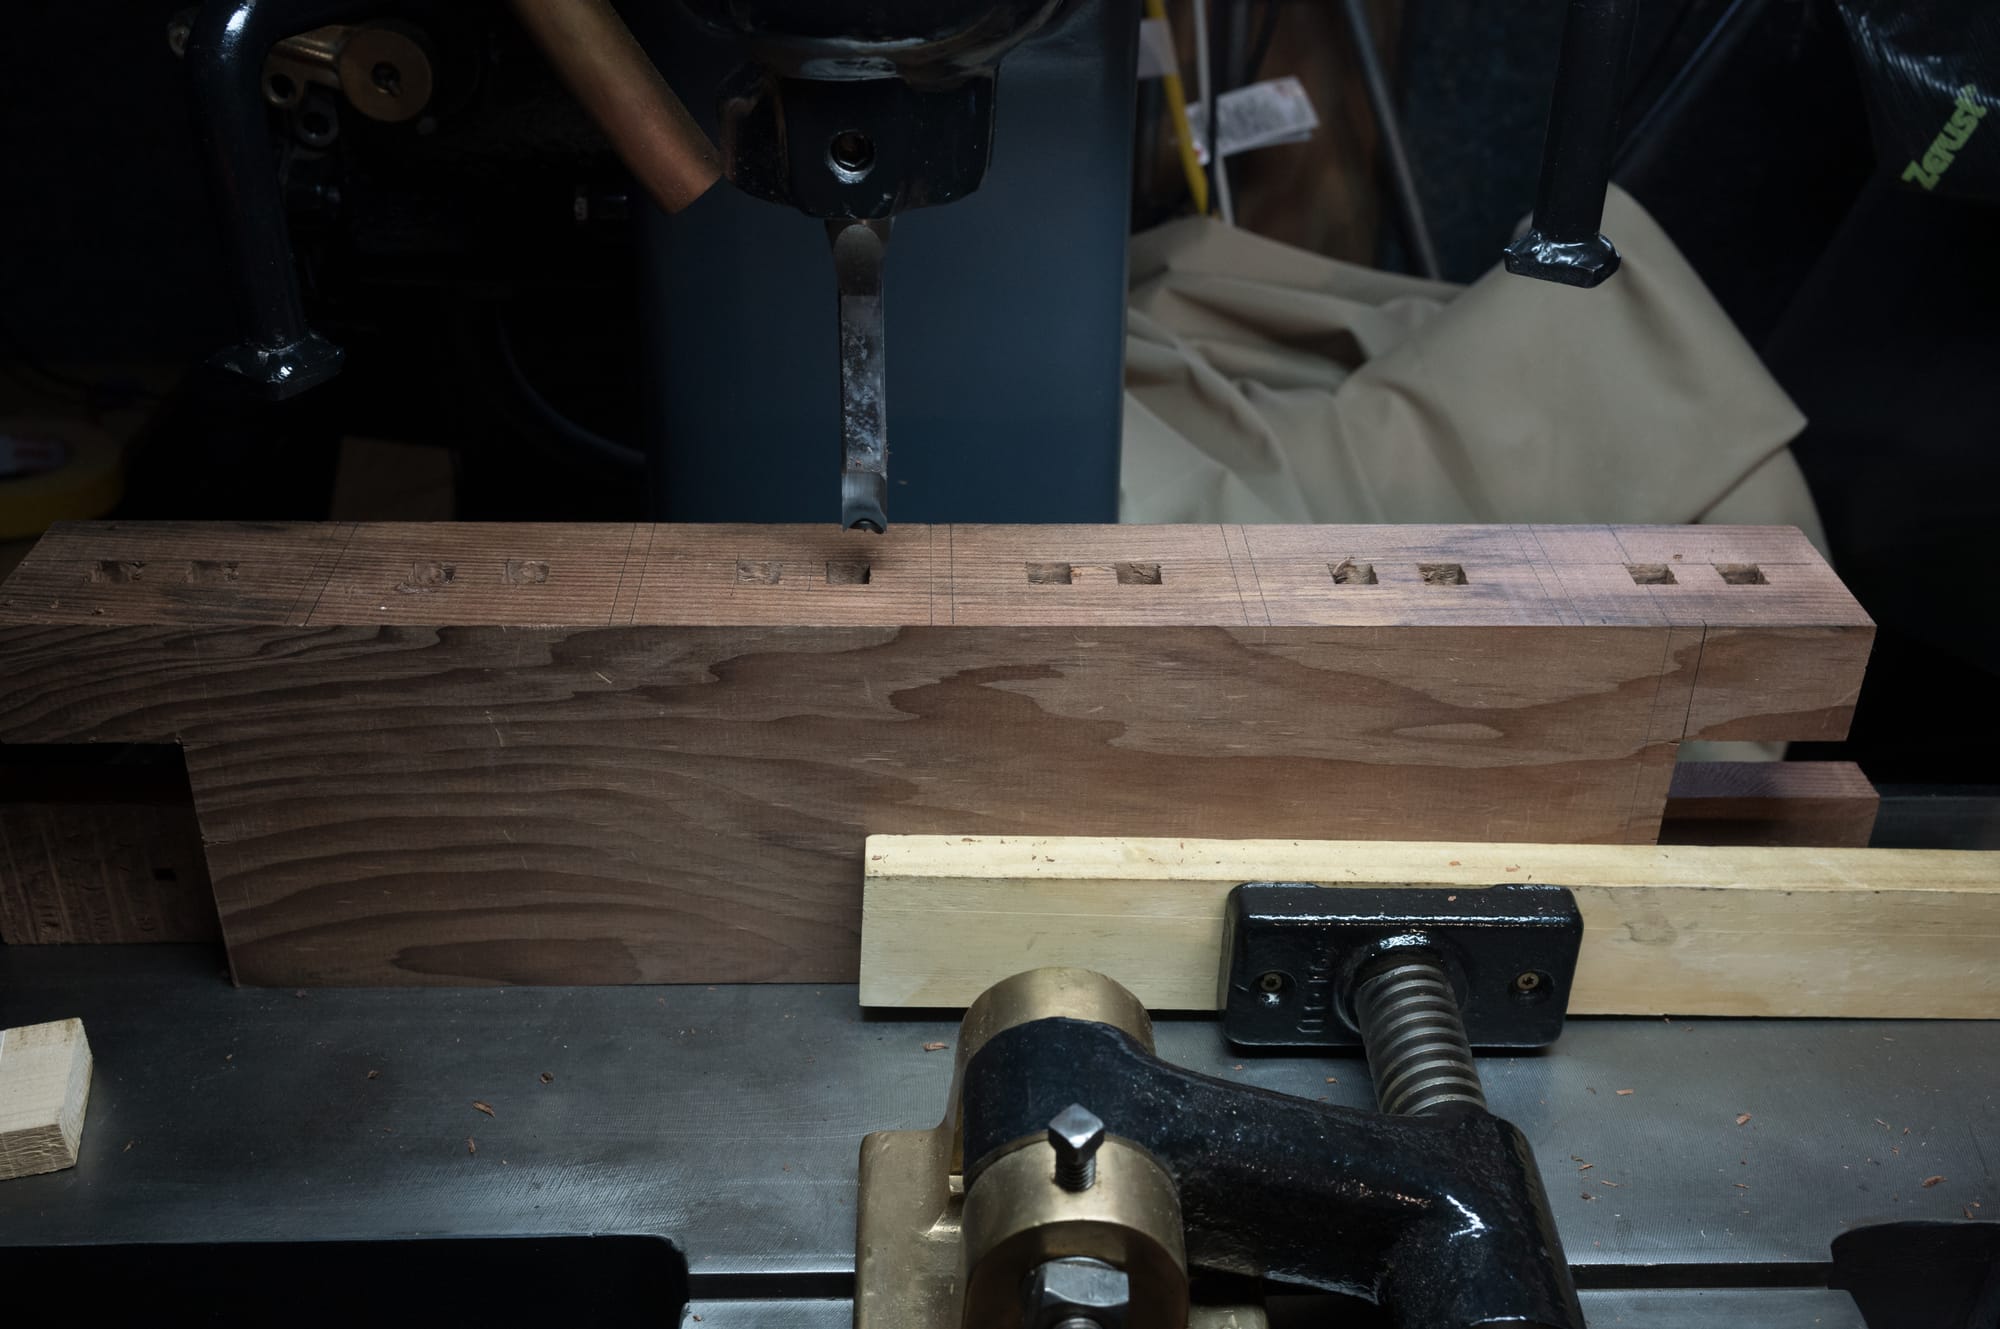
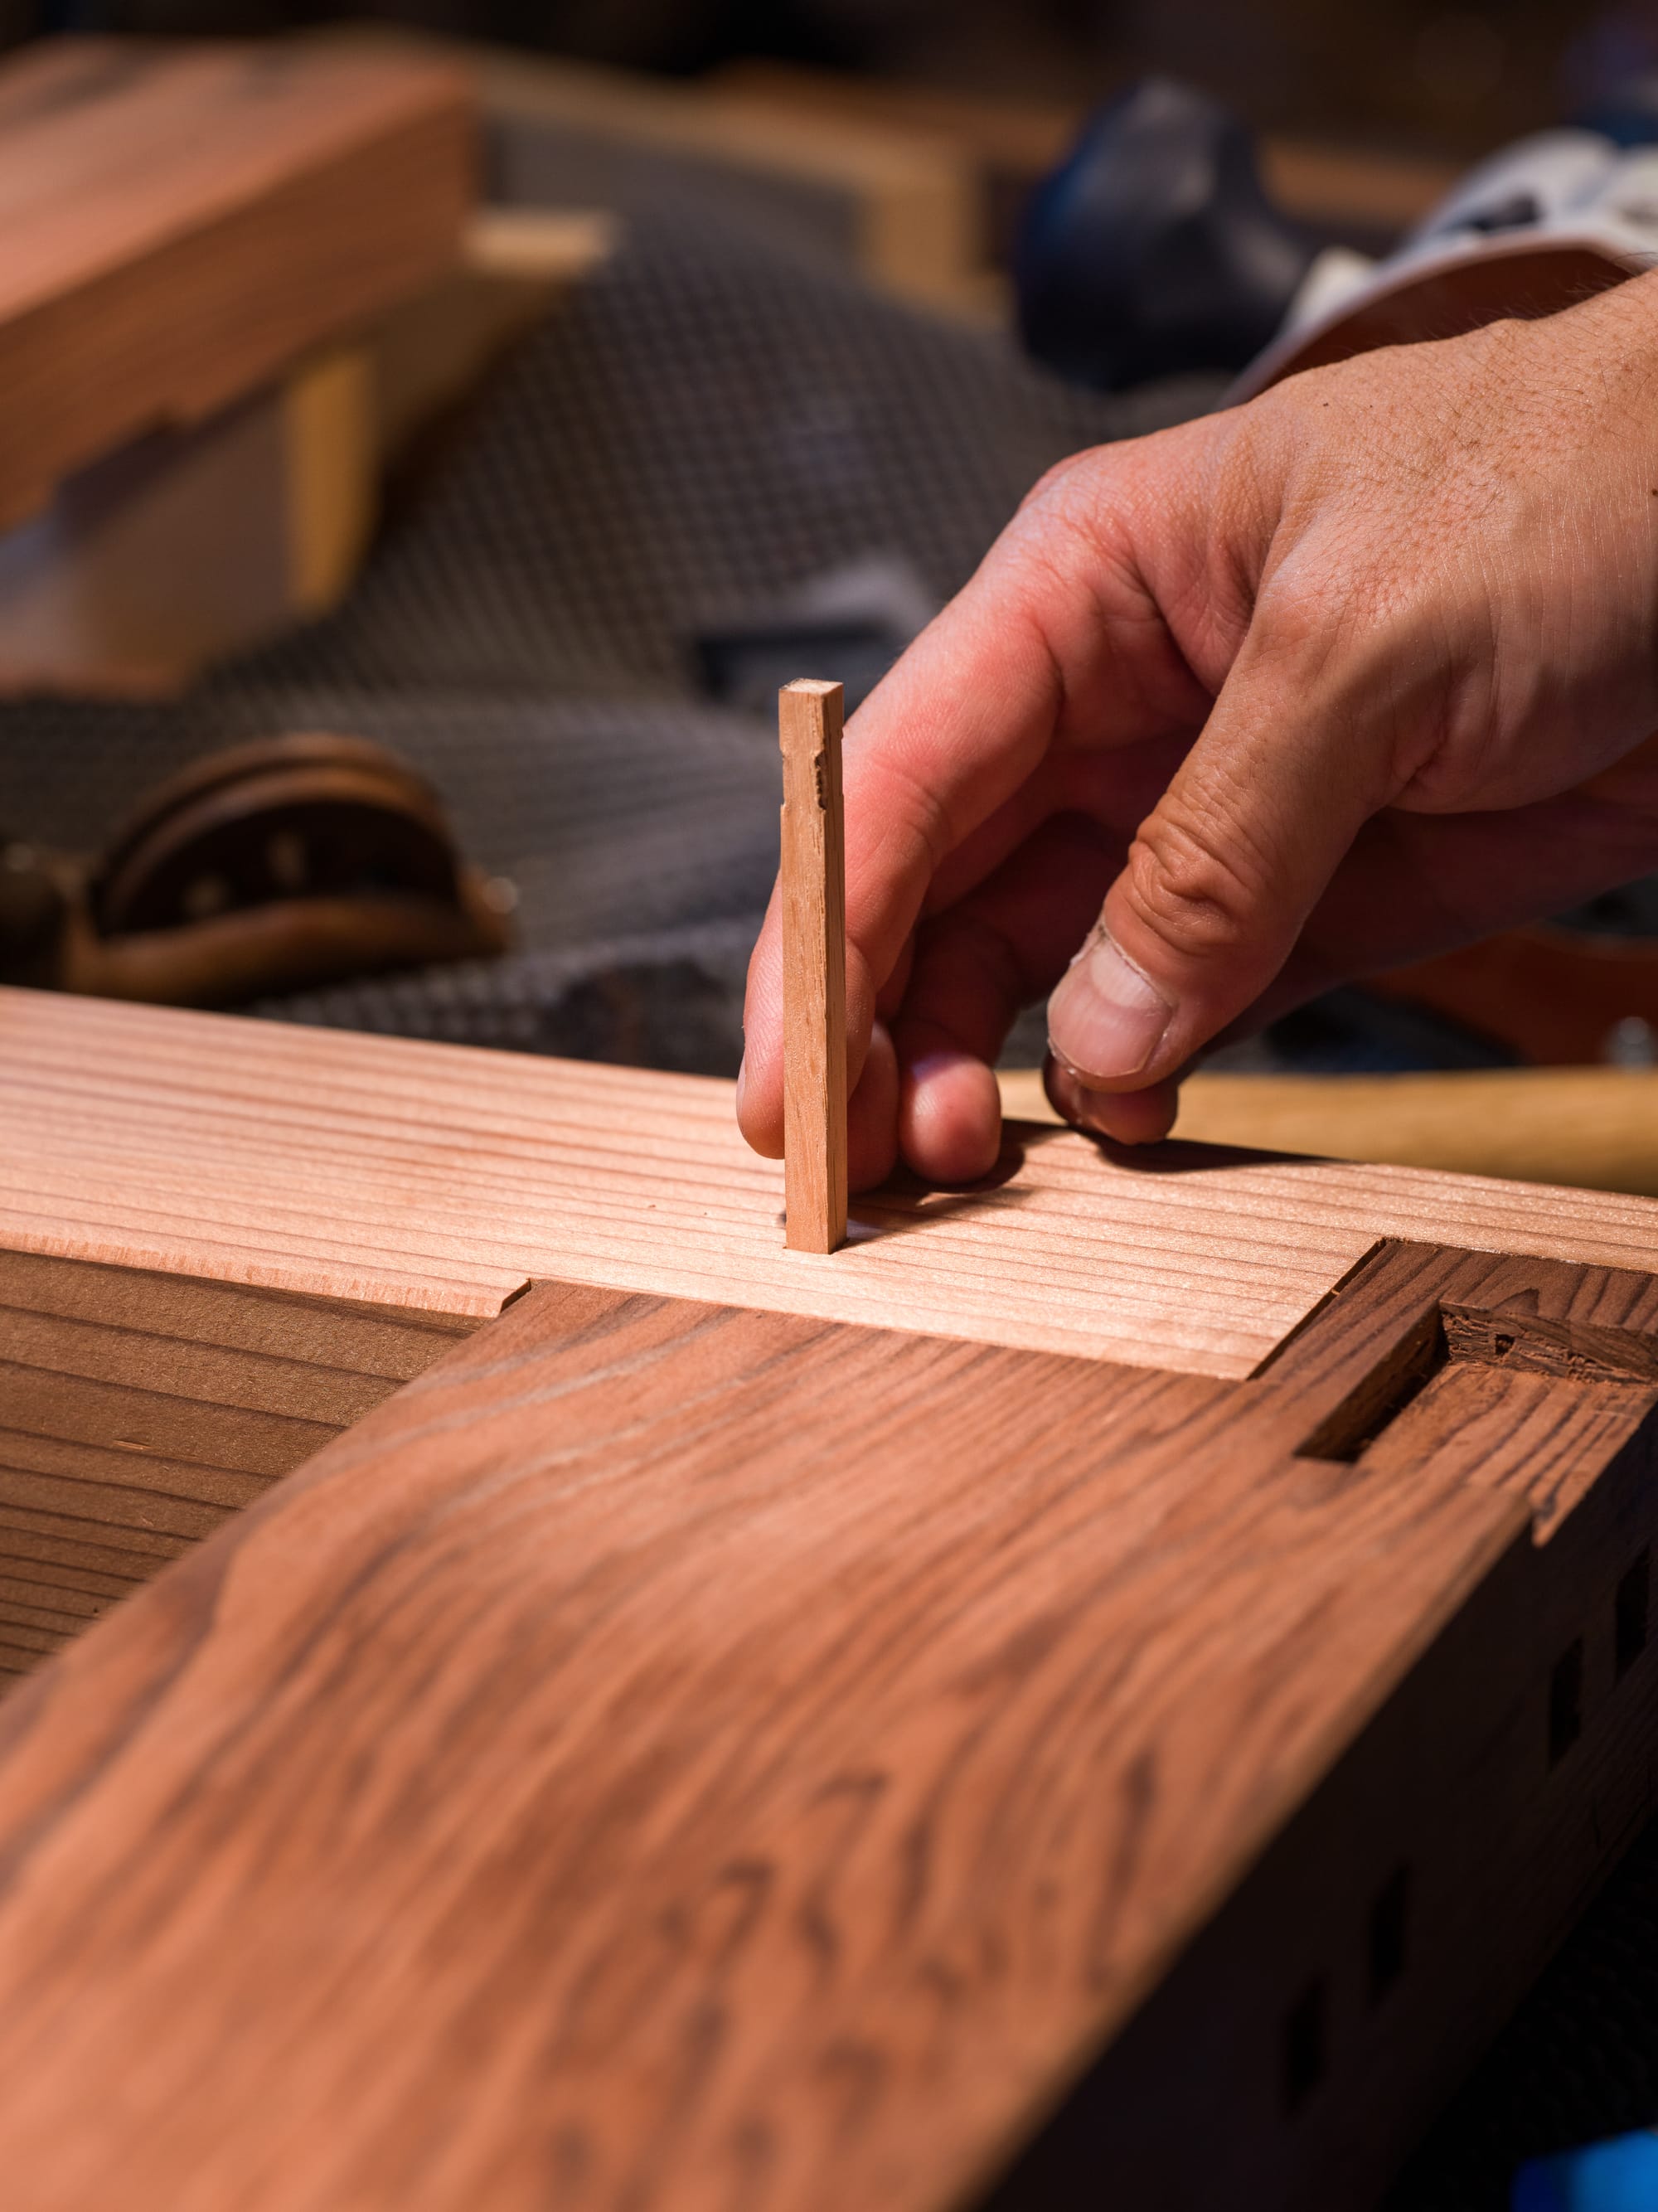
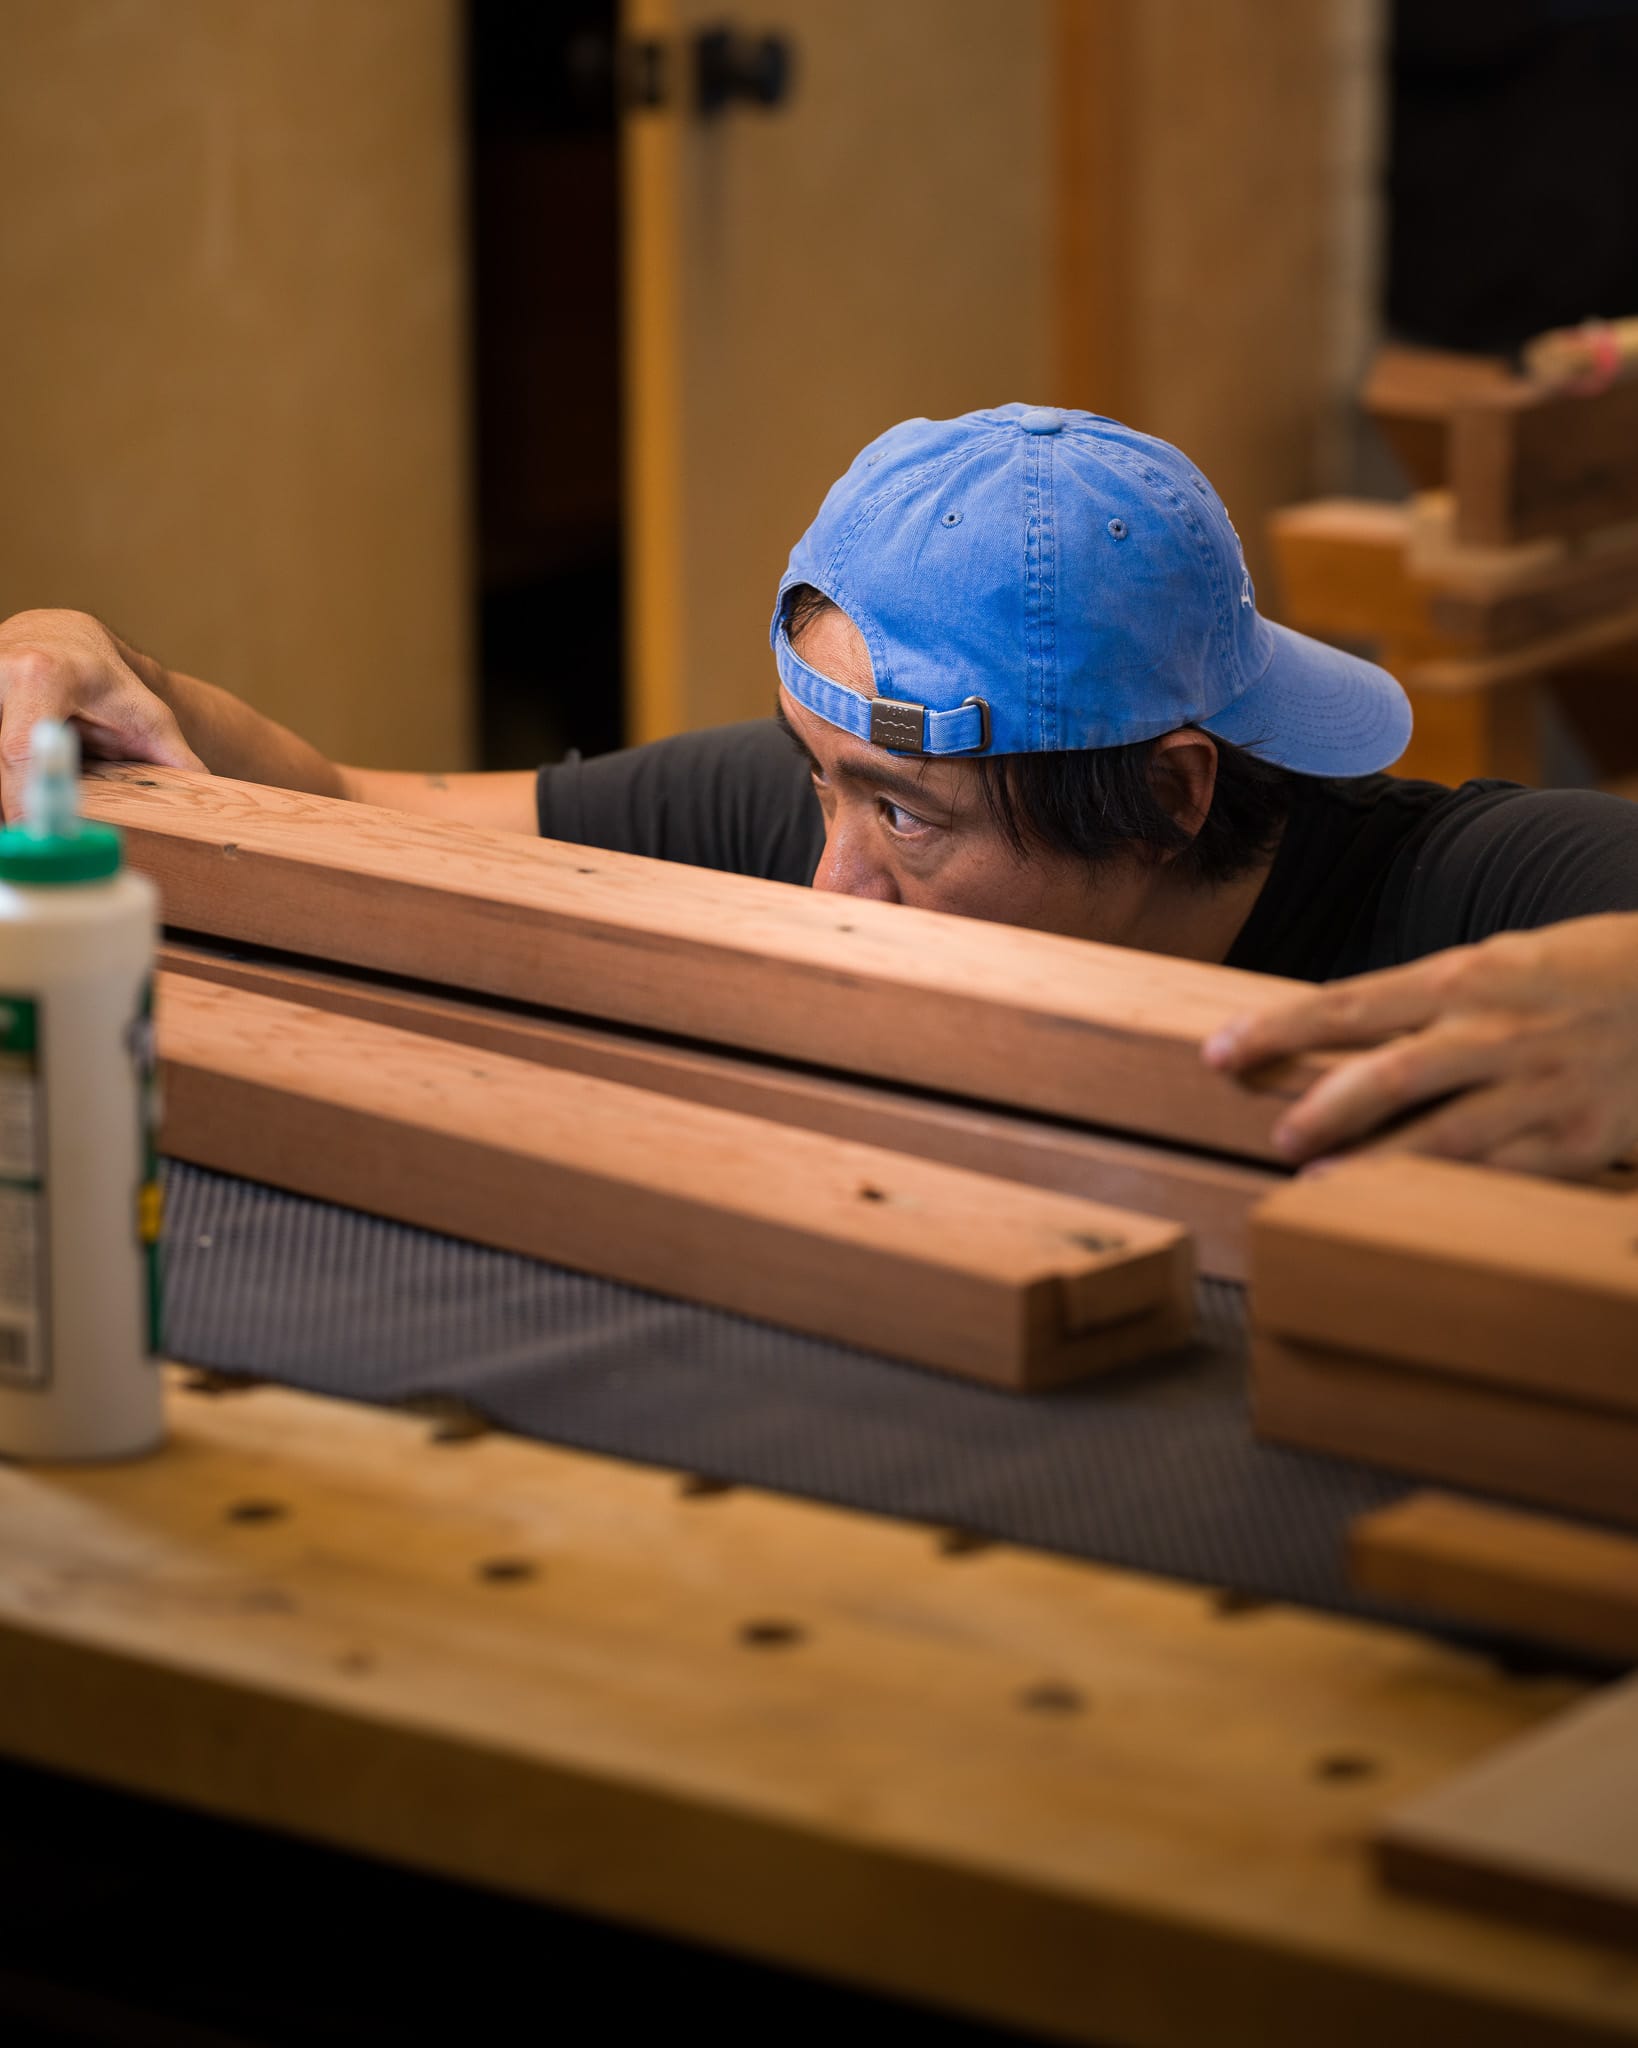
Instead, I utilized many floating tenons, 4 per board. This meant the project had about 48 invisible joints. I used some white oak ½” stock and a hollow chisel mortiser to make quick work of it, but cleared the bottoms and corners with a chisel. The boards were also given a 1/4" deep lap using a new cutter I had for my saw, an adjustable dado cutter with carbide inserts. Any roughness was cleaned out with a rabbet plane.

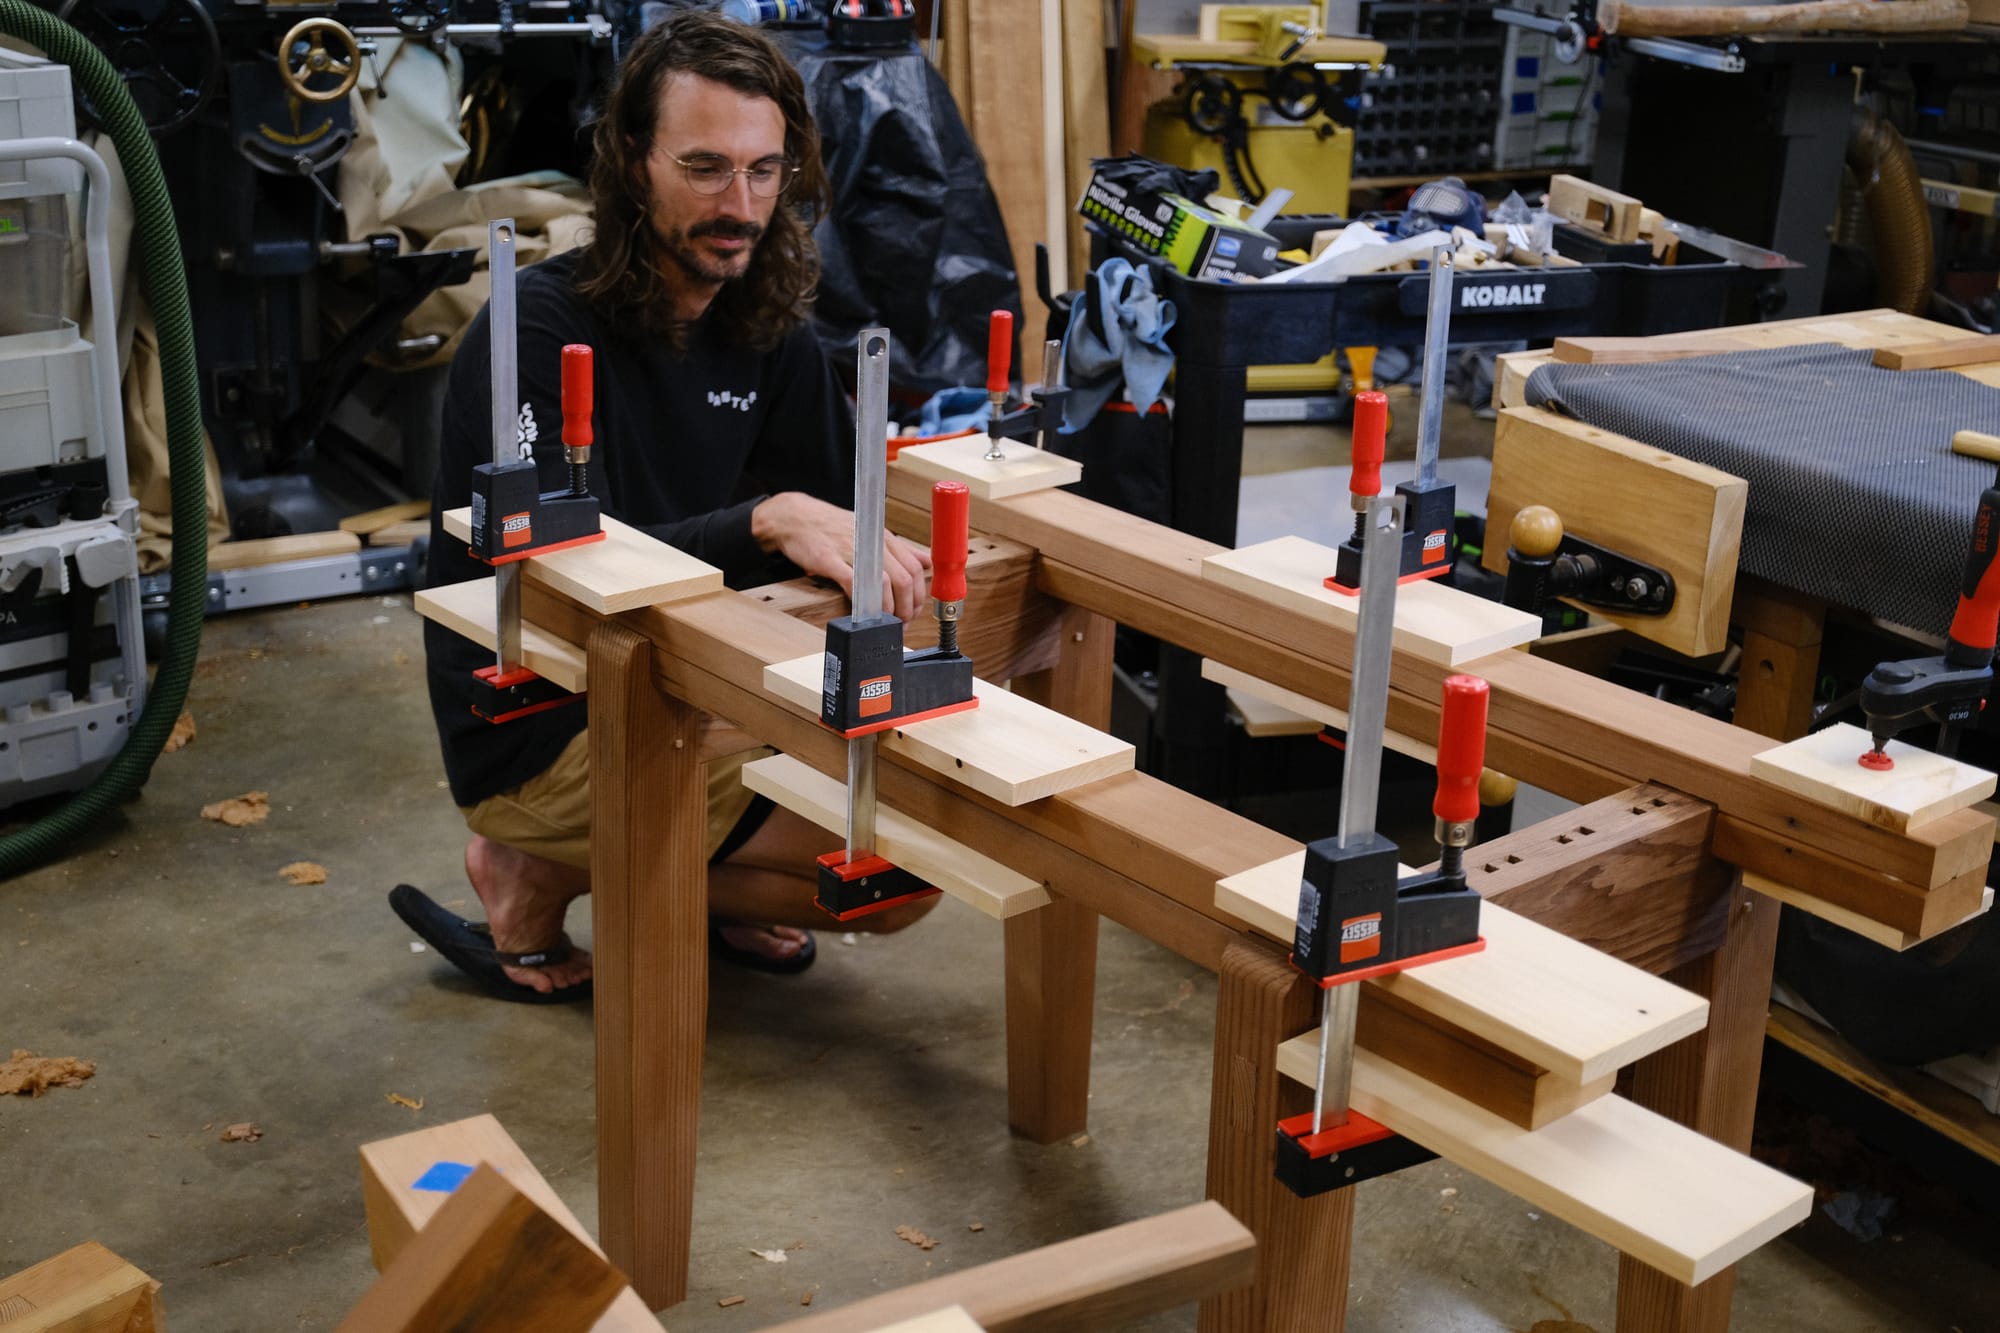
Some odds and ends like tapering legs and installing them with 1/4 oak pegs and we were on to assembly.

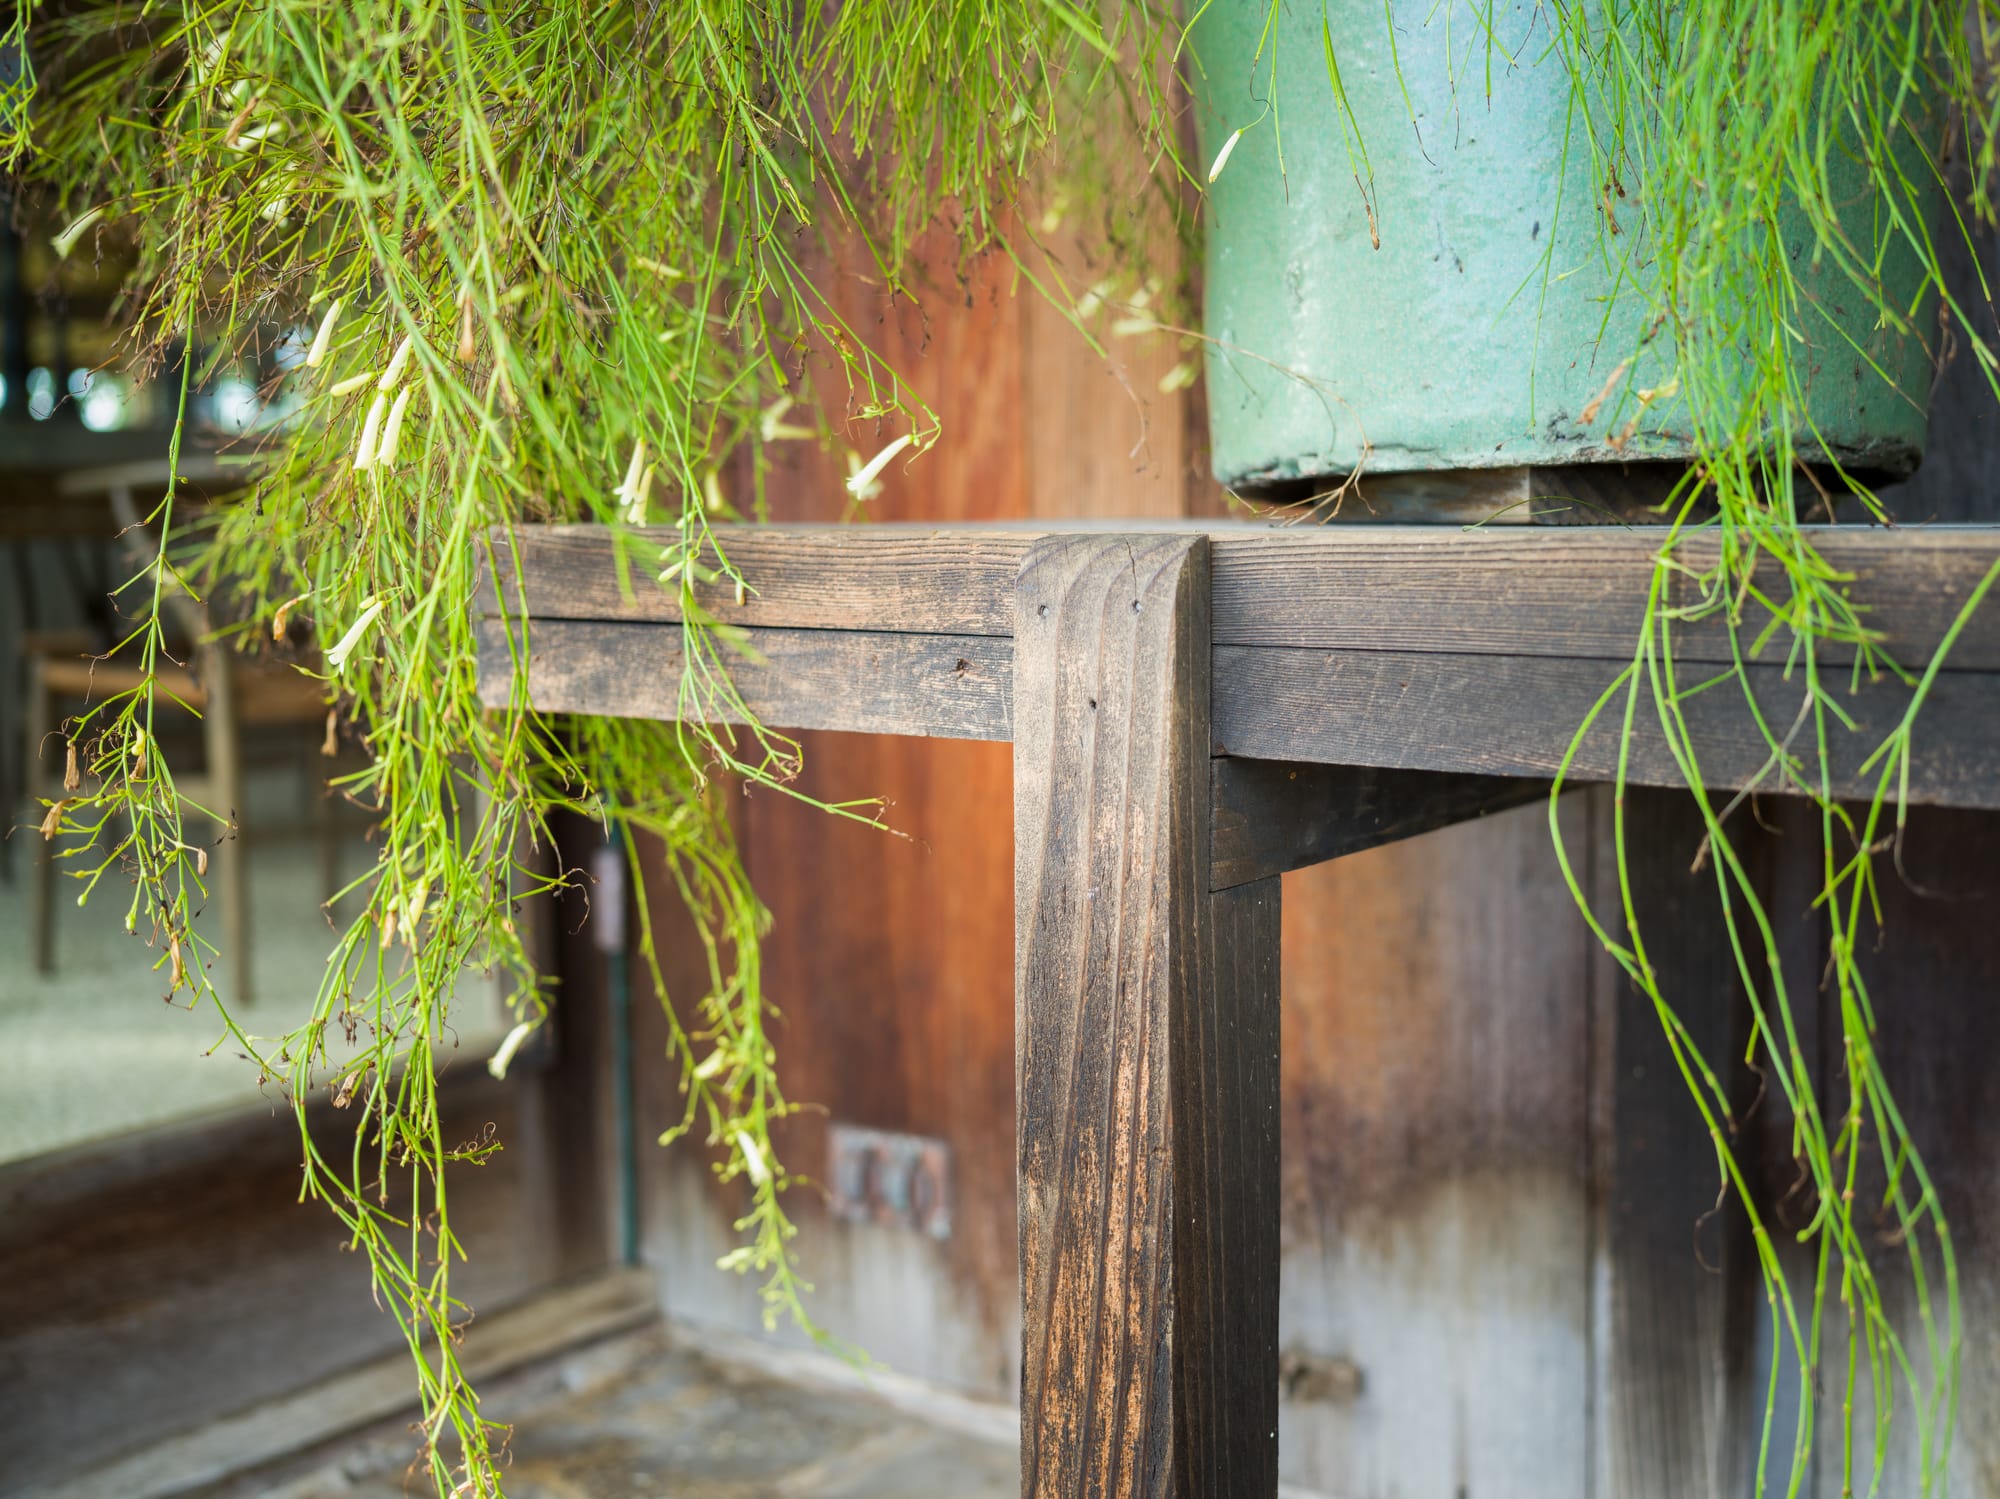
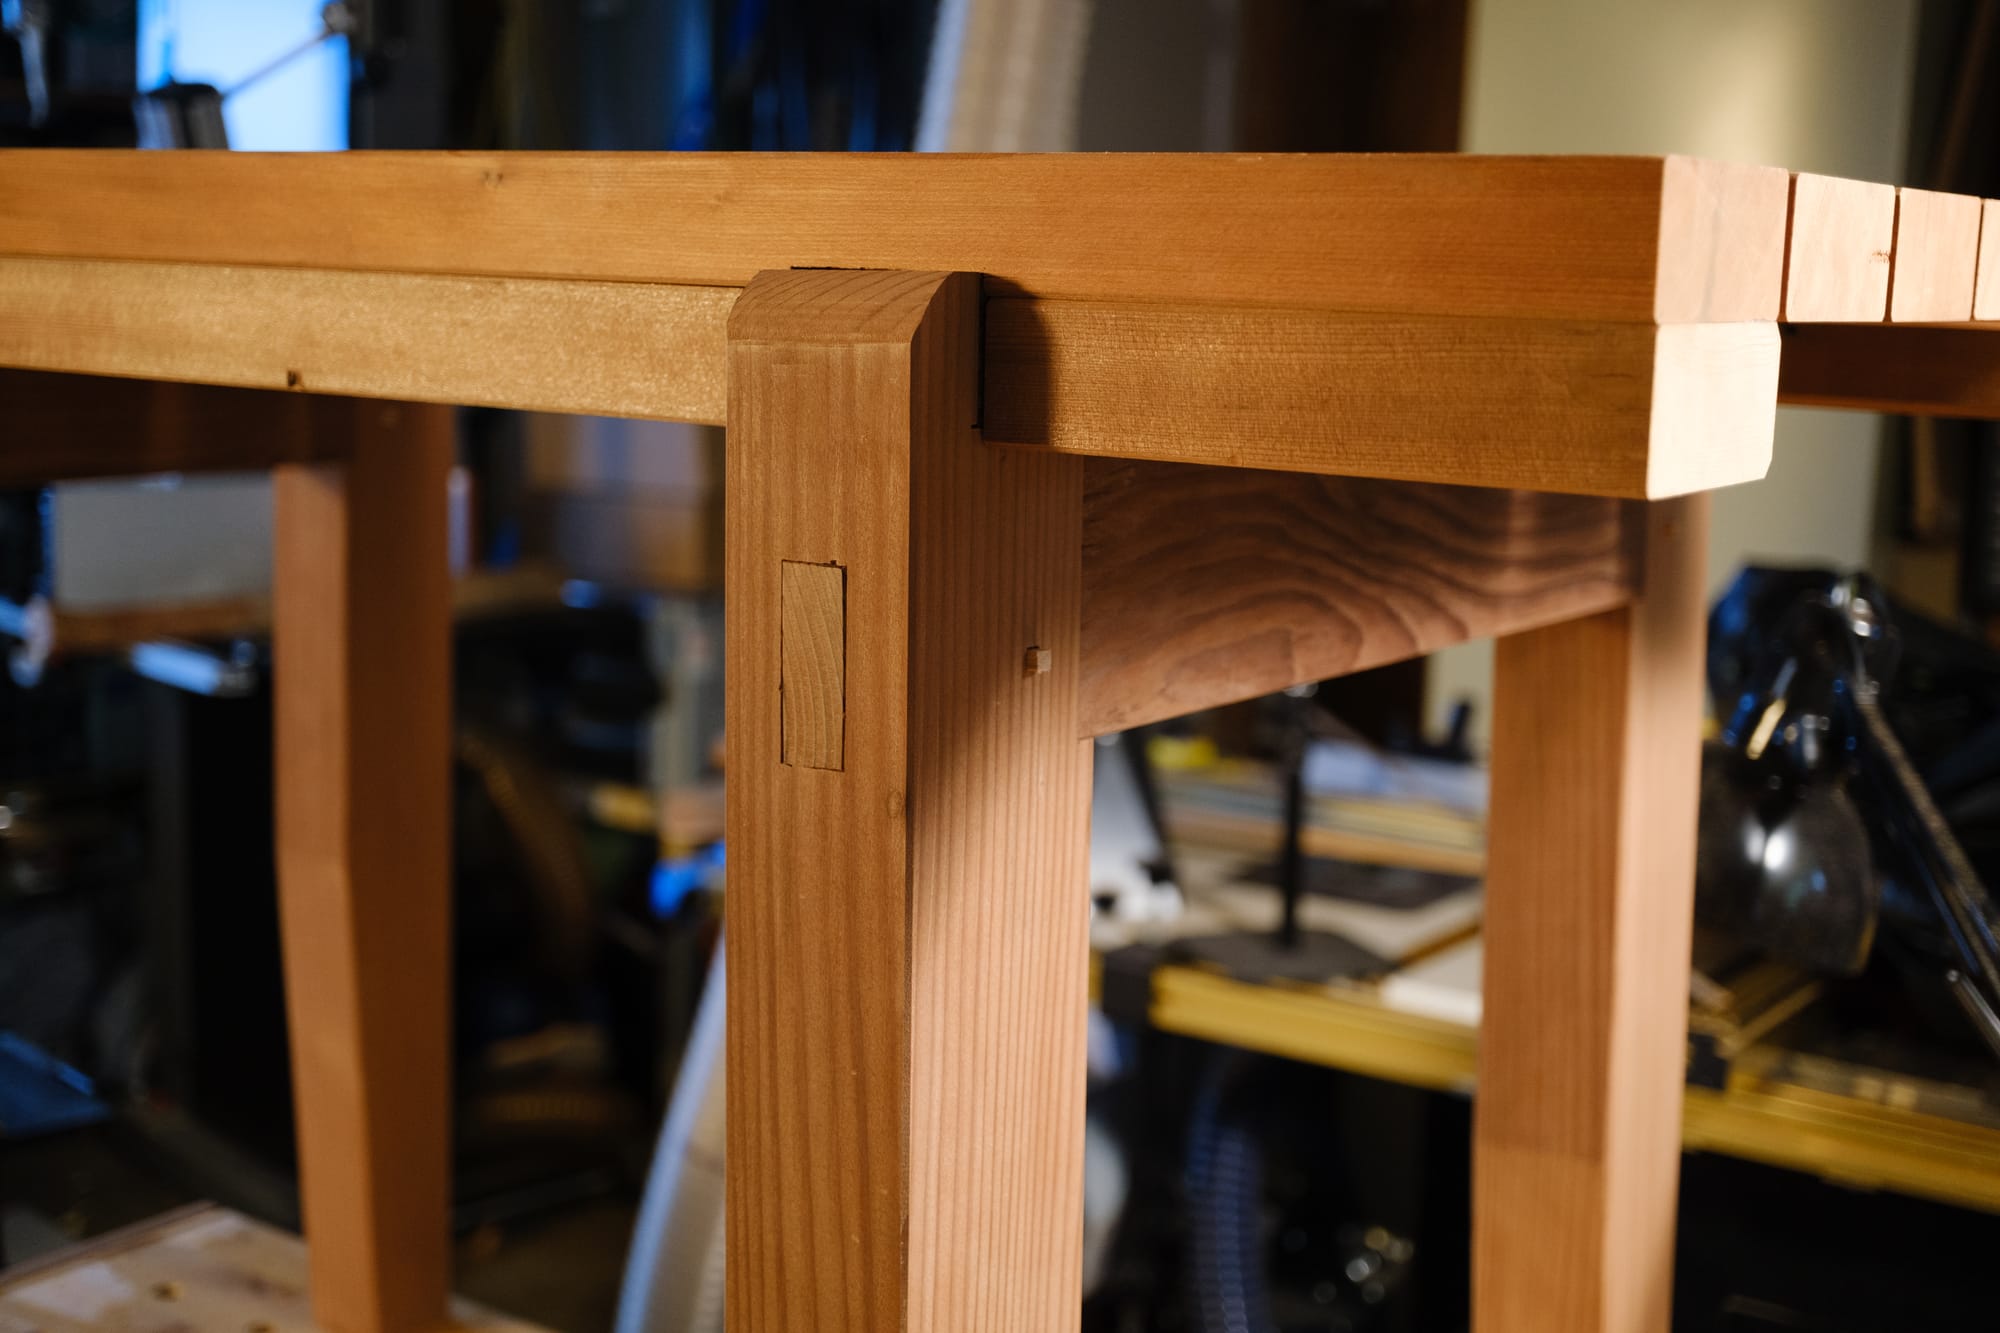
For all its quirks, the original table gained some strength from an extra 2x4 fastened to the outermost top boards. Mine couldn't go through the leg like theirs did, without causing some problems with post joinery.
So I joined them to the top in 3 separate parts using floating tenons, butting into the leg and providing some racking resistance that the original did not have. The extra boards have a little support from some open mortises that receive short tenons.
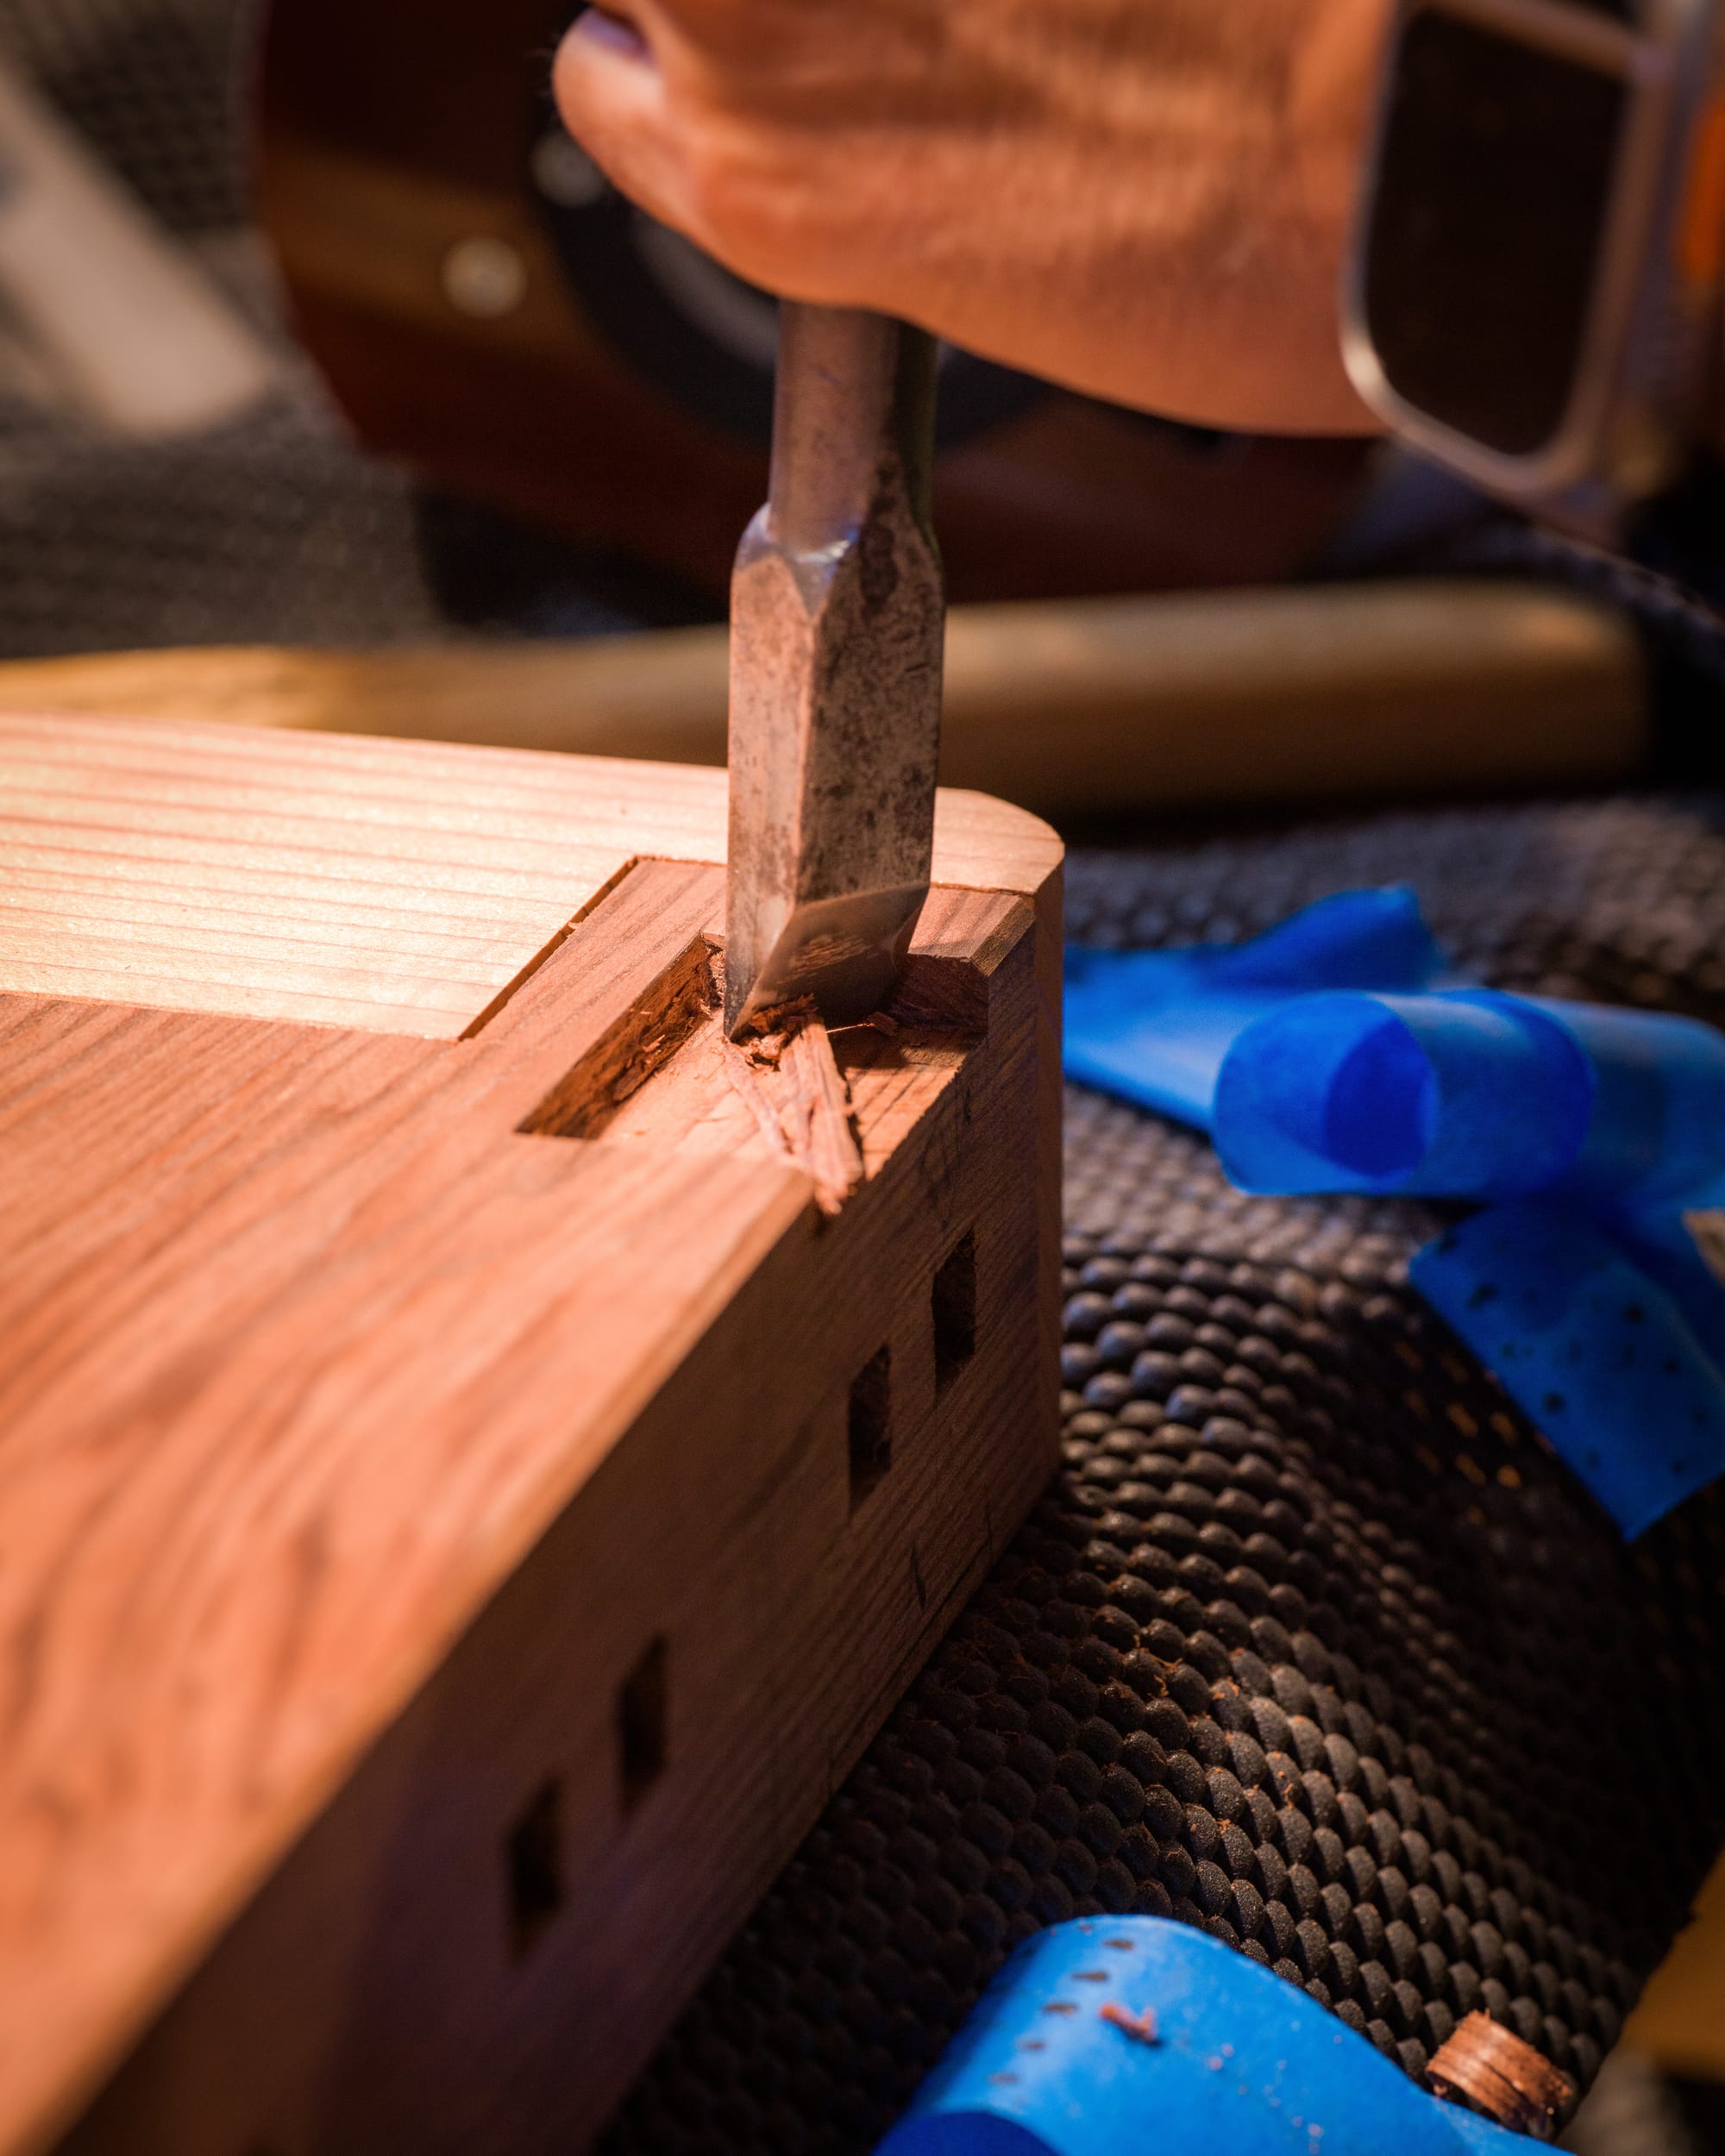
The legs were through mortised, and drawn with ¼” white oak pegs. With laps, leg and peg mortises, about 70 joints.
Material for the top parts were donated by my friend Kanoa. Planing it was fun, as planing always is.
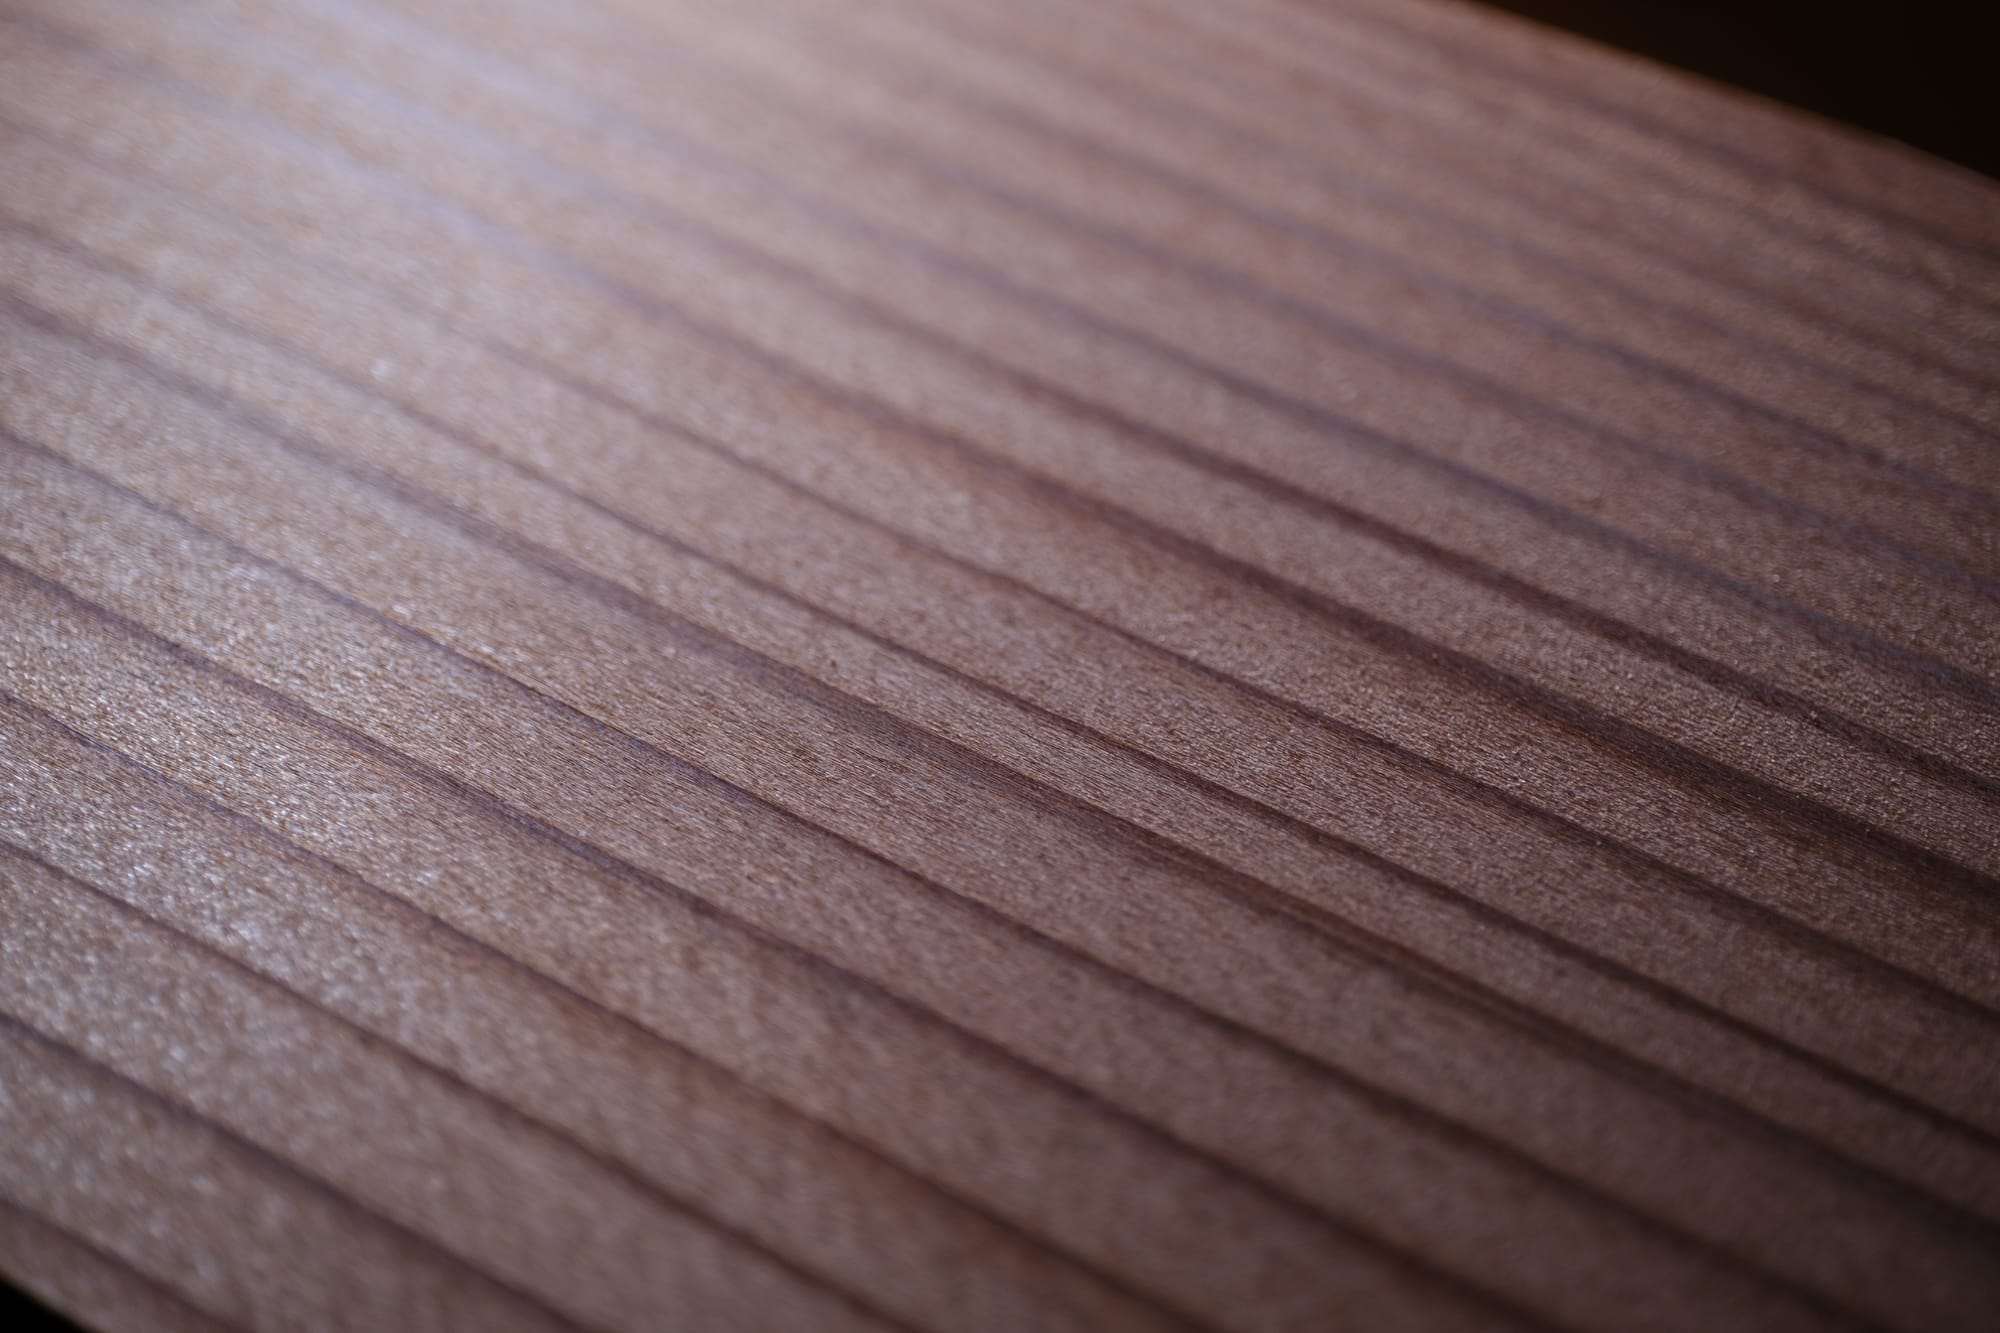
Redwood is interesting in that it is soft, but abrasive, so it can usually destroy a blade edge quickly which then leads to tearing of the soft summer wood that shows up as roughness.
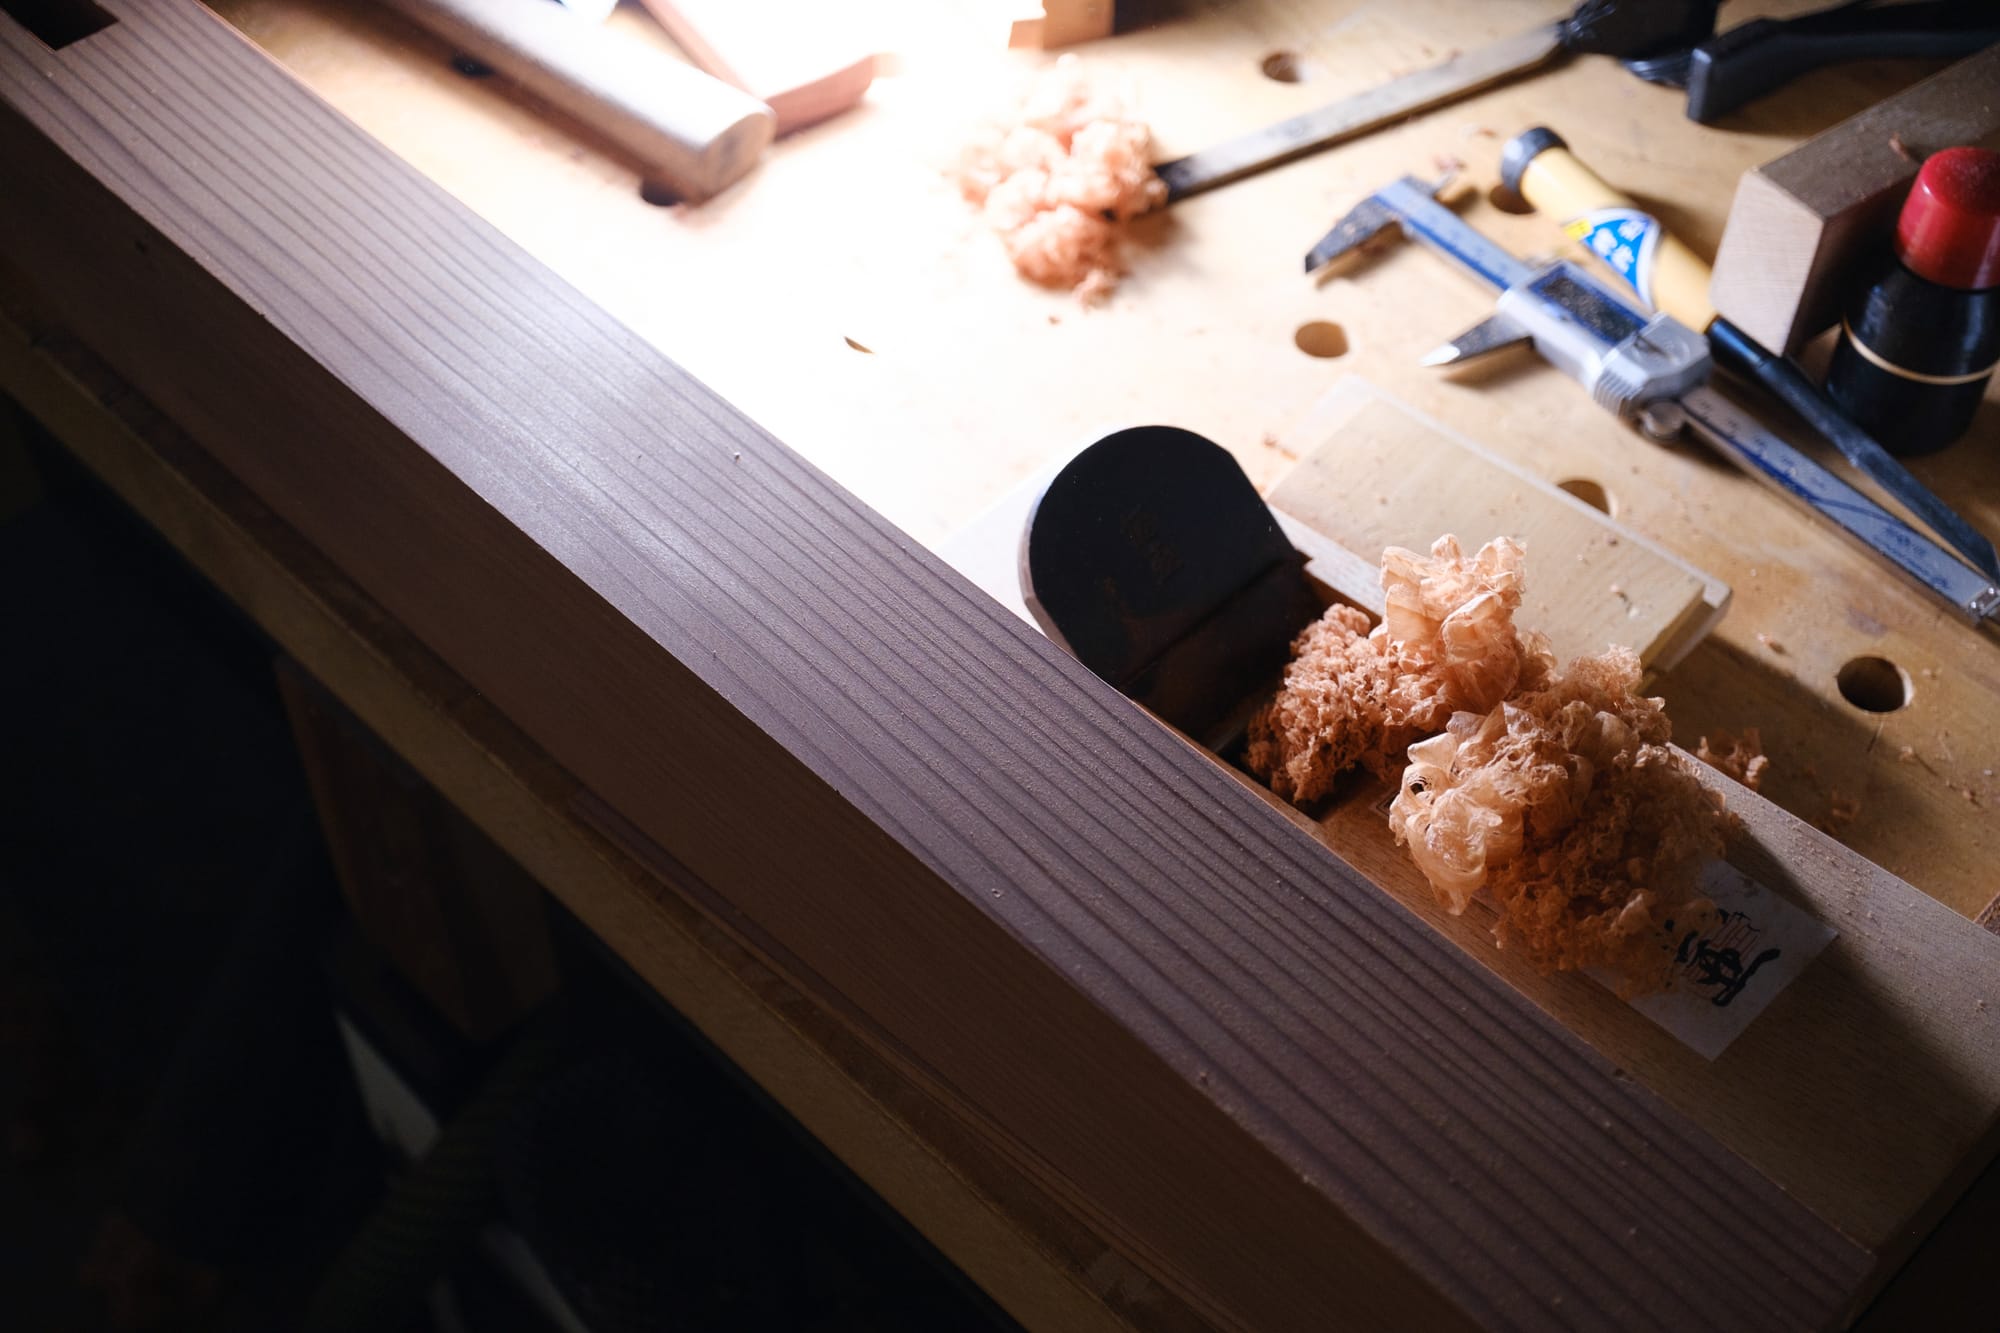
A test of 6 clean boards with a super blue blade showed roughness by the 6th face (just the tops!). Redwood acts similar to sugi cedar or western red cedar in this way, albeit in different proportions of softness and abrasiveness.
A teacher gave me some tips on how to sharpen some of the heavier alloys I favored, and it made an enormous difference, immediately. * I look forward to practicing this method more, soon.
The beams, being mostly flatsawn, definitely benefitted from the new sharpening technique.
Shan Liljestrand, who helps run the foundation, came by to help me with chamfering of the floating tenons with a chisel, and glue up. He also took some of the better photos using a really beautiful Hasselblad camera his father left him.
Maybe I've recreated some of the mistakes from the past in the design of this table. If I had more time, I might have added a single stretcher between the cross beams.
An additional stretcher would have prevented racking and added a lot of strength. There’s still the possibility of adding that later, with a piece with dovetails on each end.
But it had to be done in time for a Christmas party, so that was the compromise. We'll see how it does over the next few decades.
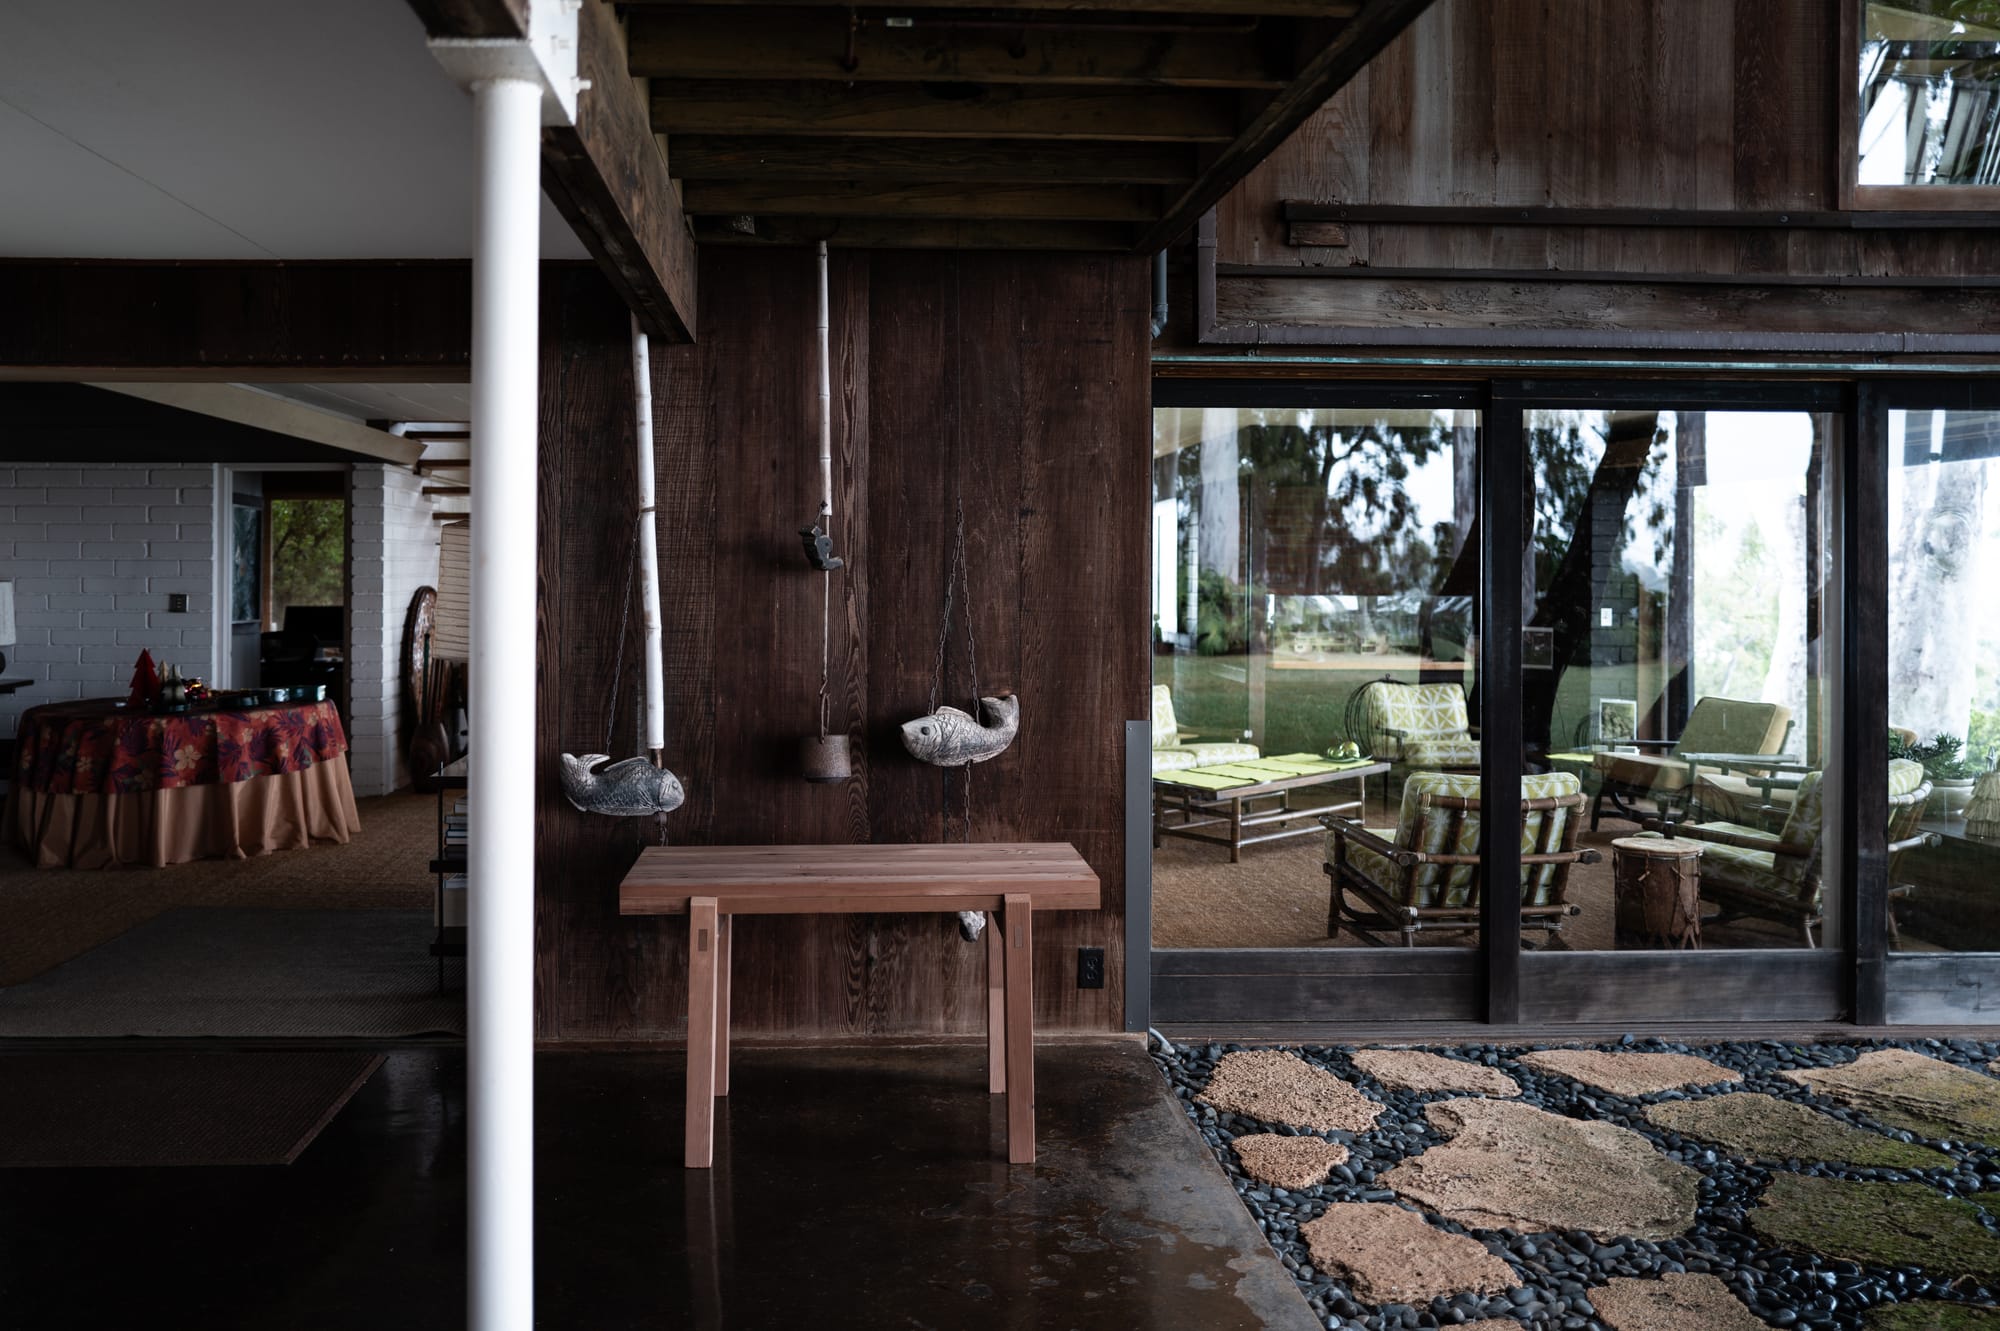
After we finished the table, Shan Liljestrand looked through the house's archive room and found plans for the table. It was originally designed to fit under the kitchen window.
More details from the plans, and some advice on sharpening HSS planes, from Jon at Somakosha, below.
*

*When planing, I took some dusty shavings and showed them to Jon Stollenmeyer at Somakosha. Jon gave me some advice around using 20k grit powder to help work a high speed steel blade and that improved the finish. I followed that up with a more finely set super blue blade by Yamaguchi. I could have used a carbon steel blade but I wasn't sure about the resistance to abrasion which was definitely on the higher end for these pieces of wood.
Subscribe
